Pearlescent Specialty Paper

 Hi there Creators,

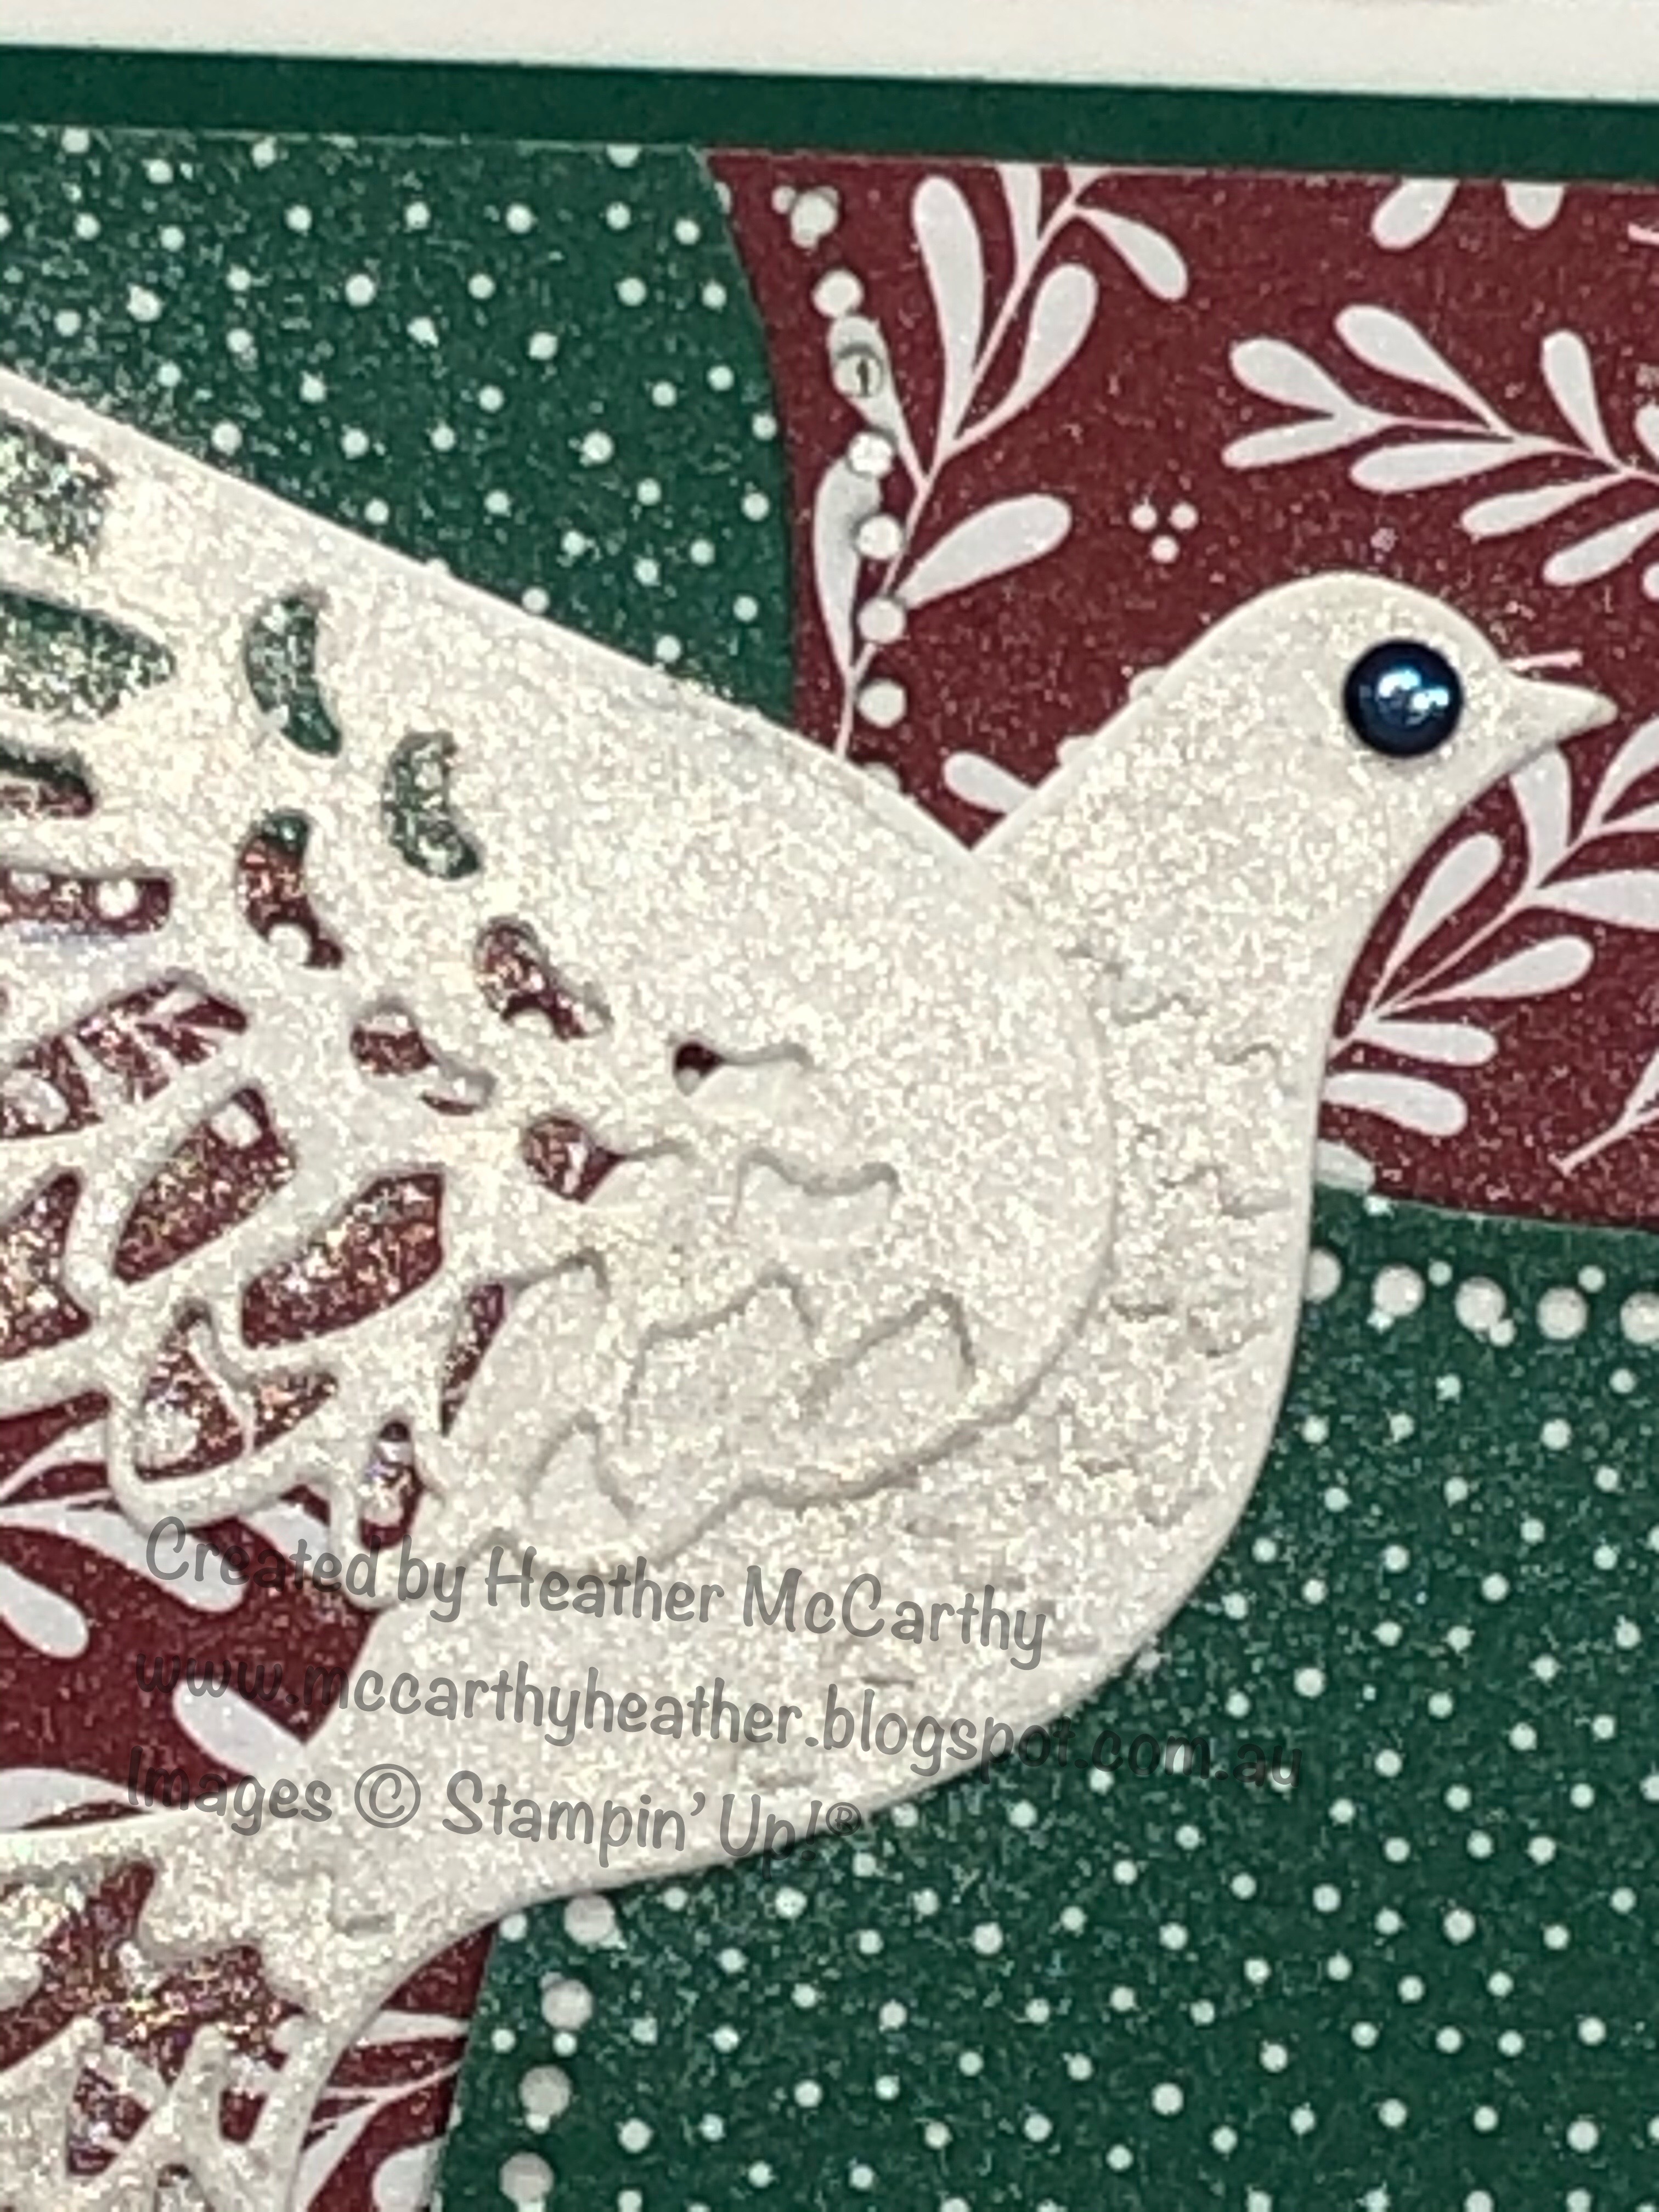
Oh my goodness I just had my first play with this new Paper from the January (5th) to June Mini catalogue, I'm hoping that in the photos you can actually see the pearl finish on the paper (it's really hard to photograph!) but Oh so gorgeous!

Initially I tried stamping on it and discovers that it just wipes straight off, oops! lol  then I couldn't help but think of rainbows, so I coloured it with my Stampin' Write markers then blended them all together with a tissue and voila.....

Pearlescent specialty Paper, Stampin' Up!

actually it wasn't quite "voila" at that point as I realised that really rainbows need a bit of light rain, so I spritzed it with water and blotted it, then WOW!

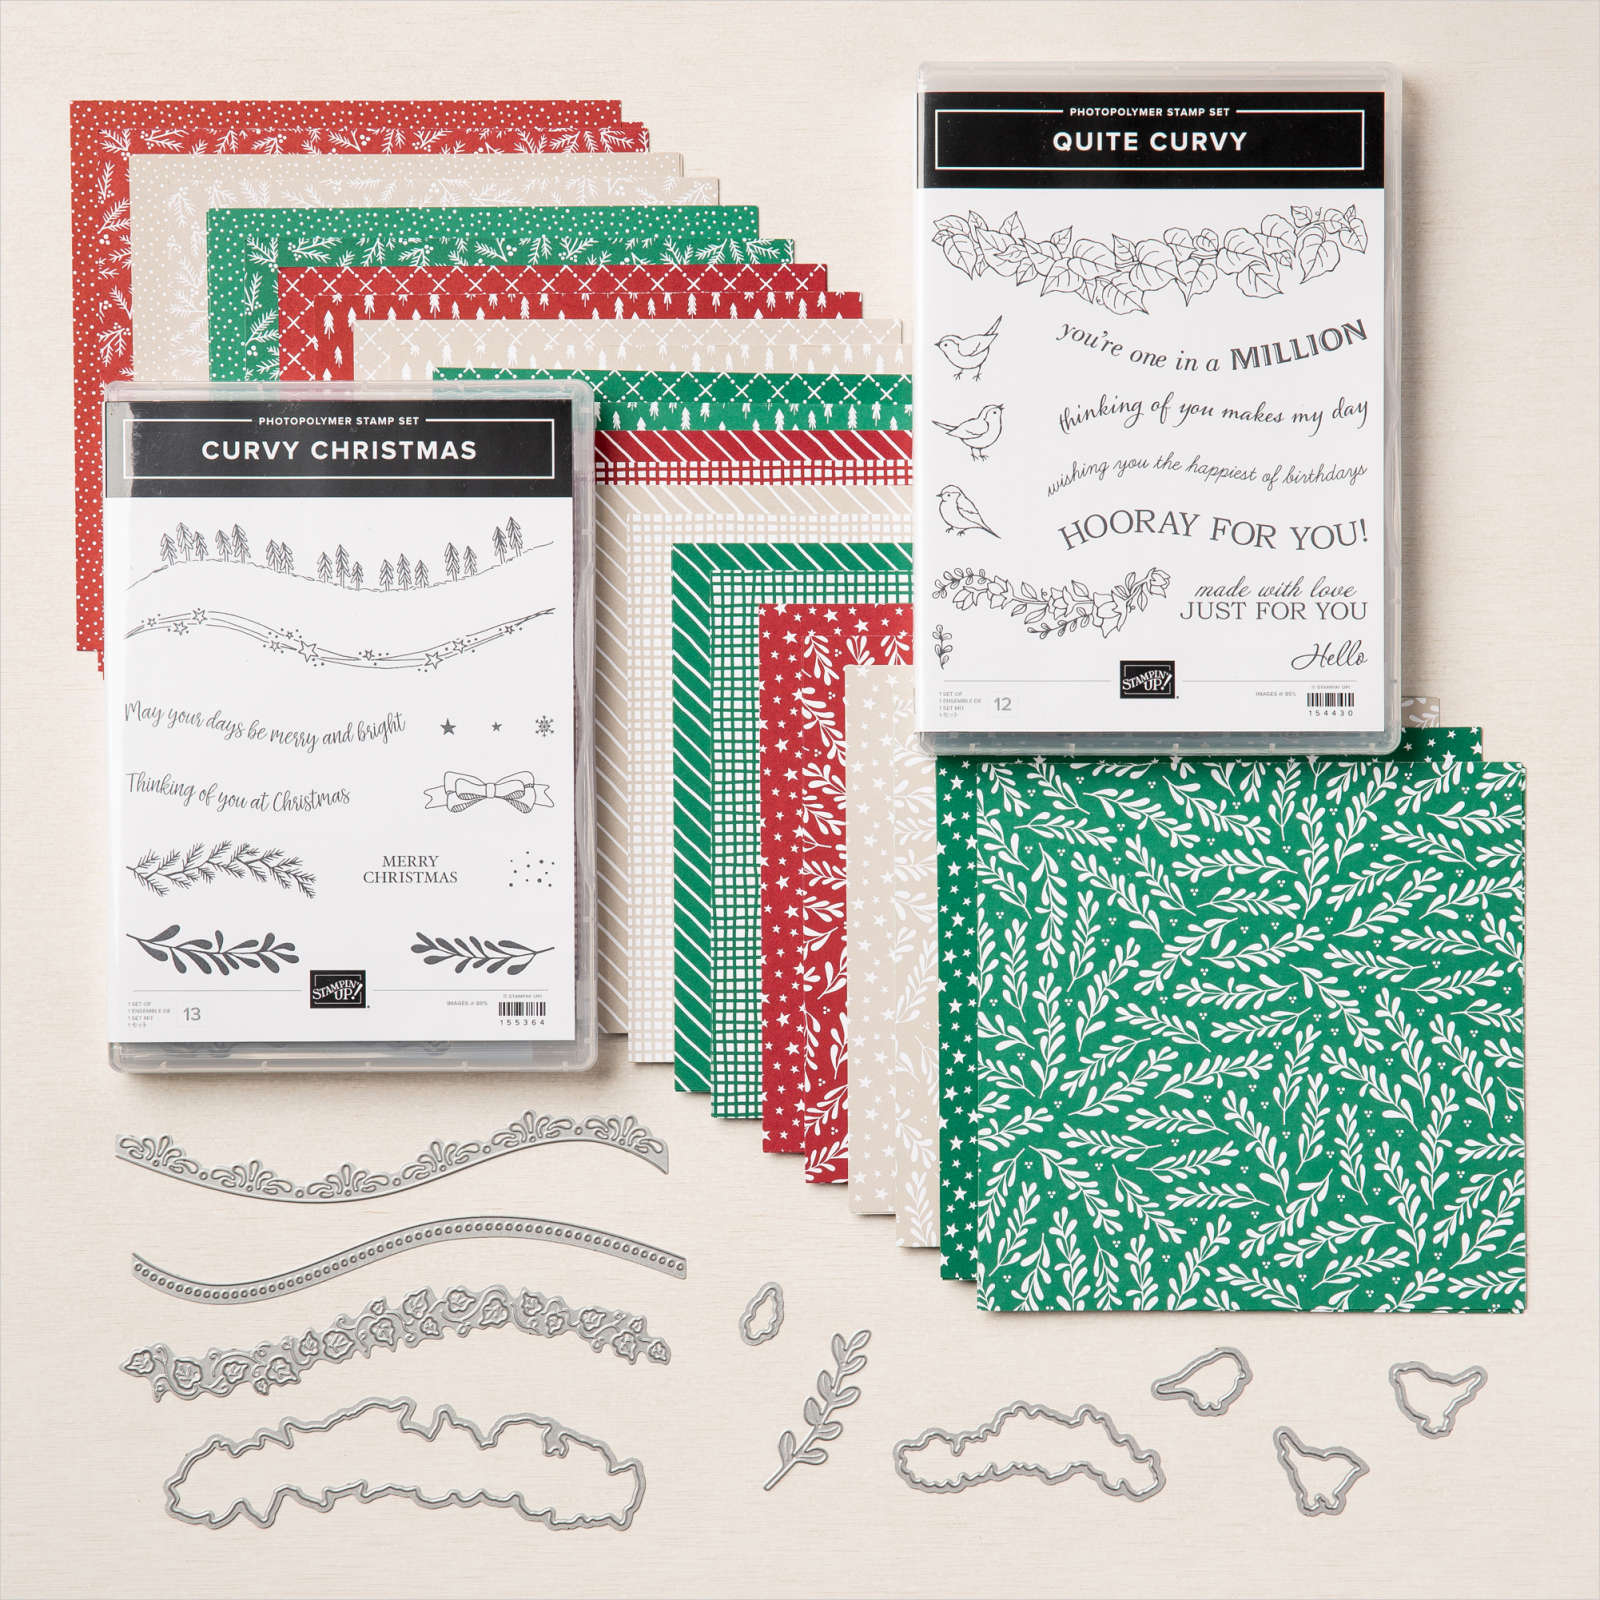
I've then used some of the Ice Cream Corner Designer Series Paper to cut the ice creams from, and a saying from "You are Amazing Stamp set", all these will be available come 5th January (unless of course you're a demonstrator, and you can get them now!)  I didn't think it needed much of a background, so I thought maybe random lines would work, done with the Purple Posy Stampin' Write Marker, I think it works, what do you think?

I took another photo to see if I could capture the Pearl elements of the paper, hopefully this does it!

I can't wait to see what other people do with this amazing cardstock, I really think it would be a great Wedding cardstock! with embossing.......ooo gotta give that a go! lol thank goodness for a couple of extra days off over Christmas!

Ok I hope this inspires you to create

God Bless love

Heather xox


What to do with your cardstock scraps

 Hi there Creators,

I've seen a few people doing this recently so thought I'd jump on the proverbial band wagon 😄

I did a facebook live on this, and have converted the video to Youtube so I can add it to this (wow I'm getting good with technology - sort of...)

However first up the cards I've made, as I've mentioned in the video I had a heap of cut off pieces of card which have been littering my craft desk for ages, and rather than chuck them in the bin (or in my scrappy container) I figured I'd have a go at this:

So, basically you start off with a rectangular piece of card, and start sticking down the strips you have onto it, I like to start in the middle and work my way to the edges, and I also leave a gap between the strips.  Either as you go, or when you get to the end you can trim off all the excess pieces.  Stick the whole thing onto a card, and add a greeting, Voila!

I found some "Tis the Season" Christmas Designer Series papers that I had a heap of strips left over, so the next cards I made with that.....

Tis the Season, Stampin' Up!

Tis the Season, Stampin' Up!

remarkably easy and quite effective, have a go!  let me know how you go with it, here's the video in case you want to see me in action 😄

I hope this inspires you to get out those scraps and do something with them.

God Bless love

Heather xox

January Mega Class

 Hi there Creators,

Thought I'd better pop up a blog post about the January Mega Class for those of you who aren't on my email list! (if you'd like to be do let me know!)

On Saturday 30th January I'll be holding a "Mega" class in Newbridge (at the hall) from 10.30am till 3pm  Here are some of the cards we'll be making........

Stampin' Up!, Ice Cream Corner, Approaching Perfection

Stampin' Up!, Ice Cream Corner, Approaching Perfection
We'll be making 20 cards in total, you'll receive supplies and instructions to make all 20 cards, lunch included, as well as 2 new Stamp sets and a punch, also ribbon, embellishments, Designer Series Papers, and a Tombow Adhesive 😊

You will need to bring with you a clear D block & scissors (and a drink of water!) don't think there's anything else but if there is I'll let you know nearer the date.

Here are the details to book your place:
  • Early bird special rate $128 book and pay by 1st January
  • If you're booking and paying after this date you have until the 6th January and the price goes to $145 (I recommend getting in early!)
  • If you are part of my CreateAbles Stampin' Up! team, I have a special price for you of $55, you will need to purchase: The Ice cream bundle (stamps and punch), the Approaching Perfection SAB stamp set and bring adhesive (you still need to make sure you've booked and paid by 6th January!)
  • If you're part of my Craft@Home group, this can count as your monthly order 😊

Let me know if you do want details to book your place 

God Bless love

Heather xox

Curvy Celebrations Blog Hop


 Hi there, 

Well I'm joining another blog hop, this time for the Curvy Celebrations.  I hadn't used the Curvy Christmas Stamp set much, so before it retires thought I'd better get in with it!  Currently you can purchase it all as a sort of Mega Bundle, which has the DSP, 2 stamp sets and a set of dies, after 4th January the papers and Christmas stamp set will retire :(  however the Quite Curvy Stamp set and Curvy dies will continue :)

 QUITE CURVY VARIETY BUNDLE (ENGLISH)

So it's a pretty fabulous bundle!

I only had time to make the 1 card with it at the moment, so here it is.........

Curvy Celebrations, Stampin' Up!

I made up the basics of the card before I had to go out with Samuel, my youngest to Cubs, then as I was meeting up with my friend Jenny, she showed me some of her cards and she uses so much fabulous bling on her cards, that it inspired me to add some to mine lol, so out came the Rhinestone basic jewels (shiny silver), the Basic Pearls, then also the Champagne Rhinestones and the fabulous Star designer elements.  I have a tendency to hoard the embellishments and not use them, so I'm trying to be determined and starting to use them lol

Curvy Celebrations, Stampin' Up!

they really lift the whole project, don't you agree?

The stamps in this set are photopolymer so I've curved them in the direction I wanted them to go in, instead of the direction they wanted to go in (if that makes sense)!  As the ink didn't show up too well on the dark green paper, I ended up having to stamp it onto vellum, and attached it with the adhesive sheets, so the glue isn't so obvious under it.

And that's it!

Now go and check out what the others in this blog hop have created too

I hope this inspires you to get creating!

God Bless love

Heather


Share it Sunday Blog Hop


 Hi there Creators,

I have joined a Facebook group called Crafty Collaborations, which is a Stampin' Up! demonstrator only group, demos all round the world, and there are various blog hops to join in with, which I thought sounded fun and might prompt me to remember to do blog posts lol!

The "Share it Sunday" is an, anything goes one, which I figured was a great start for me!

Today I thought I'd share with you a bit of a sneak peek!  Coming in January is our new Jan to July Mini catalogue and there is this AMAZING suite in it called Fine Art Floral, so beautiful!

I've made 3 cards up and kind of ended up a bit "blue" not in feelings though - you'll see.... lol

The first card is this one: I love the way it's got the 2 step stamping in the flower

Fine Art Floral, Stampin' Up!

I've used one of the gorgeous Blue gems in the middle and bit of Wink of Stella on the flower too.

This next card uses the matching dies: Floral Gallery dies, and the stamp set: Art Gallery.  Again these flowers have a stamp that layers up on it, I've actually stamped the whole lot with the Seaside Spray Ink, then coloured over the "green" bits with a Stampin' Write Marker.  The background I used the (also new) Blending Brushes, OH MY GOODNESS!  wow what a beautiful effect you can get with them!  And a bit more Wink of Stella...

Fine Art Floral, Stampin' Up!

And onto the last card, I've used the same gorgeous Art Gallery Stamps, and again just stamped with the blues - Seaside Spray with Misty Moonlight ink over top, then coloured over the "green" bits with the Granny Apple Green Stampin' Write Marker, I've also used the Misty Moonlight Marker just to add a touch more colour in a few areas, then couple more of the dies from the Floral Gallery dies

Fine Art Floral, Stampin' Up!

I hope you enjoy this post and it inspires you to create, do go and check out the other posts in this Blog Hop! see the list below

God Bless love

Heather xox


Different Shaped cards

 Hi there Creators,

well I set my team a challenge to come up with "different shaped cards" as in not the usual rectangle or square shape, and I thought maybe I should lead by example lol.

I was trying to work out what to teach the kids at school for Christmas this year, and then got a fabulous swap in the mail of a tripod tree, which I used to make many years ago, - perfect!

So here is the first card/tripod tree, which I'll be teaching the kids at Tarnagulla Primary School:

tripod Christmas tree, Stampin' up
it has velcro at the back to stick it together so that it can fold down, and you can write on the inside.
tripod Christmas tree, Stampin' up

Next I turned to my dies, and thought it would be cool to create a couple of little cards that use the dies as the shape, so first up is this using the Sunflower dies which are today have a 10% discount - yay!

Sunflower dies, Stampin' Up!
As you can see I've cut the large die out from folded card, but left a part at the fold that is uncut, then I've added the intricate cut flower on top.  It does make quite a small card, so it might be more suitable as a tag come card for a present.

The next one is also quite small (actually the 2 cards are very similar in size), wanted to make a Christmas wreath card, and I will admit it was a bit on the fiddly side! I used the Wreath builder Dies, (also in the sale today), some window sheeting, red rhinestones, and the Merry Christmas was from the matching stamp set Arrange a Wreath. ( I think all of it is in the sale today!)

Arrange a Wreath, Stampin' Up!

was hard to get a decent photo of it standing up

Arrange a Wreath, Stampin' Up!
I really love the way the inside turned out! (I do like that the die, also embosses the card a little) again you'll see the join at the top, where I positioned the die so it wouldn't cut all the way through
Arrange a Wreath, Stampin' Up!


Well I hope this inspires you to look at your dies in a new way!  if you're on Facebook check out my Being CreateAble with Heather Facebook Page, I do a Something Saturday live every Saturday at 10am, think I might be showing how to make the sunflower card this Saturday!

God Bless love

Heather xox


How to curve photopolymer stamps in a different direction

 Hi there Creators

I've been meaning to make a video to show how I do this for a while, and finally got round to it today! 

In the video I show 2 methods of positioning your long photopolymer stamps to curve them in the direction you want them to go, and as I don't make up the cards in it, I thought I should do a blog post to go with it and show the completed cards!

Here is the video - enjoy! (and don't forget to read the rest of the blog!)


First up I showed how to curve the stamp to a cut out piece, by turning the piece over, laying the clear block over the piece then positioning the stamp where you want it on the block, when you stamp you turn the card stock back the right way.

Here is the card I made using this technique:

curving photopolymer stamps, Stampin' Up!

See how the saying mirrors the edge cut with the Curvy die?  I've used some of the pretty Flowers for Every Season Designer Series Paper behind, and also for the jar, cutting out a couple of flowers from the paper to go in the jar (cut with the Jar punch) I had to make the jar a lot smaller, by trimming it down with the bottom of the punch.

I've also used some wink of stella to bling it up a bit along the line of the dies and also on some of the flowers.

curving photopolymer stamps, Stampin' Up!

The other card I used the Quite Curvy stamp set, and showed how you can use the inside cover piece for the stamps to hold your stamp in place till you have it on your block,

Here is the card I made with this method, the saying would normally curve in the opposite direction (the same way as the leaves)  how cute are the little birds?  I'm not normally big on birds but, these little ones I really like!  it's a nice simple card, coloured in with the Stampin' Blends (alcohol markers)

curving photopolymer stamps, Quite curvy stamp set, Stampin' Up!

I hope you can start to curve your photopolymer stamps a little easier now!, and this inspires you to create.

God Bless love

Heather xox


Christmas Pets Cards for December

 Hi there Creators,

I had this idea forming for some time that it would be fun to do a Christmas Pets series of cards, so the December card pack is Dogs and Cats!

Using the Playful Pets Designer Series Paper, they really are quite cute, I hope you like them!  The "due by date" for booking and payment is the end of day Friday 4th December, as I will make up the kits that weekend.  If you'd like to do the cards in person let me know and we'll book a date, or if you'd rather receive them as a kit to do at home.  The cost for the kit is $25 (this includes written instructions, all card components and envelopes) you'll need an appropriate saying stamp set I've used Joyful Holly, and ink pad, I've used Real Red.

Dogs up first I've added the Sprig punch, and the Gold twine from the Wonder of the Season Ribbon Combo pack,

Playful Pets, Christmas, Stampin' Up!
 

There's 2 dogs and 2 cats so the other dog one is this one, I loved the idea of the dogs playing with the Christmas bauble lol.  This one uses the other ribbon from the same combo pack, and how cool is the shiny green foil cardstock? I used the Hammered Metal 3D embossing folder to create a bit of texture on it too.

Playful Pets, Christmas, Stampin' Up!
Then moving onto the cats, this one is my favourite card, as I love the disgruntled impression on the cat behind, and the snooty one in front.  I so much wanted to give them antlers, so the sprig punch has been used for this!
Playful Pets, Christmas, Stampin' Up!
 

And the last card is a cat card too, I know how much shiny ball things tempt the cats.........

Playful Pets, Christmas, Stampin' Up!
And that's it!  Don't forget to order yours/ book a date with me.

I hope if you can't join us these inspire you to create!

God Bless love

Heather xox


GDP#266

 Hi There!

I did mean to blog this card a little earlier, so hopefully I'm not too late entering the Global Design Challenge #266 for it!

This time it's a Sketch Challenge, so I cut out all the pieces I wanted to use in Vanilla, then laid them out on my card, I kind of wanted to keep it simple, so hence I didn't back them with other colours, however I did dip the edges of my cardstock into the Cherry Cobbler ink pad.

here is my entry:

I have used the new Enjoy the Moment stamp set, which will be released in the upcoming Jan - June Mini Catalogue (sneak peek!).  
Stampin' Up! recently had "OnStage Online" which is usually an in-person conference, we usually receive a special bag/ stamp set and other goodies, this time it was an online conference, and they mailed out our goodie bag to us, this stamp set was in the bag!  And yes it was worth waiting for...lol
During the conference one of the presenters showed a really cool way to use the blends, creating the light blue shadow under things, so I thought I'd give it a go with this card too, I do love the way it looks!
I've used Old Olive for the green bits, with Cherry Cobbler (red bits) and Pool party for the shadow.  Oh and the seed/flower thingo's are daffodil delight, with Crumb cake.

This is the Sketch to use for our creations, which amazingly I've managed to stick to!
If you click on the sketch challenge photo, you can check out what others have created too.

I hope these inspire you to have a go too!

God Bless love

Heather xox

Celebration of Tags

 Hi there Creators,

I've been waiting ages, but finally this stamp set has arrived and it's every bit as cute as I expected it to be! So of course I had to play with it.......

First up I stamped all the images using Black Stazon (they come in strips of 3 to match the dies) and cut them out with the big joined together die.  Then got to work creating cards with them, I ended up with 5 cards in the end, Oh and I've just realised I forgot to take photos of the insides, bother!

This first one didn't get anything on the inside, I stamped the tag up, then debated what I could do to lessen the impact of the white card, and came up with the idea of inking the little label then stamping it a few times without reinking, and repeating till the card was covered sufficiently.  I'm quite pleased with the effect I got!

Celebration of Tags, Stampin' Up!


This second card is such a fun kid card, you might recognise it from my previous post on Global Design Project #264.  I've tied the ribbon at the end, then threaded on each tag, and tied it in between the tags, added some dots using my sponge dauber, and I didn't realise the little 'bitty' stamp was actually confetti until I stamped it (I thought it was just splotches) lol

Celebration of Tags, Stampin' Up!

I don't make many wedding cards, so this was kind of cool to make a nice simple wedding card  I've embossed the background card with one of the Meadow Moments embossing folders, then added a bit of gold twine to the tag and coloured in the rings. Inside this one I used the Congratulations tag that I'd stamped in the black stazon, and die cut out.

Celebration of Tags, Stampin' Up!

  This next one was actually the first one I made as I think the whale is so cute!, and it ties in so well with the Whale of a Time Designer Series Paper, I've taken a piece of 3x6" DSP, cut it in 1/2, folded over a cm on each and popped it down under the tag then added a spot of ribbon under it.

Celebration of Tags, Stampin' Up!
And finally the last one this did get the other tag inside which says Here's to You and has lines on it. I daubed over it in pink and added dots with the daubers, however on the outside I used the other embossing folder in the Meadow Moments duo   The stamp set comes with a couple of extra stamps that fill in the roses and the leaves, so I've used those to stamp them, added a bit of the Magenta Madness ribbon and voila!
 
And finally the stamp set and dies (they don't come as a bundle - sorry!) having said that the Celebration of Tags stamp set isn't an expensive one at only $37 and the Trio of Tags dies are also not really pricey at only $28.😊
Celebration of Tags, Stampin' Up!

So if you have this set, or other tag punches/dies, give some of these cards a try, let me know how you go!

Hopefully this has inspired you to create.

God Bless love

Heather xox


Global Design Project #264

 Hi there Creators, 

didn't get round to the Global Design Project challenge last week, so I'm back on the "wagon" again this week for #264, which is a "case the designer".

I had the Celebration of Tags stamp set finally arrive and wanted to make up some cards with it, having bought the Trio of Tags dies some time ago it was nice to finally pair them up together, there is another post coming with the other cards too, but with my mind set on GDP ......

GDP#264, Stampin' Up!

These stamps are so cute! I reckon when we can do birthday parties again, this one will be a great one for one of Sam's friends (my 9 year old youngest boy) I've added some dots using a dauber and ink (very quick, easy - and cheap! lol)  I had no idea the tiny little stamp was confetti, when I first looked at it (without my glasses lol) I just thought it was little splotches, so I was surprised when I saw confetti (thank goodness I stamped on scrap paper first! or the confetti could have been going upwards lol) 

I've used the gorgeous Old Olive/ Pretty Peacock Reversible ribbon, tied a knot, then threaded this through one tag and tied a knot and repeated with the other 2 tags so they ended up on the same line of ribbon.

I'm so pleased I got this stamp set and dies,  reckon they'll make great little tags for pressies too!

Here is the GDP#264 project that I cased: as you can see she's got the 3 parts to it which is what I've gone with on my card.


I hope this project inspires you to create, do go and check out the other GDP#264 projects, click on this link or the photo above. 

God Bless love

Heather xox


Card Packs for November

 Hi there Creators

After creating the cards for this November, I showed Tom (husband) and he then separated them out and said he felt I should make them into 2 separate packs, basic and advanced, so I've taken his advice! and here they are:

Basic Pack, create 4 cards, includes all card stock cut and scored for you, plus embellishments, any extra cut pieces, and written instructions.  $20 for the pack.  You will need a stamp set and ink, adhesives, and Wink of Stella Brush (if you don't have one - they are sooooo worth it, and only $11.50 - if you don't have one let me know and I can get it ordered for you.

Snowflake splendor Designer Series Paper, Stampin' Up!

Advanced Pack: Create 3 fancy fold cards includes all card stock cut and scored for you, plus embellishments, any extra cut pieces, and written instructions.  $15 for the pack as an add on to the Basic Pack (so $35 for both) or $20 as a "stand alone" pack.  You will need a stamp set and ink, adhesives, and again a Wink of Stella Brush - if you don't have one let me know and I can get it ordered for you!

Snowflake splendor Designer Series Paper, Stampin' Up!

 I have used the Snowflake Splendor Designer Series Paper (so pretty)! the fabulous Itty Bitty Christmas Stamp set to make mine with, and as we're starting to open up a bit more here in regional Vic, I figured that if anyone would like to come and make these cards in my classroom, let me know and we'll work out a time (you'll need to bring your own Wink of Stella - or order one😊)

Contact me to place your orders (or reservation for my Craft room) by Saturday 7th November.  Just in case I have to order anything extra for the kits then my aim time to send out the packs will be 2 weeks later 21st November, (if I don't need to order any extras I'll send out the packs within a week).

I hope you can join me to make these cards (if not in person - in spirit!)

God Bless love

Heather


Curvy Dies

 Hi there Creators,

well available from 3rd November will be a new bundle called Curvy Celebrations, there's 2 stamp sets, 1 die set and a pack of Designer Series Papers for only $123.25 - start saving!! (you can buy some of the products separately)

Anyway I had an idea and I'm quite pleased to say that the 1 idea produced 3 cards!!

My thought was to run 2 pieces of patterned paper together through the Stampin' Cut & Emboss machine, and cut them both into quarters then piece the pieces back together to create a sort of patchwork effect.

I've spritzed some of the Frost White Shimmer Paint onto the background and with this first one also painted the snowflake from So Many snowflake dies, with the frost white. (close up after the cards) how pretty is that intricate die cut?

Curvy Dies, Curvy Christmas Stamp set, Stampin' Up!
this next one I coloured in the dove from Detailed Dove dies, with a Wink of Stella clear brush, just love the shimmer you get!, and again spritzed the background with the Frost White shimmer paint
Curvy Dies, Curvy Christmas Stamp set, Stampin' Up!
Then the last card I pieced together the extra random bits and trimmed them down added the beautiful star conglomeration from the Stitched Stars dies.
Curvy Dies, Curvy Christmas Stamp set, Stampin' Up!
Close up of the dove coloured in with the clear wink of stella (so shiny! lol)

And a close up of the snowflake and the spritzed background

Got to admit I think these dies will be so useful (there is more and I haven't quite got round to playing with them all yet!)

I hope this excites you with new stuff to come 😊

God Bless love

Heather xox


#GDP262

 Hi there Creators,

This time the Global Design Project is a Card layout.  I decided to try and use up some of my scrap pieces on my project this time, and I'm quite pleased with how it turned out, it certainly wasn't what I had initially thought I'd create lol

This is the layout: You can click on the picture to see what others have created too.


And here is what I created:  I've used the snowflake Splendor Designer Series Paper for the background, then one of the Forever Gold Laser Cut Specialty Paper wreaths (I've coloured the back and hence used it blue!) I've also used one of the snowflakes from So Many Snowflakes Dies, and who can resist the Blue Gems they are absolutely gorgeous!

 #GDP262

I've shown you a close up of that gorgeous Blue Gem, and I've also used a bit of Wink of Stella on my snowflake, doesn't it make it glisten?!

I hope this inspires you into creating too.

God Bless love

Heather xox


Something Saturday - Shepherds Care meets Snowy Delights Masks

Hi there Creators,  Today I thought I'd play around with a couple of my latest goodies, Shepherds Care Stamp set and Snowy Delights Mas...