Hi there Creators
I've been meaning to make a video to show how I do this for a while, and finally got round to it today!
In the video I show 2 methods of positioning your long photopolymer stamps to curve them in the direction you want them to go, and as I don't make up the cards in it, I thought I should do a blog post to go with it and show the completed cards!
Here is the video - enjoy! (and don't forget to read the rest of the blog!)
First up I showed how to curve the stamp to a cut out piece, by turning the piece over, laying the clear block over the piece then positioning the stamp where you want it on the block, when you stamp you turn the card stock back the right way.
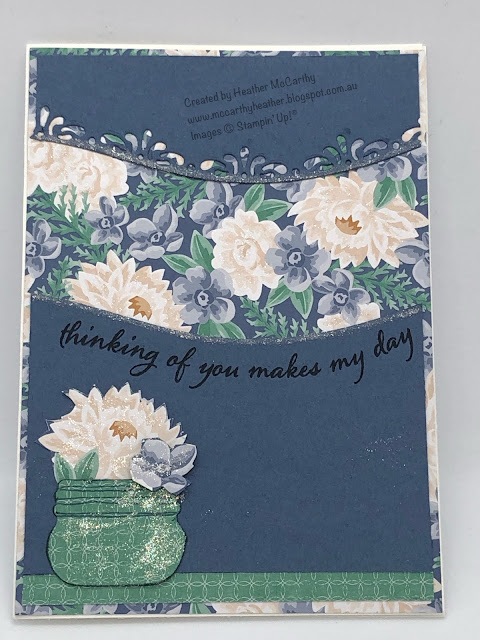
Here is the card I made using this technique:
See how the saying mirrors the edge cut with the Curvy die? I've used some of the pretty Flowers for Every Season Designer Series Paper behind, and also for the jar, cutting out a couple of flowers from the paper to go in the jar (cut with the Jar punch) I had to make the jar a lot smaller, by trimming it down with the bottom of the punch.
I've also used some wink of stella to bling it up a bit along the line of the dies and also on some of the flowers.
The other card I used the Quite Curvy stamp set, and showed how you can use the inside cover piece for the stamps to hold your stamp in place till you have it on your block,
Here is the card I made with this method, the saying would normally curve in the opposite direction (the same way as the leaves) how cute are the little birds? I'm not normally big on birds but, these little ones I really like! it's a nice simple card, coloured in with the Stampin' Blends (alcohol markers)
I hope you can start to curve your photopolymer stamps a little easier now!, and this inspires you to create.
God Bless love
Heather xox


.JPG)

No comments:
Post a Comment