Showing posts with label Biggest Wish. Show all posts

Something Saturday - Stamp care and a random stamping technique

 Hi there Creators,

Today I talked a little about keeping your stamps in tip top condition.  Whilst I love my Stampin' Shammy for quickly cleaning my stamps, I have noticed that after a while the stamps start to look a little jaded, and when you think that you've invested $30+ into a stamp set you probably want to keep it in good condition!  Enter the Stampin' Scrub, which has mats on it, one you spray with the special Stampin' Mist cleaner spray, rub your stamps vigorously over it, then the other side you dry off your stamps with.  The special spray helps your stamps to be nicely conditioned, and the mats reach in deep into all the crevices of your stamp.  The photopolymer stamps don't feel quite so sticky after cleaning this way and the red rubber looks more conditioned!  I think you can see a difference 😊

Then I moved onto a random stamping technique that often we do accidentally, but this time I've made it deliberate.  The general gist is to ink up your stamp, then stamp off a portion of the stamp on raised scrap paper, so it gives you a straight line through it, I've stamped off on 2 sides of these to create sayings that end up with a really cool effect on them.

As you can see the sayings (from Biggest Wish Stamp set) end up with stripes going through them.  This first one I've coloured some of the white crinkled seam binding ribbon using a blending brush to brush the Pacific Point colour onto it and as the edges of the card felt a little blank I've stamped "Birthday" going down the sides, I kind of like the effect! then a bit of bling, the Brushed Metallic Dots.  Oh and I used the Essential Tag punch just to add a bit of interest, with the pieces punched out then added back in, but up on dimensionals

Stampin' Up! Being CreateAble with Heather
Then this one I left the sheet intact, and did the side bit a little more deliberately (I did notice the sides on the blue card aren't quite straight 🤣 I've added in a bit of the gorgeous Metallic woven ribbon in the Orchid Oasis to match the ink.  Oh and some of the pretty Iridescent Pearl basic jewels
Stampin' Up! Being CreateAble with Heather

So this is how I did the side piece this time, a bit of scrap paper to mask off where I don't want it, then I could stamp to my hearts content, and know it's straight!

And Voila.....a kind of cool looking edge!

If you missed the video, here it is.....


 Let me know if you have a go, and how it turns out!

I hope this inspires you to have a go too.

God Bless love

Heather xox

Something Saturday - Mini Ink Pads & Alphabet dies

 Hi there Creators,

Today I showed off a quick way to create 2 cards from one cut, nice and simple, but with a great look to them.

Here are the cards: 

The cool thing with this is you can gear it to the colours the person really likes.

The idea is to have a piece of card that will give a nice gap all the way round once it's on your card, mine measures 9.5cm x 13.8cm (bearing in mind my base card is 10.5cm x 14.8cm).  You cut out the Happy (or other word) I've used the Alphabet a la Mode dies, leaving enough room to stamp a sentiment in too, (I've used Biggest Wish Stamp set) use the cut out letters in the other card, and add colour to your base card so it peeps through.

alphabet a la mode dies, Stampin' Up!
I've taken my mini ink pads and swiped them on their ends to get this scribbled effect, I guess you could use pencils or pens, but this was so quick and easy!  Mini ink pads - or Stampin' Spots as they're actually called are such fabulous pads to have, I've inked one up for each colour we have, all you need is the Re-inker and the Stampin' spots and you can have any colour you like
alphabet a la mode dies, Stampin' Up!
I wanted the cut out word, to really pop, which is why I left it white and brushed colour intensively round the edges of the card

alphabet a la mode dies, Stampin' Up!
In the video with this second card I wasn't sure how well the birthday would show up using the gorgeous Grape colour, so I ended up popping the card in my Stamparatus just in case I needed a darker colour, so much easier to line it back up again!

If you missed the video check it out here:

I hope this inspires you to create

God Bless love

Heather xox

Something Saturday - Elastic Bands

 Hi there Creators

Yep I'm using elastic bands to stamp with this week!  Actually you can get some really cool patterns for your backgrounds by twisting rubber bands round your clear blocks and using them to stamp.

It's quite a short video this week, and I don't finish off the cards so here they are for you to check out....

this is the one I had made up to begin with using the really cute Sale-a-Bration set  Hippest Hippos, I've coloured in the little ballerina with Stampin' Blends , and it really makes her pop out of the page!  I've also used the Decorative Circle Punch to punch her out.

HIppest Hippos, Stampin' Up!
The other 2 cards were an "either/or" situation as I ended up double siding them with pattern, so this is the side I chose for this one, and it the blue streaks reminded me of ice, so I couldn't resist using this Snow Crystal Stamp (have to admit it's one of my favourites at the moment!)
Snow Crystal, Stampin' Up!


This one was also stamped on both sides, but I really liked the grungy look of this side, so I paired it up with these lovely bold words from Biggest Wish stamp set (one of my "go to" stamp sets when I'm looking for some useful words), and as I didn't want to overstate things with embellishments I chose the Classic Matte Dots (nicely understated!)😉

Biggest Wish, Stampin' Up!

Let me know if you have a go, and if you feel like sharing I'd love to see your creations 😊

If you missed the video here it is:

I hope this inspires you to create

God Bless love

Heather xox

Cards for May

 Hi there Creators

Well thought I'd better share the cards we'll be making in May at my classes, which incidentally the class dates are:  Wednesday 4th at 10.30am, Thursday 5th at 7pm (both in Laanecoorie) and the Maryborough class is on Saturday 7th at 10.30am.

I'm hoping we can gather a few more people for the Maryborough class, so do tell your friends!  

We'll be making 4 cards, (with envelopes) for $20

Let's kick off the "show & tell".....

this first one uses the brand new Wisteria Wishes (oh this set is rapidly becoming one of my favourites!)  Also some a couple of the new In Colours (can you spy which ones?)

Stampin' Up!, Wisteria Wishes
Next up, I can't resist the pull of the ocean..... with Waves of Inspiration (and another new In Colour)
Stampin' Up! Waves of Inspiration
Number 3 (if you know me you'll know I love all things gold🤣)  This uses the gilded leafing, along with the quite cool Beautiful Shapes dies, and Biggest Wish Stamps

Stampin' Up!, Beautiful Shapes Dies, Biggest Wish Stamps

Last but not least I've dug out the Celebrate Sunflowers Stamps and done a spot of bleaching with them (such a great effect!).  I think I'll have a selection of bling to use on your sunflowers (especially as I now realise that the From my Heart Faceted Gems will be retired by the time we do the class)
Stampin' Up!, Celebrate Sunflowers

 Hopefully you can join us, - book your place!, and if you can't , then I hope these cards inspire you to create!

God Bless love

Heather xox

Something Saturday - Clear Blocks are more than just for Stamps!

 Hi There Creators

join me today as I show you how to make the most of your clear blocks!

Before the video I had actually managed to create a couple of cards - yay go me!!

Which were these ones;

To find out what I used on this first card click here:  What Heather Used

Alternate ways to use clear Blocks, Stampin' Up!,  Biggest wish
 

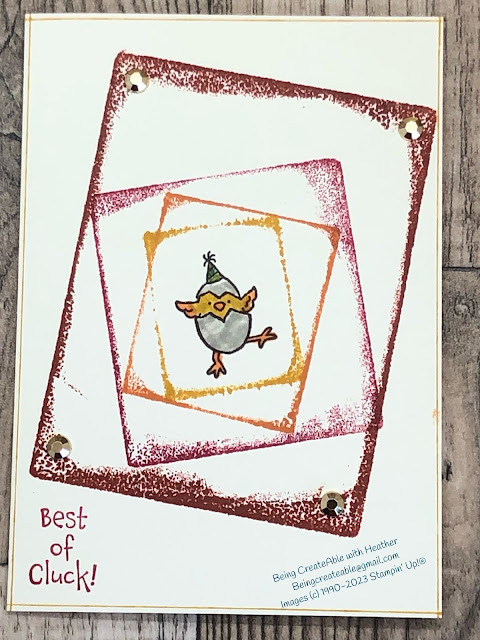
To find out what I used for this Chick Card, click here: What Heather Used

Alternate ways to use clear Blocks, Stampin' Up!, Hey Birthday Chick

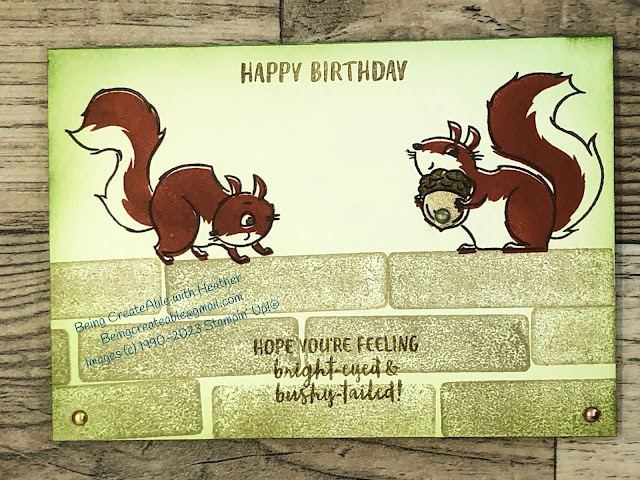
 Then in the video I showed how to create this wall using clear blocks, to see what I used click here: What Heather used  In the video I mention when one of us at work gets distracted one of the other girls has a catch phrase for it "Oh look a squirrel!"  After having mentioned that, I thought, Oh squirrels would look good on top of the wall! 🤣 (good job I have squirrel stamps!)

Alternate ways to use clear Blocks, Stampin' Up! Nuts about Squirrels

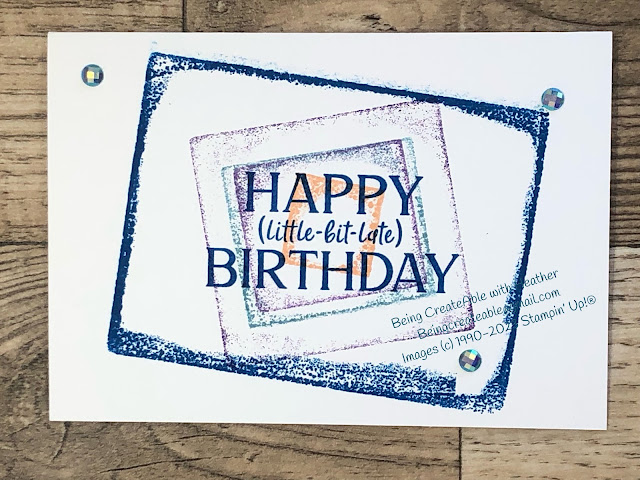
and for this card I show how to create these frames, to see what I used clear here:  What Heather used

Alternate ways to use clear Blocks, Stampin' Up!, Happiest of Birthdays

 It's actually easy to use your clear block to create cool backgrounds or as in the squirrel card, bricks.  All you do is forgo the stamps on your blocks and add ink directly to the block, then stamp it.

In the last card and the chick card I've just inked up the edge of the block to create a frame, then stamped it.

Check out the video here:


 I hope this inspires you to ink up those clear blocks!

God Bless love

Heather xox


Something Saturday - 2 from 1 Stripes & Trees

  Hi there Creators Today I'm doing one cut with my Designer Paper and creating 2 different cards - gotta love it when you can get 2 for...