Posts

Showing posts with the label Boxes. 3D projects

Something Saturday - Click Clack Concertina Card

Image
 Hi there Creators Well I was sitting last night wondering what to do for my Something Saturday, and playing around with a bit of paper, ended up designing this card, I've made similar cards before like the cascade cards, this is probably a bit more basic, but I'm happy with it and it's way simpler to create, but still packs a cool Woah factor🤣  I've used Sentimental Christmas Designer Series Paper which is on the last chance list. I decided it needed a sentiment so picked out this one from Sweetest Star Stamp set (last chance list again), because it has 6 words (1 for each panel!😃) and these Adhesive backed Snowflake Assortment are also on the last chance list and happen to be reduced to 1/2 price (woo hoo!) Ok, onto measurements.... You'll need a sheet of A4 for the base card, score it at 9.9cm either end, then cut in 1/2 at 10.5cm, fold so each piece is concertina'd into 1/3rd's then each folded piece needs a cut that goes 1/2 way up the card (in the...

Something Saturday - Scalloped Gift Card Box

Image
 Hi There Creators Well I have to say this box stumped me initially, (probably because I didn't read the name right) - it's all in the name "Gift Card", so I was wondering what the heck the insert bit was for 🤣   Now I know!  check them out here: Scalloped Gift Card Box Anyway in my video today I decorate it up for a Father's Day gift (shhh don't tell Tom)  I'm pretty sure I'm safe as Father's day is tomorrow and he's unlikely to watch my video or read my blog 🤣 (now just to make sure he doesn't look over my shoulder as I type this up.....) So this is a really cute little box, obviously designed to hold a gift card, it slips into the insert nicely (who'd have thought?!)  with just a few pieces of cut Designer paper and a stamp or two you can make it look really good.  As you can see I had to add a bit of bling, so I chose the More Dazzle specialty paper to go as the top base layer.  Then the Designer paper I chose is the Let's Go ...

Something Saturday - Designer Paper Boxes

Image
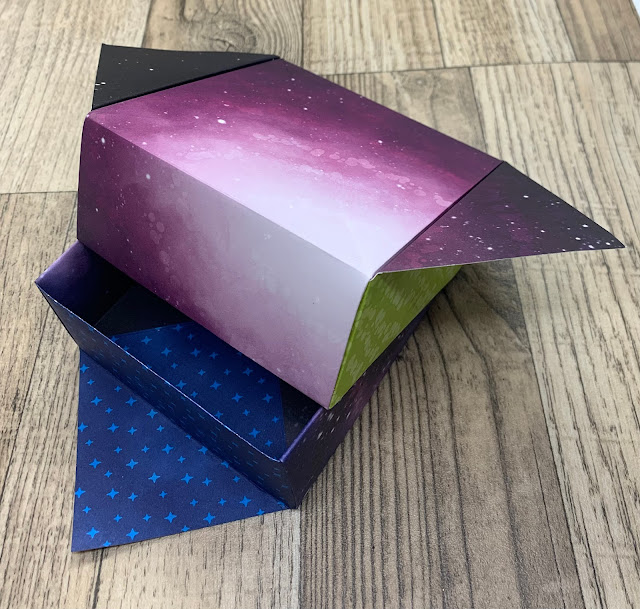
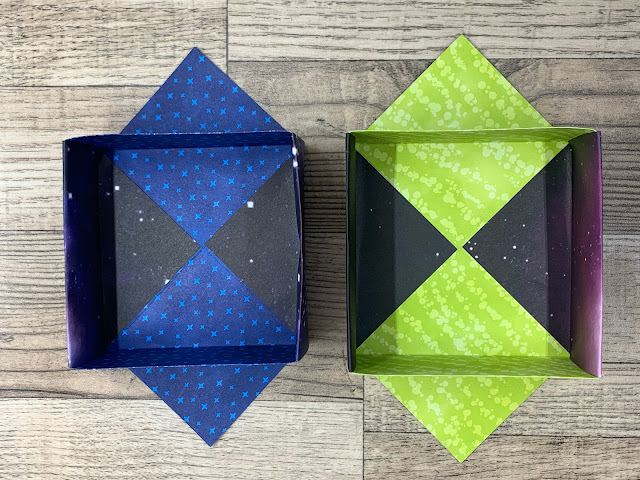
 Hi There Creators well today we're doing a spot of folding - Go the Origami boxes!  I used to make an origami box like this (with origami, it doesn't require glue) I wondered how I could make it so it displayed both sides of the Designer Paper, and now I've worked it out (kind of by accident!, and mine requires glue!) 🤣 Currently until the end of June there is a Designer Paper sale on - woo hoo hopefully you'll find the papers here:  Patterned Papers   The one I'm using today is called Stargazing it's quite gorgeous (as are most of the Stampin' Up! Papers)! Anyway here are the photos then I'll attempt to explain how to make them, ummmm! Ok here goes, you will need a square of Designer Paper (that is patterned on both sides) Fold the square in 1/2 so you have a rectangle, then open and fold in 1/2 the other way and open it up again (you'll now have a + in the square) now fold the corners in to the centre Then turn the whole thing over and fold the s...

Something Saturday - What to do with your left over Chocolate tins

Image
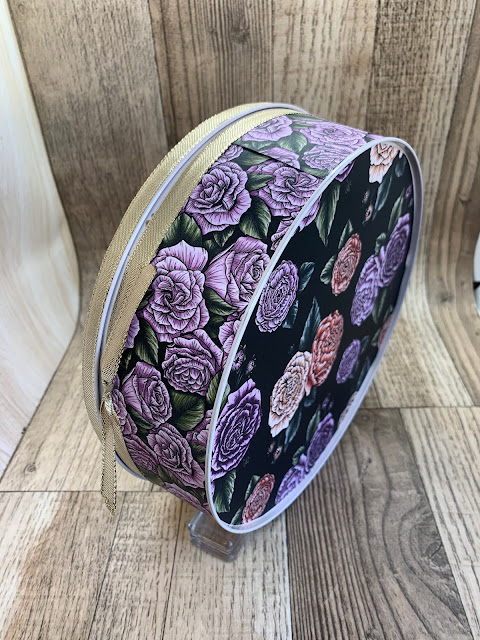
  Hi there Creators Well I don't know about you, but around this time of year I end up with some chocolate box tins or biscuit tins that are decidedly empty.  Chocolates/biscuits have all "flown the coop", and it seems a shame to just dump the tins.  I'm sure there are heaps of things you can do with them if you check out Pinterest, but equally you can decorate them and use them as "gift wrap" solutions (who doesn't like a pretty tin?)🤣 So here is my big Roses Box of Chocolates altered tin:  I've used the gorgeous Favored Flowers Designer Papers that are free when you purchase $90+ of goodies until the end of Feb, but you could use any lovely papers that you have lying around (most of us if you've been paper crafting a while seem to have heaps!) In the video I show you how to get measurements so the paper will fit onto your tin (even if the sides of the tin aren't quite 90 degrees to the base - as I discovered when doing this 🤣)  Oh and don...

Something Saturday - Christmas Tree Box

Image
 Hi there Creators, Today I'm showing you how to create a little box with a Christmas Tree standing up on top of it, this is actually one of the projects my Craft@Home group have to create this month (if you would like more details about my Craft@Home group, just ask) You could give a Christmas presy in this box, and then it can be stored to use as a decoration, the ribbon is a belly band around the box, so it will slide on and off, and the tree can be stored inside the box when it's been packed away How to make this?  well...... you're going to need  3 (or more) symmetrical trees for the tree decoration, I've used Twinkling Lights Dies , you can also buy them as part of a bundle with a stamp set too (bundles give you a 10% discount) Christmas Lights Bundle . 😍 Something to colour your trees with, I used Garden Green, Pear Pizzazz and Shaded Spruce inks brushed on with a blending brush.  (Although I'm now thinking they'd look good cut from Designer Papers.) An ...

Something Saturday - Cute & Easy Boxes

Image
 Hi There Creators, Today's video was showing you how you can create these ultra easy "sunny boy" boxes, so called after Sunny Boy flavoured frozen iceblock/drink things.  Before I arrived here in Australia (Tom - hubby said, Oh they were so good and only 10c each......)  probably not 10c anymore if they were still around 🤣 Anyway, they are so simple to make, my one recommendation with them is to make sure the join isn't going to end up on a fold, so when you squash flat the bottom, make sure the join isn't central, but to one side! Here's what I created, my first one was with a sheet of A5 cardstock (14.8x 21cm)  I had stamped the fishes on it first using the "A Fish & a Wish Bundle" .  Then rather than sealing up the top, I've cut slits using the Label Me Fancy Punch . and made up a ribbon handle. This next box is using Designer Series Paper (this one, Artfully Composed -so gorgeous is retiring at the end of June) so currently it's r...