Hi there Creative Peeps,
Thought I'd show case Fancy Phrases stamp set today, funny thing with this one is that it wasn't on my list of "must have's" but then I was buying the one across the page from it (Arrange a Wreath) and happened to see it, it's such a pretty set with such lovely wording, and I had a few hostess dollars to spend (I think it was my pre-order and I get a bit carried away sometimes lol), so it suddenly catapulted to the top of my list, and here are some of the results......
I saw this set as a vintage type, the first thing I wanted to try was watercolour, I kind of like the way watercolouring bleeds outside of the lines (might just be me lol)
I used some of the watercolour paper to stamp on then some of the new colours, Just Jade for the leaves and Bumblebee with Magenta Madness for the flowers
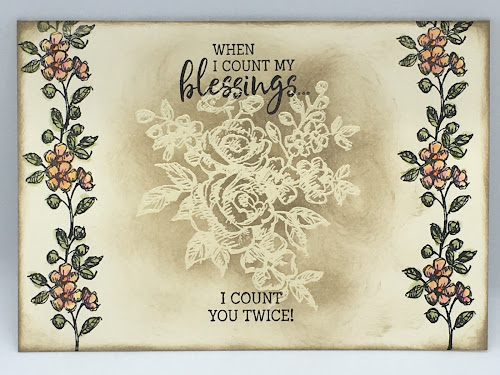
Next I wanted to go a bit more vintage'y, starting off with the smaller flower spray in the stamp set, I've put them on top of each other, they actually joined really easily, I thought I'd missed a couple of times but it worked! this time I used watercolour pencils and a blender pen to smooth them over, then for the middle I went with a bit of clear stampin' emboss powder (I had thought I'd be able to watermark the middle with the versamark stamp pad, but it didn't show up enough, I think it's better on coloured card), then I've used a bit of crumb cake over top to make the image pop, and stamped with Stazon the saying, as anything else would rub off the embossed work
Then I had an idea......!
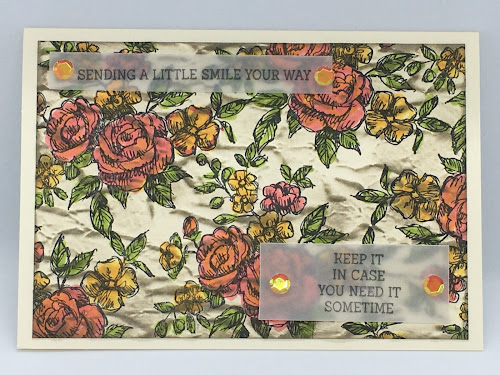
Why not mix this stamp set with the Old World Paper 3D embossing folder?, after all I want it to look old 😊 So I stamped the image a few times with Stazon, coloured it in with the Brights Stampin' Write Markers (mainly Flirty Flamingo, Mango Melody, and Granny Apple Green), ran it through the embossing folder, and buffed over the top and round the edges with Gray Granite. I love the way it turned out, however then the saying wouldn't show up (or for that matter, stamp on it), but I didn't want to lose the look by putting stark vanilla on top, so thank goodness for vellum! again using Stazon ink, and how fabulous are the sequins? They're the Artistry Blooms sequins, I like the fact they have no hole in the middle, so they look more like gems.
All in all I'm pretty pleased I bought this set, although when I was typing up this blog I then discovered that I missed out on getting the Fancy Phrases Bundle, bother, as I'm bound to buy that Fancy Tag Topper punch anyway, Ah well - learn from my mistake, and check to see if there's a bundle involved (saves you 10% on the overall price)
So I hope this inspires you to play around with your stamp sets, and reminds you to look out the bundles in the catalogue!
God Bless love
Heather xox


.JPG)
