Showing posts with label Tropical Thinlits. Show all posts

ClassCards@Home May 2020

Hi there Creators,
If you order my ClassCards@Home kit this month you'll be receiving these cards to create at home, for each of these, you'll need to use your own Stamps, Inks and Glues but I'll be providing all the papers pre-cut along with instructions and videos.  Click on the link below by Friday 1st May to order and pay for your kit, I will get the kits all organised over that weekend and mail them out on Monday 4th.

With Mothers day on the horizon, I thought this might be suitable with a appropriate saying, you'll be choosing a colour and saying that you have at home.  This card uses the beautiful Tasteful background dies, and the really pretty Woven Threads Sequin Assortment.  Oh and also the Stitched rectangle dies.  I've called this card "Tasteful Things"

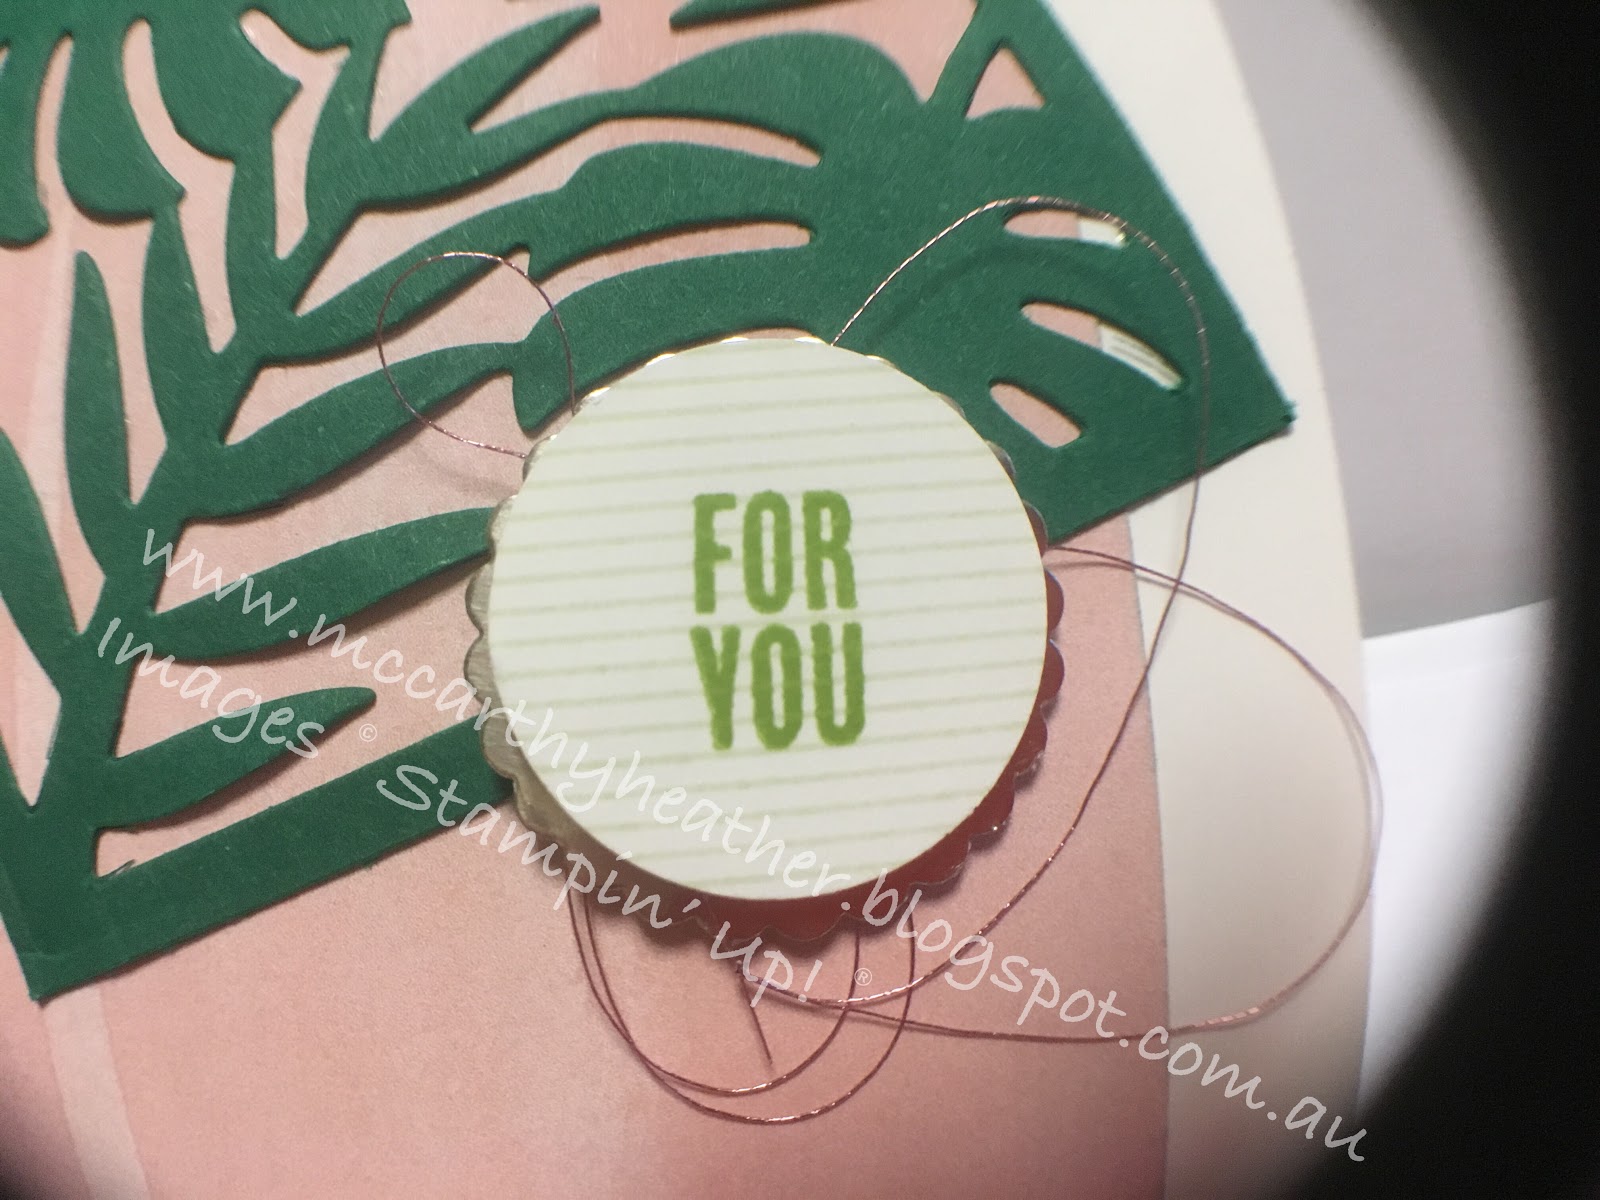
Card #2 could also be used as a Mothers Day card if you wanted to, this one uses the Tropical thinlits, and I did discover that the Label Me Fancy Punch does sit nicely on top of the Timeless Label Punch - Yea!  I've called this one "Timeless Tropical"
Then I thought we might do a couple of "blokey" cards, although this one would equally suit a female.  I've used the Smooth Sailing dies, and made the frame using the Stitched Rectangle Dies, also used the Subtle 3D embossing folder, you'll need to have a blue to daub on for the ocean.  
This one is called "Hopeful Fish"
And this last card uses the Garage Gears Dies, you'll need either black or dark grey ink for this it's a little difficult to get a good photo when silver foil card-stock is used!
Last but not least this is called "Geared Birthday"


 Bear in mind that all these cards use your own stamps and inks to put in the sayings.

Here is the secure link for payment for the kit of all 4 cards: May ClassCards@Home Kit
If you'd like extra's of some cards, or would prefer to have individual kits, please get in touch with me.

I hope you can join us to do this ClassCards@Home class, if not I hope this post inspires you to create at home!
God Bless love
Heather xox


Tag Card for March instructions

Hi Creators,
if you have ordered from me this month you'll receive a tag on your bag, I've included the extras to make this card, so thought I'd drop in quickly and explain how to pop it together!

first up here is the tag, it's small but cute!  I've used the Tabs for Everything stamp set, which has this cool line stamp perfect size to cut out with the 1" circle punch, I've backed it with the 1 1/8" scallop circle punch, using the Champagne foil sheets, then it's hung using the rose metallic thread.
So then onto the card itself!  take your piece of Designer Series 3x6" paper, and fold over around 1cm at one end of it, attach it down to your card (and attach the flap down)  then attach down the die cut Tropical Thinlit piece.  Then take your tag, add adhesive to the back of it and loop the thread around till your happy with the way it looks and attach this to your card too, Voila you're all done!
I hope you enjoy making up your "tag" card, and if you haven't ordered from me yet this month, then you've still got a few days left!  Remember that until the end of March, for every $90 of products you purchase you get to pick a free Sale-a-Bration product! next month it'll all be over red rover for another year!
I hope this inspires you to create,
God Bless love
Heather xox

Thankyou card and Tag Card for July

Hi There!
Thought I'd share with you the thankyou card and tag that you can make up into a card that I'll be sending out this month to everyone who orders from me.  I was making these as I was on my Stand at Craft Alive in Wodonga, here I am!
so I was little limited to what I'd taken with me, which in this case was the Brights and Neutrals Stampin' Write Markers, and some of the new matching Brights ink pads.
I'd seen so many beautiful cards made with both these stamp sets, so I succumbed! lol
This one uses the Tropical Chic Bundle, Oh wow it's so gorgeous!  I just love the way it cuts out the fronds from the card, and leaves it intact.  And Oh isn't the flower so beautiful?  I've inked it up with 2 of the Stampin' Write markers, then used a dauber to blend the colours together.  I've used the same technique with the leaves, and 3 greens, effective isn't it?  If you want to see it "in the flesh" just make sure you place an order with me this month. Don't forget to use the current hostess code: WZTSTANH for your chance to be in the draw for the hostess benefits.


The other card I want to show you is this one using the Dandelion Wishes Stamp set, it's one that caught my attention as soon as I saw it in the catalogue! and I wondered how it would look in white on black, so here it is....
and I rather like the effect, what do you think?  The black card part is the tag that will be on your bag when your order from me (my gift to you) and I'm including the extra bits so you can create a card with it if you want to.

Did you know that if you join Stampin' Up! in July not only will you get the amazing joining deal, $235 of products for only $169, but on top of that Stampin' Up! are throwing in one of the colour family Ink Pad Collections, Brights, Subtles, Regals or Neutrals worth $117!! wow, wow wow!  If you want to know more about joining Stampin' Up!, and my team, click on the link above "Join my Team, the CreateAbles".

I hope these inspire you to create!
God Bless love
Heather xox

Something Saturday - 2 from 1 Stripes & Trees

  Hi there Creators Today I'm doing one cut with my Designer Paper and creating 2 different cards - gotta love it when you can get 2 for...