
Thankyou for joining me today, I have been a Stampin' Up! Demonstrator, since 2008. My blog will show you how to make cards and projects using Stampin' Up!'s fabulous products. And occasionally random extra stuff (that's the way I roll 🤣) Please do sign up to receive my emails, so you get my latest info.
Something Saturday - Shepherds Care meets Snowy Delights Masks
Something Saturday - Double Embossing
Hi there Creators,
So, today we're doing "double embossing" oooo! First we dry emboss using an embossing folder (with a twist) then we heat emboss the same image 😃
Here are the cards I created from this technique:
This is the first card I made before the video (and I was really happy with the way it turned out! I've put versamark onto the embossing folder, then run the piece of Blackberry Bliss card through the Stampin' Cut & Emboss Machine, then heat embossed with silver embossing powder, I was so happy with the way it turned out I figured I should show you all how to do it too 😁 I've used the stamp set Light the Sky (which I think I used last week too!), the embossing folder Merry Melody, and Metallics heat embossing powders
If you missed the video and would like to see how I did this, here it is:
I hope this inspires you to have a go!
God Bless love
Heather xox
Something Saturday - Heat embossing with stencils
Hi there Creators
today I thought I'd have a play around to see what it would look like to heat emboss using stencils or masks (in this case the Artistic Mix Decorative Masks) I love the tartan look you can get with these ones, and I said to Tom (hubby) I think I made the perfect card for a Scottish Essendon Supporter 🤣 (you'll see....)
I wanted to try out both lots of the embossing powders and as they come in packs of 3 colours it kind of worked (bearing in mind I used clear last week). In with the "Basics Embossing Powders" you have Black, White and Clear. Then in with the "Metallics Embossing Powders" there are Gold, Silver and Copper
the first card I made up used the Metallics, here it is, it's kind of cool that you can heat emboss over top of heat embossing. With this card I did the big silver squares first then the small gold squares & lines. heat embossing always looks classy (especially the metallics) I've used the Limited Edition stamp set to create these cards, and I love this saying:
Then I moved onto the black & white embossing powders, and figured that to make them stand out I'd need a colour underneath (hence I picked Real Red) this is how it started, I pressed versamark through the small checkered stencil onto the red card, peeled off the stencil then dusted over with white and heat set it, it actually looks pretty good just like this!
then I added the larger squares mask and added black embossing powder to this first one, then I couldn't resist seeing how it would turn out the other way round (black then white), interesting how they are totally different! (you wouldn't get this effect in the same way from ink alone)
Anyway then I made them up into cards..... (see what I mean about the Scottish Essendon Supporter?)
This first one I made up into a similar card to the first Metallics card, with a piece of ribbon across the bottom and saying in the middle stamped onto vellum.
And that's it!
If you missed the video here it is:
I hope this inspires you to have a go too
God Bless love
Heather xox
Something Saturday -Snow Crystal Stamp 3 colour heat embossed
Hi there Creators,
In my video this week I show how to pop 3 different embossing powders onto this gorgeous Snow Crystal (159821 $37) stamp set.
Here are the cards I have made up after the video with the embossed pieces: I decided the Gold & Rose Gold Metallic Specialty paper went really well with it, so the first has the rose gold and the 2nd has the gold. I've picked out a a saying from Trees for Sale (159785 $39), which also goes with the "Tree Lot" dies (a Sale-a-bration set you can get for free when you purchase $180) I might try and show this off next week actually, as it's got a really cute caravan in it too, umm stay tuned......
You'll notice these also have a pretty little sequin in the middle too, this is from the new Adhesive Backed Sequins and Gems (159972 $13.25) I have to say that the sequins look more like gems, and I thought they were till I went to pick one off the backing!
Oh and, to do the saying, as it is all on one line, I have "masked off" the opposite side of the stamp set with a bit of sticky note, then inked it up, removed the sticky note and stamped: see the photo below
Do check out what I used for the cards here: What Heather Used
If you've missed the video and would like to see it - here it is!
I hope this inspires you to dig out your heat embossing gear and get creating!
God Bless love
Heather xox
Mixing it up with Embossing Powders
Hi there Creators,
Well this Something Saturday I've mixed up my embossing powders - literally!
I thought it would be interesting as they come in packs of 3 now to see what black and white would look like mixed up and embossed etc.
Therefore here are my findings.....
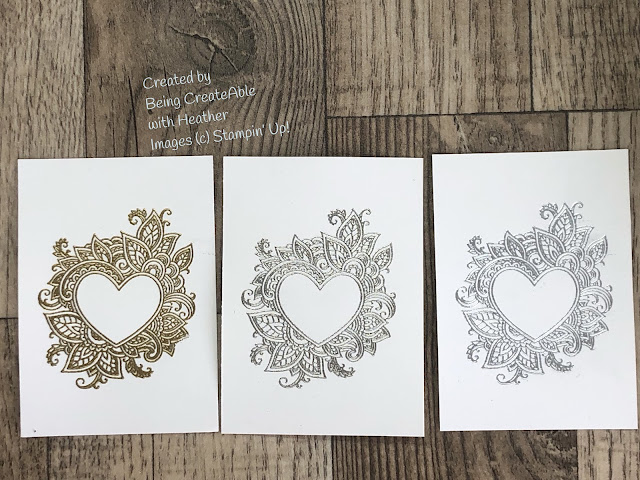
first up the embossing powders straight up -
Top Row: Gold, Silver, Copper,
Bottom Row: Black, Clear & White (yes the clear isn't obvious, but bear with me!)
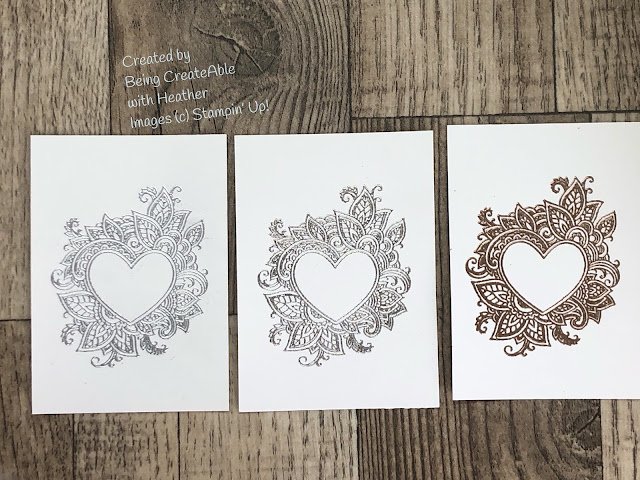
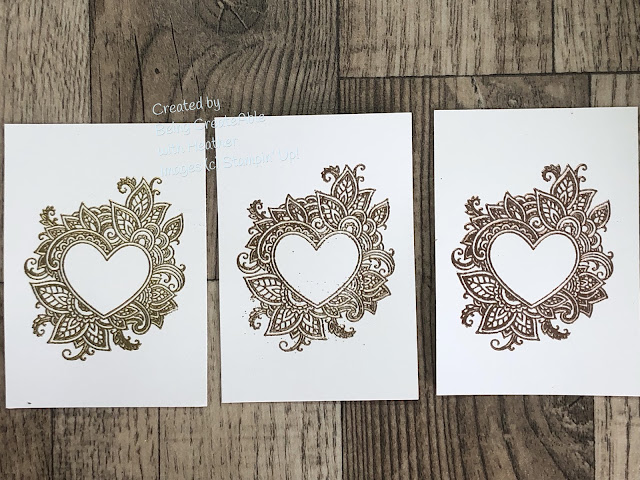
So then I took a bit of 2 different colours from the sets of 3 and mixed them up in separate containers, and these were the results: I've put the 2 original colours either side of the mixed colour
Gold and Silver mix
Black & White Mix
Gold & Copper Mix (I really liked this one!)
Now I asked you to bear with me on the clear, and here is what I did with it (actually I did 2 things....)
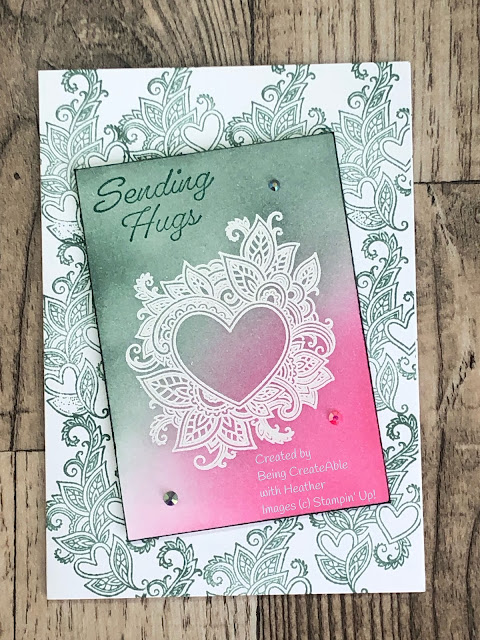
Firstly I took the clear embossed on white cardstock, and added colour to the background using Blending Brushes; where the embossing is stays white (so pretty)
Then as I was doing this I thought how cool it would look with a different colour under the embossing, so I've used Pool Party cardstock, clear embossed onto it then added colour over the top (love it!) by the way how pretty is this heart from Henna Hearts stamp set?I made them both up into cards using the lovely "Sending Hugs" saying from the new Eden's Garden Stamp set
If you'd like to check out the video here it is:
Do click this link to find out what I used: What Heather Used
I hope this inspires you to pull out your embossing powders and mix it up, see what colours you can come up with!
God Bless love
Heather xox
Stamped Heat De-bossing (Something Saturday)
Hi There Creators,
This week my "Something Saturday" video was on Stamped Heat De-bossing, I'm not sure if it's called this but I can't think what else to call it!
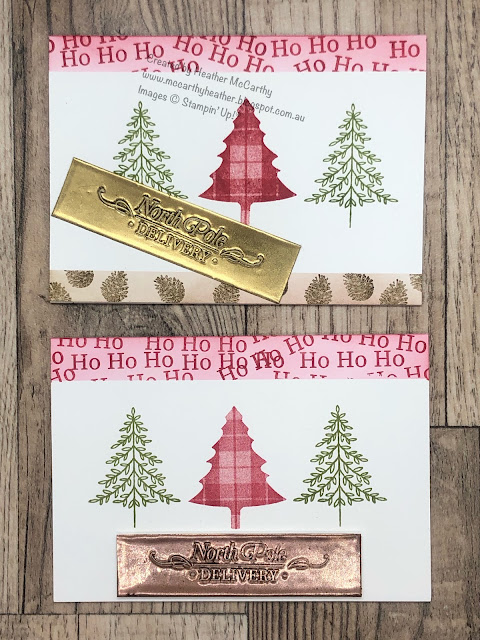
This is it, there's no ink used in the saying, just heat embossing powder and a stamp.
I think it creates a really cool look.
These are the finished cards the top card is the one I actually make in the video
:
Anyway I'm sure if you haven't viewed the video that you're wondering how I've done this.
It's actually quite simple if you know how to heat emboss!
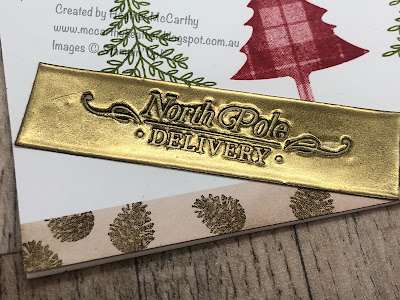
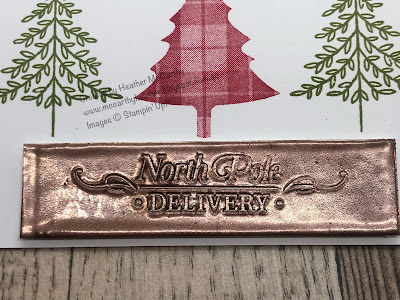
Take your piece of card, wipe it over with your Versamark ink pad, then cover it with heat embossing powder, and heat emboss it.
Then repeat the process so (in my case) the Gold or Copper gets thicker, I've done mine 3 times, then on the last time you need the stamp ready and waiting, while the melted embossing powder is still hot, press the stamp into it firmly. If you find that you've ended up with a partial image, heat it up again till the stamped bit "melts out" and try again. I'm not sure how many times you can re-heat it before the embossing powder doesn't like you, but I did have to do this once in the video!
Let me know if you have a go! I'm putting a link below to all the products I used making these cards, and don't forget until 30th September (not long now) for every $90 you order you do get to pick a FREE Sale-a-Bration product! (bargain!)
ALSO if you love everything (like me) and want heaps more, why not join my team? You get to pick $235 of goodies, only pay $169 PLUS until 30th September you get to pick a free bundle from the mini catalogue, then you get an ongoing 20% discount rising to 25% after a certain amount of rolling "sales" (I joined for the discount 13 years ago.....lol) Check out this link:
WHAT HEATHER USED TO MAKE THESE CARDS
I hope this has inspired you to have a go, and have fun with your cardmaking and scrapbooking!
God Bless love
Heather xox
Something Saturday - Holder for last weeks project
Hi there Creators, I mentioned last week that maybe I should create a holder for all those cards to sit in and make it look great as a gift...

-
Hi there Creators I saw this cool star ornament in another video, and had a bit of a play around with it, ending up with this.... (with a r...
-
Hi there Creators Come and join in our Collective 61 Fundraiser on 21st February at 2.30pm at Enjoy Church, 29 Valentine St, Bendigo. Mak...
-
Hi there Creators, thought I'd join in this Sale-a-Bration Blog hop today, and I'm excited to see what others have created using...
.JPG)


.JPG)
.JPG)
.JPG)
.JPG)
.JPG)
.JPG)
.JPG)
.JPG)
.JPG)
.JPG)
.JPG)






.JPG)
