Showing posts with label Artistically Inked. Show all posts

Something Saturday - Look what's retiring

 Hi There Creators

Today we're taking a look at some of the goodies that will be retiring from the Annual Catalogue (specifically ones that I currently own!)  I go through them in the video and mention if they're being discounted on 9th April, but bear in mind if you specifically want something, sometimes it's best not to wait, as things can be sold out before you realise it!  Here is the retiring list for the Annual Catalogue: Last Chance Annual Catalogue List

The Mini Catalogue is also retiring, but I haven't focused on that today, maybe I should next week, we'll see.....  anyway here is the retiring list for the Mini Catalogue:  Last Chance Mini Catalogue List

(I'm really hoping those links work!)  there is a heap retiring and it's worth checking if it was bundled whether the bundle is still cheaper or if it's worth purchasing the individual items separately if they've both been reduced to less than the bundle price (if that makes sense?) 

Anyway I'm not going to list them all now, I'll just show you what I created at the end of the video with the absolutely gorgeous Artisitically Inked Stamp set (being reduced from $42 to $29.40) , and although I didn't use them for these cards, the Artistic dies are being reduced from $61 to $30.50! (bargain!!)

I accidentally stamped the saying on a "wonk) so then had to stamp a whole heap more to make it look authentic 🤣  I mentioned in the video I felt it needed a bit of bling, so I've actually used some of the gorgeous Gilded Leafing, which is sadly also retiring (going from $15.75 to $7.87)  recommend you watch a video on using this before you open the container!  pretty sure this one here tells you about it: Artistically Inked with Gold Gilded Leafing

Look whats retiring April 24, Stampin' Up!
wasn't sure how well the gilded leaf would show up so I took a close up too 😁
Look whats retiring April 24, Stampin' Up!
Then after the video I thought I should probably use some of the retiring inks too....  so this one uses all the retiring In Colour Inks (and now I realise how much I actually like Orchid Oasis!)  Anyway retiring In colours are: Sweet sorbet, Parakeet Party, Tahitian Tide, Starry Sky and Orchid Oasis.
Look whats retiring April 24, Stampin' Up!
And again just in case it didn't show up well in the big photo the bling: 2022 - 2024 In Colour Pearls (which incidentally are going from  $12.25 to $6.12)  sooo pretty......
Look whats retiring April 24, Stampin' Up!
I hope you get the chance to check out the lists, and if you're not on my email list to receive these and other things, let me know!

Here is the video in case you missed it:


Hope these inspire you to create

God Bless love
Heather xox

Class Cards for October

Hi there Creators,

Exciting to be able to use some of the new Mini Catalogue products in our class cards for October!

There is a change with my Maryborough class to be aware of, and that is that we're moving!  So we'll actually be meeting up at the Wattle City Church, they have a nice little meeting room at the back which I think will be perfect for us.  I'll be sending out an email with the address, if you don't get my emails let me know!

The dates for classes are: Wednesday 4th at 10.30am in Laanecoorie (my classroom) Thursday 5th 7pm (my classroom again)  and Saturday 7th at 10.30am in our new location.  Class cost is $24 for 4 cards.  Don't forget to book your spot!

Here are the cards we'll be creating:

This first one uses the Online exclusive Trucking Along, which is a punch and stamp set, sadly the stamp isn't from the same set, it's from Artistically Inked but I wanted a basic Happy Birthday rather than a fancy one!🤣 The die set Around the Bend is a really one!

 
Then how about these amazing Abundant Beauty Decorative Masks?  This is so cool!
Abundant Beauty Decorative Masks, Stampin' Up!

I did get asked if we were going to be making Christmas cards at the next class, and most definitely!!........

This one uses the Stars at Night embossing folder (it's a duo deal with the matching dies)  I just knew I had to get this set, I've borrowed a stamp from the Night Divine Stamp set.  Oh my goodness the ribbon is just Wow!  it's called Night of Navy and Gold Glittered ribbon.

Stars at Night embossing folder, Stampin' Up!

Then the last 2 are a "pick one" depending on which colour scheme you prefer.  Again it uses a stamp from Night Divine stamp set the first one uses the Artistic Mix decorative Masks, and the purple one uses the Abundant Beauty Decorative Masks

Night Divine, Stampin' Up!

Night Divine, Stampin' Up!


I hope you can make it to class, if not, I hope these inspire you to create in your space 😊

God Bless love

Heather xox


Something Saturday - Faux Silk

 Hi there Creators

Today I thought we'd delve into Faux Silk using the tissue paper that has sat on my desk for quite some time now.  If you're a regular viewer/reader you might recall a few weeks ago my UFO video where I used up a (sadly smaller than I'd hoped) portion of my unfinished objects from my crafting desk, and amidst the scraps was a piece of tissue paper that came from a pack of window sheeting, which I mentioned at the time I'd kept for this very purpose, finally I have used it!

so.... here are the projects I made up with it: Here is the one I made up in the video, check out what I used in this card here: What Heather Used

Faux Silk, Stampin' Up! Artistically Inked
and this one I made up after, as a card to send off to my Mum  this one I've added some gilded leafing to and also a spot of heat embossing in gold around the label, check out what I used for this card here: What Heather Used, I have used the new Cheerful Daisies bundle  (such a great bundle)

 
thought I'd better show a close up too as I'm not sure how well you can see the silk effect!
 
Faux Silk, Stampin' Up! Cheerful Daisies

The actual technique is really quite simple:
  • stamp on the tissue paper, and allow to dry thoroughly
  • add glue all over the base card that goes underneath 
  • scrunch up the tissue paper and smooth it out leaving a few wrinkles
  • Add the tissue paper to the gluey cardstock 
  • trim off the edge
And that's it!
 
If you want to see me in action making it, check out my video here:
 

 I hope this inspires you to have a go too.
Till next "Something Saturday"
God bless love
Heather xox


Something Saturday - Card in a Box

 Hi there Creators

Well I made a card in a box a couple of years ago and since then it's been going to craft shows with me and people have commented on it and asked if I had a tutorial, so I thought maybe it's high time I did one!

I also didn't entirely like the design I did the first time, so this gave me time to refine it a bit

here's my original one:

Card in a Box, Stampin' Up!

I decided I wasn't keen on the fact that it completely opens up and takes up a fair bit of space, so here's the one I made in the video:

Card in a Box, Stampin' Up!

As you can see I've left the back 2 pieces joined, so it creates a kind of wall, I thought it would look kind of cool if you could see a bit of a reflection of the back of the cake, using the gold foil.  Plus I absolutely adore this stamp set: Artistically Inked stamp set, along with some of the Gilded Leafing (kind of satisfies my gold craving 🤣)  I always find using Tombow (Multi purpose Liquid Glue) and Tear & Tape Adhesive works well to add the gilded leafing to.  You need to let the tombow dry a bit first so it doesn't squidge everywhere.

Anyway I said I'd share my measurements with you, so here goes..... bear in mind if you're stamping on the pieces, make sure you do that before gluing anything together!

First up you'll need a piece of card 2 parts wide by 3 parts long, I went with 19cm x 28.5cm, scored into squares of 9.5cm (see my mud map below) dotted lines scored, black line cut.

If you're using my measurements then your lid will need to measure 12.6cm square, and score 1.5cm in on each side, if you're trying out a different size you want to add 1mm to the size of the squares in your box, then allow extra for the lid sides (with mine it's 9.6cm plus 1.5cm extra for each side, hence 12.6cm)

The circles I used the Layering circles dies to find the diameter I cut the circles with scrap paper first, folded them in 1/2 and measured it (the diameter is the line length across the middle of the circle).  From the diameter, you then times the result by 3.14 (Pi), and the number you get is the circumference (all the way round the edge of the circle) which is the length of card you need for the cake sides plus 1cm to create an overlap flap to glue it together.   At this point I will say it doesn't have to be exact, because you could come up with some weird numbers lol.

You'll then need to decide how high you want your cake tiers, my base tier is 3cm high and the top one 4cm.  You'll need to add 2cm to each of these (so 5cm and 6cm respectively)  and score 1cm in on each side, then you snip in to the score line to create a kind of fringe on both sides, this will allow the cardstock to bend around (see photo)

Make this "fringed" piece into a circle and secure it together (you have hopefully allowed the 1cm over-flap, as I mentioned)  And I reckon that's about it for the measurements 😊

If any of it doesn't make sense, hopefully the video will!  if not let me know.  Here's the video:


Well...... as I say in my in person classes - now it's your turn!

I hope this inspires you create

God bless love

Heather xox


Class cards for November

 Hi there Creators

Gee Whizz haven't the months flown by!  Not long till Christmas again (I love making Christmas Cards!)

Anyway Novembers cards are sparkly and 2 of them Christmassy 😃

I'll start with them.....  

See the links below each card for the individual products (codes and prices) I've used for each card and at the bottom I'll pop the times/day of classes:

 Expressions in Ink, Artistic Dies, Angels of Peace, Stampin' Up!

I do love this angel from Angels of Peace Stamp Set, she feels really serene to me, I've paired her up with the lovely leaves die from Artistic Dies, and some of the stunning Expressions in Ink specialty Paper.  Not forgetting a bit of Wink of Stella for glittery wings😉  

Check out this link to see what I used for this card: Peaceful Pieced Angel


Stampin' Up!, Parisian flourish, Stars are shining

This other Christmas Card Ive finally got around to using a couple of things I haven't used much, the Parisian Flourish 3D embossing folder and the Stars are Shining bundle, I've heat embossed round the edge and combined my gold and silver powder to create a really cool champagne'y sort of colour

Check out this link to see what I used in this card: Parisian Stars 


Stampin' Up!, Eden's Garden

Card #3 I've used some new stuff......Eden's Garden is a new Suite coming out on 2nd November I have used one of the dies and stamps from it, combined with the Gold and Rose Gold Metallic Specialty Paper.

Check out this link to see what I used in this card, although I can't link to the Eden's Garden suite yet: Eden's Garden Hugs


Artistically Inked, Gilded Leafing, Stampin' Up!


Last but not least, I think this might be my favourite card.  I love this stamp set - Artisically Inked.  It really doesn't need "dressing up" I've used 4 colours, and have to admit did add some Gilded Leafing.

Check out this link to see what I used in this card: Artistically Inked Gilded Roses

SO, which card is your favourite of the pick for November?, do comment below and let me know!

The day I'm teaching these cards is 3rd November at 10.30am or 7pm, you'll need to book your place if you want to come along as places are limited Class cost is $20 which includes envelopes and instructions to take home too.  However if you'd like to make these cards and can't make it that day, let me know and we can arrange another day (the advantages of having my own classroom is that I can leave it set up for another day 😉)

I hope these inspire you to create,

God Bless love

Heather xox

Something Saturday - How to add veins of gold leaf to your stamped images

 Hi there

My Something Saturday this week is about how to add veins of the gorgeous Gold Gilded Leafing to your stamped work, I've used the beautiful Artistically Inked Stamp set, I think this is just soooooo gorgeous! (check the bottom for the link  to the products I've used)

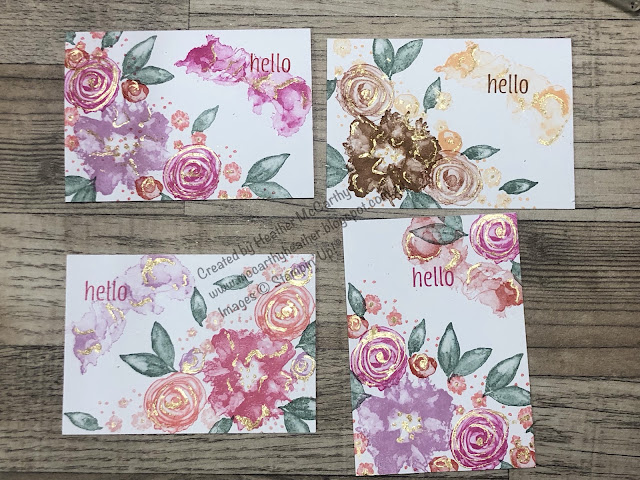
Here are my cards I created:

Artistically Inked, Gilded Leafing, Stampin' Up!, Being CreateAble with Heather
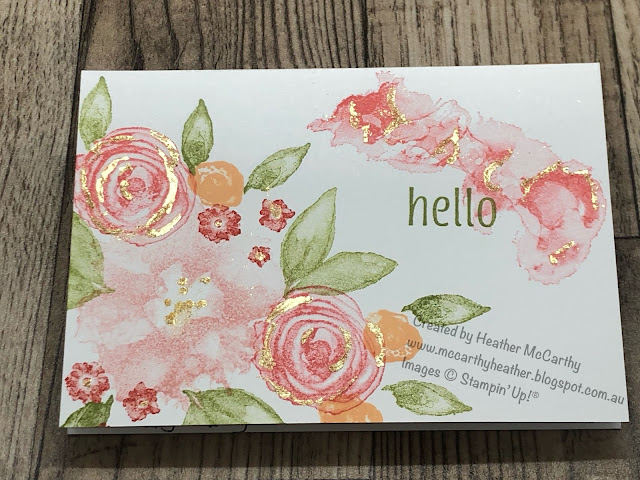
this is the card I create in the video:
Artistically Inked, Gilded Leafing, Stampin' Up!, Being CreateAble with Heathe

 Isn't it gorgeous?  It's so easy, this stamp set Artistically Inked, is so forgiving to use, pick a few coordinating colours and stamp, you can stamp quite randomly, I like to try and cluster them together. then just use the fine end of the tombow (Multipurpose Liquid glue) to draw on glue where you want the gilded leafing to go, allow the glue to dry a little before dusting over with the Gilded leafing, and brush off the excess, I like to use a fairly firm sponge for this.  And voila gold veined stamped images, wooooooh 😍

And one last image for you.. (got a bit carried away!)

Artistically Inked, Gilded Leafing, Stampin' Up!, Being CreateAble with Heathe


 Link to the YouTube Video


Click on this link to see the products I've used to create these cards:  What Heather Used

I hope this inspires you to have a go too!

God Bless love

Heather xox


Something Saturday - 2 from 1 Stripes & Trees

  Hi there Creators Today I'm doing one cut with my Designer Paper and creating 2 different cards - gotta love it when you can get 2 for...