Hi there Creators,
I've been waiting ages, but finally this stamp set has arrived and it's every bit as cute as I expected it to be! So of course I had to play with it.......
First up I stamped all the images using Black Stazon (they come in strips of 3 to match the dies) and cut them out with the big joined together die. Then got to work creating cards with them, I ended up with 5 cards in the end, Oh and I've just realised I forgot to take photos of the insides, bother!
This first one didn't get anything on the inside, I stamped the tag up, then debated what I could do to lessen the impact of the white card, and came up with the idea of inking the little label then stamping it a few times without reinking, and repeating till the card was covered sufficiently. I'm quite pleased with the effect I got!
This second card is such a fun kid card, you might recognise it from my previous post on Global Design Project #264. I've tied the ribbon at the end, then threaded on each tag, and tied it in between the tags, added some dots using my sponge dauber, and I didn't realise the little 'bitty' stamp was actually confetti until I stamped it (I thought it was just splotches) lol
I don't make many wedding cards, so this was kind of cool to make a nice simple wedding card I've embossed the background card with one of the Meadow Moments embossing folders, then added a bit of gold twine to the tag and coloured in the rings. Inside this one I used the Congratulations tag that I'd stamped in the black stazon, and die cut out.
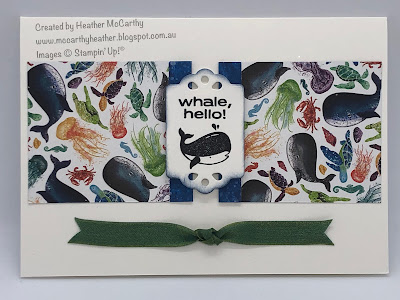
This next one was actually the first one I made as I think the whale is so cute!, and it ties in so well with the Whale of a Time Designer Series Paper, I've taken a piece of 3x6" DSP, cut it in 1/2, folded over a cm on each and popped it down under the tag then added a spot of ribbon under it.
So if you have this set, or other tag punches/dies, give some of these cards a try, let me know how you go!
Hopefully this has inspired you to create.
God Bless love
Heather xox


.JPG)
.JPG)
No comments:
Post a Comment