Showing posts with label Heart punch pack. Show all posts

Cards for February 2023 Classes

Hi there Creators,

Now we have the new Mini and Sale-a-Bration Catalogues out, of course I've been inspired to use new stuff....lol

Classes are Wed 1st, at 10.30am and Thursday 2nd at 7pm in Laanecoorie then Saturday 4th 10.30am in Maryborough.  Class Cost $20 for the 4 cards. Don't forget to book your place.

I will admit I had a struggle to know what to use (there's just so much and so little time!)

Anyway, the Owls called to me (hoo? 🤣)  How cute is this little guy?  you can get the Adorable Owls stamp set for free when you purchase $90 of goodies (in fact that's the only way to get it, as it's one of the Sale-a-Bration offerings)  I've teamed it up with the Heart punch pack, and the Stampin' Blends (alcohol markers), and discovered that my Rustic Metallic bling slipped (oops)

Adorable Owls, Stampin' Up!

The next card I made is this one (which I think is really lovely in "real life" just hard to photograph well)  This also uses a Sale-a-Bration set: Beautifully Happy, and I will admit we're not using it to the full extent of it's abilities, but I really love the contrast you get of watercolour pencils on black cardstock.  to get this set as it's quite extensive, you'll need to purchase $180 of goodies, then pick it for free.  I've also used some of the gorgeous Dry Burshed Metallic Cardstock oooo shiny....

Beautifully Happy, Stampin' Up!

Card #3 is this one using the beautiful Fancy Flora Designer Paper, I've teamed it up with the Two Tone Flora stamp set and the Something Fancy stamp set for the saying (which conveniently fits onto the larger Dragonfly punch😉) and added a few of the Iridescent Pastel Gems (umm bling..)

Fancy Flora DSP, Stampin' Up!

And on to the last card using the By the Bay designer paper - Oh wow (have I ever mentioned I love Gold?🤣)  I think this might be my favourite card, I've teamed up the designer paper with the Brushed Metallic Cardstock, the Balmy Blue & White Variegated Ribbon, and stamps from Charming Sentiments.

By the Bay DSP, Stampin' Up!

I hope if you can't make it to class these inspire you to create in your own space.  

And if you're placing an order do use this host code to be entered into the draw for the free host benefits: D4KMXY6C

God Bless love

Heather xox 

Cascade Card (Something Saturday)

 Hi there Creators,

Well today I'm showing how to make a really simple cascade card, once you've got the dimensions worked out you can make it in any size.

I couldn't remember the name of this to begin with and waterfall card, accordion card both came to mind, but after a spot of googling, it's actually called a Cascade card!

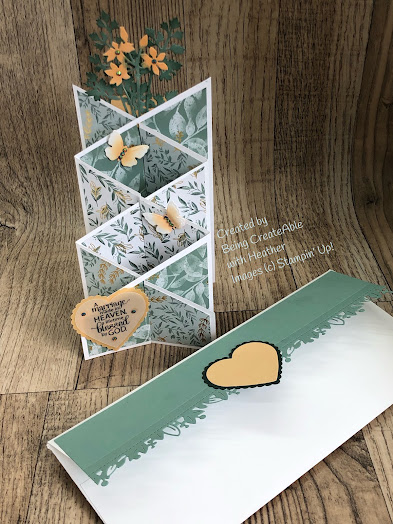
Here is the finished article (which will be off to my friends who are getting married this afternoon, so they shouldn't be able to see this post!)

Cascade Card 

Cascade Card
As you can see I ended up having to create an envelope too for the card, as it was just too big for a standard envelope (plus this dresses the outside up nicely!)😉  How gorgeous is this Edens Garden Paper? and the meadow dies I think go nicely with it.  I couldn't resist using some of my favourite Garden Gems too (sad to think at the end of the year the Eden's garden paper and gems will retire 😢)  So if you want some get them now!!
Cascade Card
See this link for the products I used in this card:  What Heather Used

Whatever size card stock you choose, here's how you do it.....

score it into 3 equal pieces so it concertina's up, then you'll determine how high you want the first tier of your card to be, say you want it to start the slope at 1", you mark a 1" on each side (see the photo) then you cut the diagonal between the 2 marks.


Cascade Card
Now you should have 2 equal (hopefully) pieces 😃  Line these up on top of each other, make sure the bases are together, even if the top isn't. Then work out the middle (both ways) of each individual section, then put a pin mark in so it goes through both pieces of card.  You'll then want to cut lines up and down, (opposite for each piece of card) see the picture below:

Cascade Card

these should then slide into each other to create your card :) Like so....

Cascade Card

It's really not complicated!  have a go, I'd love to see what you make.

I hope this inspires you to have a go.

God Bless love

Heather xox


True Love Designer Series Paper

 Hi there Creators

Well after having played with a bit of the True Love Designer Series Paper, (DSP) I just couldn't resist continuing on with it, so here is my next lot of cards that I've made up with it.  I got a bit inspired when I saw what others had done with it and adding hearts into the equation!  Having recently treated myself to the Heart Punch Pack, which consists of 2 heart punches, that fit together nicely.

Anyway onto the cards......

The first card I made I just punched the straight heart out from a piece of card, lined it up on the DSP and drew round the cut out heart, then I coloured in where it needed it, attached it together, and if you're a regular reader of my blog, you might remember that I stamped up the Many Messages stamp and cut out all the messages with the matching die, so I had 18 sayings to pick from (have to admit I'm loving this way of adding my sayings!)  check out the Many Messages Bundle!

True Love Designer Series Paper, Many Messages, Stampin' Up!


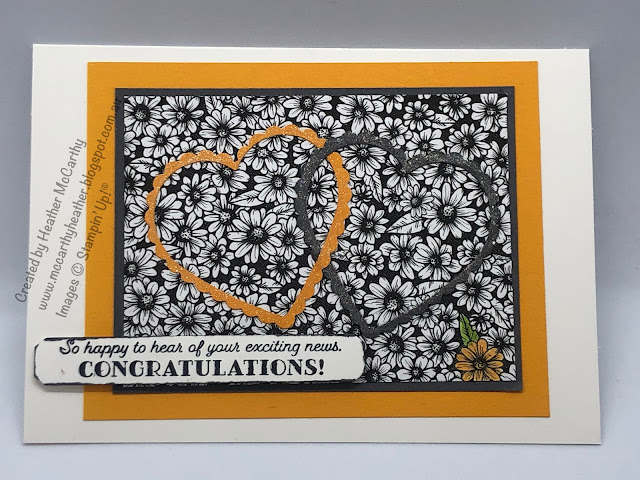
This next card, I have punched out the straight heart first then punched the scalloped heart, as you can see where to position your scallop heart this way round, I've added Wink of Stella over both hearts. And another one of the sayings......

True Love Designer Series Paper, Many Messages, Stampin' Up!

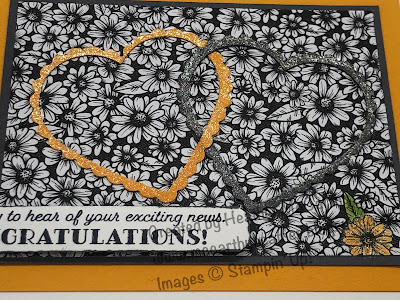
You can see the Wink of Stella better on this photo:

True Love Designer Series Paper, Many Messages, Stampin' Up!

The next card I made was this one, extremely simple, but quite effective!, take a piece of the DSP, punch the straight heart out of the middle, then punch the scallop heart out too, pop the rectangular piece of DSP down on the card add a line of the Black organdy glittered ribbon. Daub round the edge of the heart, I've also used my new blending brushes, and add the heart on dimensionals to your card. Did you guess I used another one of the sayings from Many Messages?

True Love Designer Series Paper, Many Messages, Stampin' Up!

And the last card, I've coloured in the flowers with my Stampin' Write Markers (I've used the 2020-2022 In Colours) Again I've cut the straight heart out first, then the scalloped heart, and utilized both, the straight heart is painted over with Wink of Stella (it's a lot more glittery than my photo gives it credit for!)  You know what I still have a heap of the sayings left over on my desk from the Many Messages!

True Love Designer Series Paper, Many Messages, Stampin' Up!

There is the potential to make so many cards out of this fabulous pack of DSP (and it's only $20! pretty good value!) I've used a small section of each pattern in the cards I've made so far.

Well I hope these inspire you to create in your space!

God Bless love

Heather xox

Something Saturday - Shepherds Care meets Snowy Delights Masks

Hi there Creators,  Today I thought I'd play around with a couple of my latest goodies, Shepherds Care Stamp set and Snowy Delights Mas...