Showing posts with label Wreath builder dies. Show all posts

Different Shaped cards

 Hi there Creators,

well I set my team a challenge to come up with "different shaped cards" as in not the usual rectangle or square shape, and I thought maybe I should lead by example lol.

I was trying to work out what to teach the kids at school for Christmas this year, and then got a fabulous swap in the mail of a tripod tree, which I used to make many years ago, - perfect!

So here is the first card/tripod tree, which I'll be teaching the kids at Tarnagulla Primary School:

tripod Christmas tree, Stampin' up
it has velcro at the back to stick it together so that it can fold down, and you can write on the inside.
tripod Christmas tree, Stampin' up

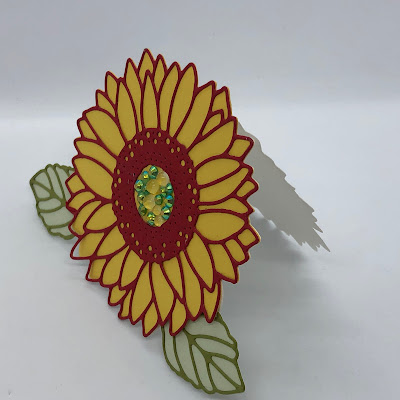
Next I turned to my dies, and thought it would be cool to create a couple of little cards that use the dies as the shape, so first up is this using the Sunflower dies which are today have a 10% discount - yay!

Sunflower dies, Stampin' Up!
As you can see I've cut the large die out from folded card, but left a part at the fold that is uncut, then I've added the intricate cut flower on top.  It does make quite a small card, so it might be more suitable as a tag come card for a present.

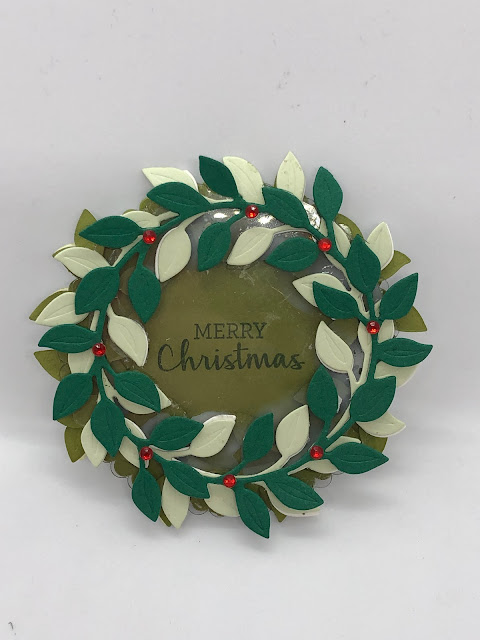
The next one is also quite small (actually the 2 cards are very similar in size), wanted to make a Christmas wreath card, and I will admit it was a bit on the fiddly side! I used the Wreath builder Dies, (also in the sale today), some window sheeting, red rhinestones, and the Merry Christmas was from the matching stamp set Arrange a Wreath. ( I think all of it is in the sale today!)

Arrange a Wreath, Stampin' Up!

was hard to get a decent photo of it standing up

Arrange a Wreath, Stampin' Up!
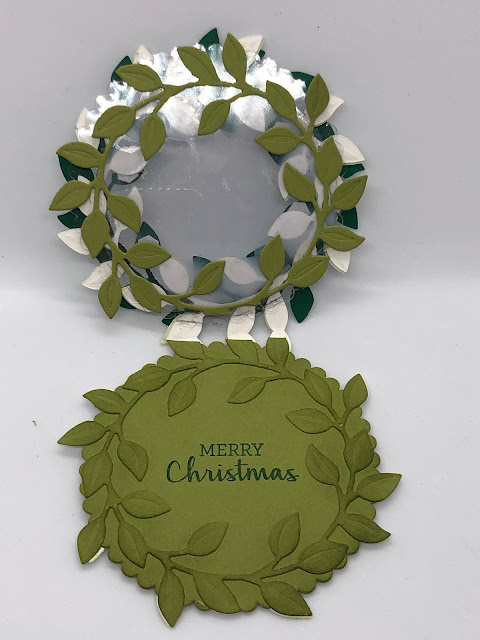
I really love the way the inside turned out! (I do like that the die, also embosses the card a little) again you'll see the join at the top, where I positioned the die so it wouldn't cut all the way through
Arrange a Wreath, Stampin' Up!


Well I hope this inspires you to look at your dies in a new way!  if you're on Facebook check out my Being CreateAble with Heather Facebook Page, I do a Something Saturday live every Saturday at 10am, think I might be showing how to make the sunflower card this Saturday!

God Bless love

Heather xox


Arrange a Wreath Bundle

Hi there Creators,
I'm making myself a bit of a challenge to make at least 3 cards with each set of stamps/dies that I've bought, so here we are onto day 4 (not sure how long I'll be able to keep it up, but so far so good lol)  I figured while I'm making them I'm going to share them with you all (hope you enjoy it and it inspires you).

Hence, I've moved onto the Arrange a Wreath Bundle today which consists of the Arrange a Wreath Stamp set and the Wreath Builder Dies.   If you end up with a bundle you save 10% on the cost of buying them (bonus) .  Anyway you're not here to hear me waffle!, on to the cards.....

Soooo...... the reason I bought this set was for the wreath's, and Christmas!  however it does come with this cute "Love" heart, and flowers....and bow!
Arrange a Wreath Bundle
For this card I've teamed it up with the Artistry Blooms Patterned Paper, which as I mentioned in the last post, I really love the grading in the paper!, also used the lovely Rainbow Glimmer Paper to create the bow (oh and the Artistry Blooms Sequins for the flower centres, really like the fact they don't have a hole in the middle of them!

Then of course I had to make Christmas cards, it's never too early to make Christmas cards lol!

Arrange a Wreath Bundle
For this card I didn't have any patterned paper that I felt would work behind the flowers, so I made some.  I've just taken my dauber (the paper and ink are both Old Olive) if you ink up your dauber and "puff" it round your card, then using the edge of the dauber, sort of scrape on extra lines, it gives quite a cool effect!  I've also taken one of the cut out pieces and used the piece it came out of to create a mask for the background of the card.  I did discover that the teeny tiny circle die that's in the set, is there to create a circle to go behind the centre of the flower! (who knew! lol)  Oh and I've used the absolutely stunning Brass Foil Sheets, and the Champagne Rhinestone Basic Jewels.

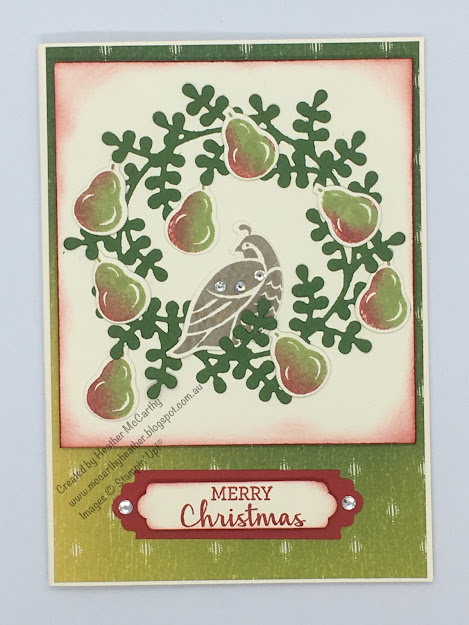
And for the final card I couldn't resist........... And a Partridge in a Pear Tree (did you sing it?)
Arrange a Wreath Bundle
So this card I've used the Artistry Blooms Patterned Paper again underneath, some Diamantes, which I had intended to use for the birds eye, but that didn't look right! (got to improvise lol)  Oh and the Lovely Labels Pick a Bunch punch for the saying, I've punched both ends, I will say with this, that if you're using a short piece of paper, make sure you check the back of the punch to ensure it's in the right place!
The pears are inked up with the Pear Pizzazz, I've used my real red dauber to add a touch of red to one side, then stamped (thankfully there's 2 pears per stamp 😊)

Did you have a favourite? let me know!
I hope this inspires you to get creating.
God Bless love
Heather xox

Something Saturday - 2 from 1 Stripes & Trees

  Hi there Creators Today I'm doing one cut with my Designer Paper and creating 2 different cards - gotta love it when you can get 2 for...