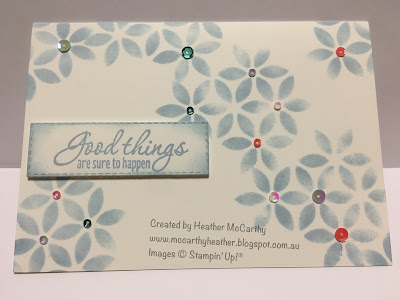
Showing posts with label rectangle stitched edge framelits. Show all posts

Something Saturday - Faux Tiling

 Hi There Creators,

Well somewhere I saw someone had done Faux Tiling, and it kind of fascinated me, so I've been experimenting......

to begin with I wasn't impressed with the results and eventually I realised that it's because I like to see the grouting looking white, or at least, contrasting with the "tiles", so I discovered that if I added extra colour to the background it worked for me 😃  enter, Watercolour shapes stamp set, perfect to give a smidgen of colour!

Here are the 2 cards I completed before the video to show off the technique, I used the large rectangle watercolour shape for these. The top card uses Edens Garden, Jar of Flowers, and Charming Sentiments Stamp sets and the bottom card uses the Charming Sentiments, and Painted Poppies Stamp sets (along with the Watercolour Shapes)

Stampin' Up!, Faux Tile Technique

Then I also made this one, which I'm not so keen on, I used the circle watercolour shape for the background on this one, and moved onto Good Feelings Stamp set, and the Stitched Rectangle dies

 Stampin' Up!, Faux Tile Technique

I had made up the tiled part of this card before the video, I'm not sure if you can tell in the photo but I made the tiles shiny on this one (because although I know you can get matte tiles, it just seems wrong to me 🤣 I need the shine!)

Stampin' Up!, Faux Tile Technique

In the video I show making the tiled part of this card by scoring it at intervals (I went with 1.5 and 2.5 cm gaps, and showed how to make it shiny, very simply, just add some of the fine tip glue pen, and let it dry, it dries slightly raised and shiny.  I added some extra scored lines into the background to add a bit of interest to the card but not take away from the focal point.

Stampin' Up!, Faux Tile Technique

Stampin' Up!, Faux Tile Technique

It's funny I tried and tried to get this look which kind of reminds me of that blue china you can get, (threw out a few attempts) then eventually gave up, and lo and behold I happen to pick out Starry Sky in the video...... 

Word of warning when you are stamping, choose a stamp that has a lot of surface area, make sure the ink pad is not really wet, as otherwise it will fill in the "grouting" areas, and don't stamp heavily or for too long.  

If you missed the video here it is.....


 I hope this inspires you to have a go too.

God Bless love

Heather xox

Something Saturday - Night Sky Pastels

 Hi there Creators,

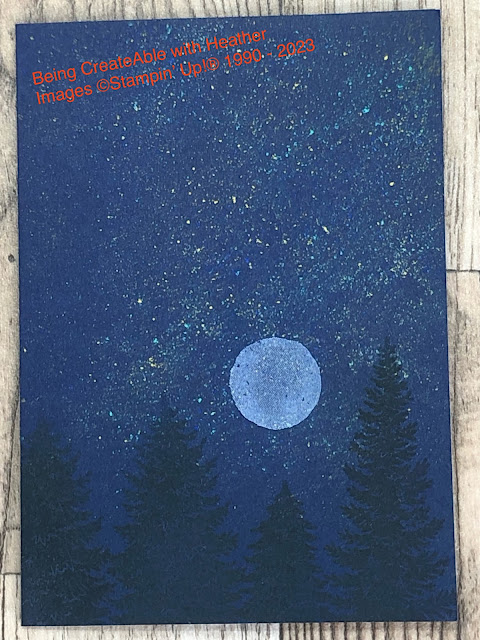
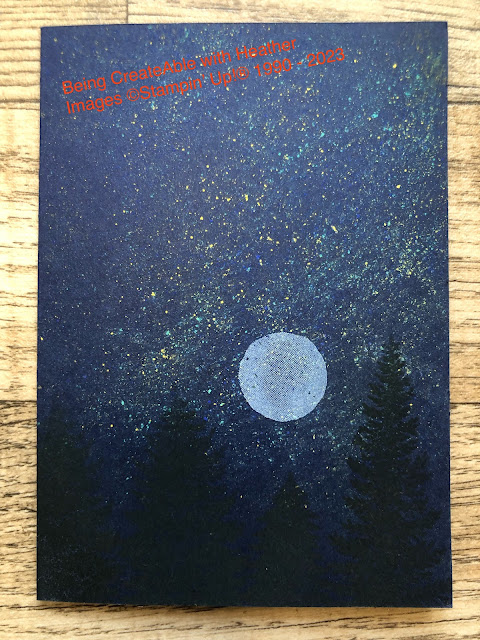
Continuing on our Pastels journey, I have "night sky" pastels to show you this week, I was amazed at how well the pastels show up on dark cardstock.

Here are the cards I made up....

Night Sky Pastels, Stampin' Up!, Home & Garden Bundle

this first one I made up with a black background, and really wanted it to be looking out of a window (this is when I wish I had Window Flower Box dies)  however I used the exceedingly useful Stitched Rectangle dies instead😃, as I wanted it to look like the inside of a shed I've "hung" a few tools off the window sill (courtesy of the Home & Garden bundle) and used the Brick & Mortar 3D embossing folder for the wall.


Night Sky Pastels, Stampin' Up!, Evergreen Elegance
then this is the card I made up in the video (couple of photos as I couldn't make up my mind which was better 🤣), Here is the link to the products I used in this one: What Heather Used

Night Sky Pastels, Stampin' Up!, Evergreen Elegance
So, down to the nitty gritty, how do you do this?

Take a dark coloured cardstock (I used Night of Navy in the video), then lightly grate pastels onto it (I used a serrated knife to scrape mine), which creates a dust of colour on your card, I used Daffodil Delight, Coastal Cabana and a bit of Night of Navy (not sure that one showed up on this, but it works on the black).

Take a piece of baking paper, and carefully cover the dust, press it down well into your card (I used my bone scorer) try not to move it as you do this or you end up with it smudging.

Take some hairspray, and spray this over the card (this will set the pastel in place, otherwise it will wipe off) let it dry then decorate your card however you wish.

Check out the video here:


 I hope this inspires you to create!

God Bless love

Heather xox


ClassCards@Home May 2020

Hi there Creators,
If you order my ClassCards@Home kit this month you'll be receiving these cards to create at home, for each of these, you'll need to use your own Stamps, Inks and Glues but I'll be providing all the papers pre-cut along with instructions and videos.  Click on the link below by Friday 1st May to order and pay for your kit, I will get the kits all organised over that weekend and mail them out on Monday 4th.

With Mothers day on the horizon, I thought this might be suitable with a appropriate saying, you'll be choosing a colour and saying that you have at home.  This card uses the beautiful Tasteful background dies, and the really pretty Woven Threads Sequin Assortment.  Oh and also the Stitched rectangle dies.  I've called this card "Tasteful Things"

Card #2 could also be used as a Mothers Day card if you wanted to, this one uses the Tropical thinlits, and I did discover that the Label Me Fancy Punch does sit nicely on top of the Timeless Label Punch - Yea!  I've called this one "Timeless Tropical"
Then I thought we might do a couple of "blokey" cards, although this one would equally suit a female.  I've used the Smooth Sailing dies, and made the frame using the Stitched Rectangle Dies, also used the Subtle 3D embossing folder, you'll need to have a blue to daub on for the ocean.  
This one is called "Hopeful Fish"
And this last card uses the Garage Gears Dies, you'll need either black or dark grey ink for this it's a little difficult to get a good photo when silver foil card-stock is used!
Last but not least this is called "Geared Birthday"


 Bear in mind that all these cards use your own stamps and inks to put in the sayings.

Here is the secure link for payment for the kit of all 4 cards: May ClassCards@Home Kit
If you'd like extra's of some cards, or would prefer to have individual kits, please get in touch with me.

I hope you can join us to do this ClassCards@Home class, if not I hope this post inspires you to create at home!
God Bless love
Heather xox


Tag Card for July

Hello all you lovely Creators!
Sorry I haven't been around much, this is what holidays do lol. 
Coming up this Saturday is my Christmas in July Mega Class, I have 10 coming to it, and it should be so much fun I'm really looking forward to it, we're making 20 Christmas cards. I'll show you a little snippet...

 Anyway that's not what I'm here for today, I'm here to show you how to put together your "tag" card, the tag is what I send you/ give you on your bag when you receive your order, then I pop in some other bits to make it into a card.
So..... here is the tag you'll be receiving:
And here is the end card
The tag is cut out of the card to begin with, and the Stitched Rectangle Dies are fabulous in that they give you the stitched look on the outside and the inside (gotta love that) and there's heaps of them in the pack - well 13 seems like heaps! lol
Anyway moving on... I have then stuck in another sheet of white behind the gap (you could use a different colour if you wanted to, I'm providing white)  I've used the Wish for it all stamp set to create the tag (so pretty) with some of the Whisper White Polka Dot tulle ribbon in the corner to hold it onto your bag (makes a nice accent on the card too) And of course the 2 daisy punches, The larger "Daisy Punch" and the smaller "Medium Daisy Punch" these will be random pink colours, layer them up.  Then in the middle I've used one of the gorgeous Gold Faceted Gems or you might end up with a Silver Faceted gem!  then the whole lot is up on dimensionals which gives it a nice shadow effect.
And that's how you put together your tag card for July (of course if you haven't ordered from me this month you'll miss out on one of these!) but the good news is that we're only 1/2 way through the month, so you've still got time 😊
Ok well that's it from me for now, I hope this inspires you to create (and possibly order lol)
God Bless love
Heather xox

Cards for April

Hi there Creators,
Well almost at the end of March, and so here are the cards I'll be teaching in April.  The class dates are Wednesday 3rd 10.30am in Laanecoorie, Thursday 4th at 10.30am and 7.30pm in Laanecoorie, then Saturday 6th at 10am in Maryborough.  Do let me know if you plan to come to one of the classes (and haven't done so already).
Best start showing you the cards!  This first one uses the stunning Country Floral Dynamic Textured Impressions Embossing Folder, which is currently a Sale-a-Bration item till the end of March, so spend $90 and you can choose it for FREE! (you can't purchase this one at the moment).  I've also used the Label Me Pretty Stamp set with Matching Pretty Label Punch, and the lovely chunky ribbon is Gray Granite Textured Weave Ribbon.
 
Card #2, I thought we hadn't used the Stampin' Blends for a while (don't forget if you're using the Blends they are alcohol markers so you need to use memento ink for your base lines so it doesn't smudge with the pens.  I really love the way this card came out, I've used the Serene Garden Stamp set and Itty Bitty Greetings Stamp set.
Moving onto the next card, I think I had a couple of triangle off-cuts lying on my desk, so then of course I played with them, and Oh light bulb!  a pinwheel card lol, I've used the Tropical Escape Designer Series Paper, such lovely colours in it, and paired it up with the Sunshine Sayings Stamp set and some Gingham Gala Adhesive Backed sequins (they're so pretty).
And the last card, I was asked for more heat embossing, so I thought it would be fun to have 2 embossed colours together - gold and silver (hope it works in class lol)  I've used the Sheet Music Stamp set with the Better together stamp set.  thought this saying was somewhat appropriate to the background 😆
As the silver/gold embossing is not so obvious in the above photo thought I'd give a close up too, this Sheet Music Stamp is really one of my favourite stamps!
oh and as you can see from this photo I've used the rectangle stitched framelit dies too (such a useful set of dies)
Well that's it!  I hope if you can't make it to class these cards inspire you to create in your own space.
God Bless love
Heather xox
Oh and if you're ordering between now and the end of the month, make sure you use this hostess code to go in the draw for the free hostess benefits:  2H4RBNQQ


New 2nd wave Sale-a-Bration goodies and more

Hi There Creators,
thought I'd drop in and show you a few things I've been creating recently.

After the class I had a few horse cards unfinished so one of them got turned into this, using some of  of the other stamps in the Let It Ride stamp set, to do this I've ended up cutting out more stencils, 2 for the single horse and one for the 2 background horses, so that I could stamp the trees into the background  I think it's kind of cool having the 2 galloping away in the foreground, what do you think?
 There is a second wave of Sale-a-bration products available from tomorrow 15th Feb, and this card that I have made up as my "tag" card for the month uses some of them.  I've used the Country Floral Dynamic Textured Impressions embossing folder, which is so pretty!  I've used Rich Razzleberry, Pumpkin Pie and Old Olive daubers to lightly daub over the raised pattern. For those of you receiving it I've left it white for you to add your own colour to it.  The tag itself is made using the beautiful stamps in the Painted Season Bundle, and also the really useful Rectangle Stitched Framelit dies (have you noticed them? they're on page 28 in the catalogue) and I've just realised that they bundle together with the Amazing Life Stamp set!
always good when things bundle and you get 10% off!
I also thought I'd show you the "one sheet wonder" type sheet I created to cut the stamped tags from, as it really lends itself to a one sheet wonder this stamp set!  I stamped up the whole A4 sheet (and I have some left over, so I'm planning to see how many cards I can make out of it!)  aren't the flowers so pretty though?
Ok moving on....  actually lets not move on too much as I also made up another card with the same stamp set, slightly ironic as the main reason I went ahead and got the set is for the Pine cone and I haven't used it yet!  I wasn't sure I'd like the flowers so much, but I really do! this card I took the flowers and stamped them on the card, then stamped them a couple more times on scrap card, and cut out the bits to create a Paper Tole type image, layered up with dimensionals.  The saying are from the beautiful Dear Doily Stamp set (more about that too in a mo!)
thought I'd show you a close up of the flowers (because I can lol)
Then we'll flow onto the Dear Doily stamp set.....which conveniently comes as a bundle too.  And Oh My Goodness!  it is awesome! however I don't have anything with the dies to show you just yet, as all I've done is cut them out in white card and ooh and Aah over them lol, but I did make up this simple card with the stamps, as it's so delicate I was looking around for a ribbon to go with it and thought this one was perfect - it's the Whisper White 5/8" flax ribbon, although it's chunky it has the right amount of delicacy for this card, I think it's the slightly see through nature of the ribbon.  Colours I've used with this are Balmy Blue, Mint Macaron and Petal Pink, which has a slightly coral/orange'y hue to it.
Well I think that's it for now, do let me know if you have any questions, or you're interested in placing an order but unsure how.  Don't forget for every $90 you order till the end of March you get to pick a free Sale-a-Bration product YAY!
Thanks for reading this, and if you're not on my e-mailing list and would like to be, do let me know!
Happy Creating
God Bless love
Heather xox

Something Saturday - 2 from 1 Stripes & Trees

  Hi there Creators Today I'm doing one cut with my Designer Paper and creating 2 different cards - gotta love it when you can get 2 for...