Showing posts with label Jar punch. Show all posts

Cards for October class

 Hi there Creators,

these are the cards we'll be making in my classes next month, the class dates are: Wednesday 5th 10.30am in Laanecoorie, Thursday 6th 7pm in Laanecoorie and Saturday 8th 10.30am in Maryborough.

I thought we'd do 2 Christmas cards again this month, as we work our way up to 3 in November and 4 in December 🤣

This first card uses Quatrefoil embossing folder, then the Handmade wishes bundle (stamps and punch)  I love this punch I think it's so versatile!  I did do a blog/video on it back in July, you can see it here if you want to find out just how versatile it is: https://mccarthyheather.blogspot.com/2022/07/something-saturday-handmade-tag-punch.html,  for some reason this embossing folder to me looks "Christmassy"  To see what I used click here: What Heather Used

Stampin' Up!, Handmade wishes, Quatrefoil Embossing folder,
Last time someone mentioned that we hadn't done much by way of embossing folders recently, so this month we're rectifying that 😃  This next card uses Charming Landscapes Embossing Folder (there's 2 in the pack, the other one has mountains, which also might work with this, umm might have to play around with that one too!  Anyway I've also used the Wisteria Wishes Stamp set.  To check out what I used click here: What Heather Used.

Stampin' Up!, Wisteria Wishes, Charming Landscapes EF
Next Up, I was thinking I haven't used my Jar punch for a while, and I thought it would be cute to use it as a little fish bowl, then I had the saying stamped directly on the card, but it went a bit "skewiff" However there's always a way to fix these things 🤣  I quite like combining my "sea'y" stamp sets, so this combines Friends are like Seashells and A Fish & a Wish, and having not found a good use for the white pieces of Vellum Layering designs previously I'm quite happy with the strip of it down the side of this card.  You probably can't see this in the photo, but I've added some window sheeting on top of the jar to make it look more glass-like.  To see what I used click here: What Heather Used
Stampin' Up!, Friends are like seashells, A fish & a wish, Jar punch
Last but not least, I thought it would be nice to do a "fancy fold card" it is quite simple but it packs a bit of a wow (I hope)  I love this spiral or plaited look down the side.  Check out what I used here: 
Splendid Day, bough punch, double oval punch, Stampin' Up!

Do let me know if you can join me at any of the classes (Laanecoorie one's do have a capacity limit, so get in quick!).  If you can't make it I hope these inspire you to create in your space.

God Bless love 

Heather xox

Do more with your Punches!

 Hi there Creators

Well I said the title out loud and my youngest son showed me a few creative punches, like this Mum, umm not quite the sort of punches I was thinking of lol!😀

Of course I'm talking about "papercraft punches", how to get the size to be bigger or smaller, handy to know when you have a saying that's longer than your punch, or when a small saying looks a little lost in the middle of your punch!

So that's what my "Something Saturday" video was on this week, you can find it over on my Youtube "Being CreateAble with Heather" Channel or on my Facebook "Being CreateAble with Heather" Page

However I have taken a few photos for you, and I'll try and explain.... (click on the links to view the punches).

This first one shows the Delightful Tag Topper Punch, which has 3 widths, 2", 1 1/2", and 1", I love this for making my tags to go on bags or presies, you can do a larger one in colour, and pop a smaller one over top to create a nice layered effect down the side of the tag.  Plus you can punch both ends of the card and tie it round something or create napkin rings..... (your imagination is your limit)

The next one I show in the video is this one, the Treasured Tags Pick a Punch, so called I'm guessing, because you can pick either side of it and create 6 different looks!  Again this one has 3 specific widths, 1", 3/4" and 1/2".

Then we get creative, I can't remember the order I did these ones in, but if you measure the width of your punch (either direction) you can put one end in and punch it then put the other end in and punch that, so you can choose however long you want your tag to be.
 

I've used the Tailored Tag punch here, you can create great arrows with it!

then this one Elegant Tag Punch - this is so pretty on the corner of a card, or double ended
My favourite punch is this Everyday Label punch, this one is easy to enlarge in either direction!
 

 And the last one I use is the Jar punch, again it's an easy one to enlarge up or sideways! you can have tall jars or wide jars, again the limit is your imagination

View the Video on YouTube here:


I hope this inspires you to do more with your punches!

God Bless love

Heather xox


How to curve photopolymer stamps in a different direction

 Hi there Creators

I've been meaning to make a video to show how I do this for a while, and finally got round to it today! 

In the video I show 2 methods of positioning your long photopolymer stamps to curve them in the direction you want them to go, and as I don't make up the cards in it, I thought I should do a blog post to go with it and show the completed cards!

Here is the video - enjoy! (and don't forget to read the rest of the blog!)


First up I showed how to curve the stamp to a cut out piece, by turning the piece over, laying the clear block over the piece then positioning the stamp where you want it on the block, when you stamp you turn the card stock back the right way.

Here is the card I made using this technique:

curving photopolymer stamps, Stampin' Up!

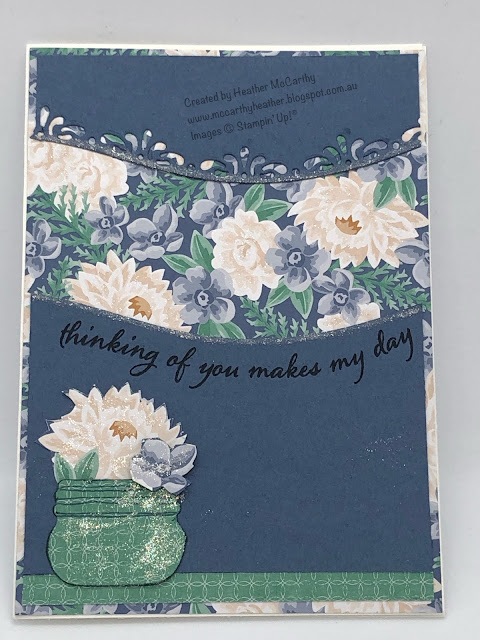
See how the saying mirrors the edge cut with the Curvy die?  I've used some of the pretty Flowers for Every Season Designer Series Paper behind, and also for the jar, cutting out a couple of flowers from the paper to go in the jar (cut with the Jar punch) I had to make the jar a lot smaller, by trimming it down with the bottom of the punch.

I've also used some wink of stella to bling it up a bit along the line of the dies and also on some of the flowers.

curving photopolymer stamps, Stampin' Up!

The other card I used the Quite Curvy stamp set, and showed how you can use the inside cover piece for the stamps to hold your stamp in place till you have it on your block,

Here is the card I made with this method, the saying would normally curve in the opposite direction (the same way as the leaves)  how cute are the little birds?  I'm not normally big on birds but, these little ones I really like!  it's a nice simple card, coloured in with the Stampin' Blends (alcohol markers)

curving photopolymer stamps, Quite curvy stamp set, Stampin' Up!

I hope you can start to curve your photopolymer stamps a little easier now!, and this inspires you to create.

God Bless love

Heather xox


Forever Greenery DSP

Hi there Creators
As you would know if you keep up with my blog, my pre-order goodies arrived for the new Annual Catalogue the other day, I haven't had much of a chance to play with them.  However as I was cutting up the gorgeous Forever Greenery Designer Series Paper into 3 x 4" rectangles, I figured I might as well make up some cards with them.  This is (currently) my favourite paper from the new upcoming catalogue, add a couple of the new In colours (Misty Moonlight and Just Jade, and one of the 2019-2021 In colours Pretty Peacock) so here we go.....

you can see I've paired up a couple of the cards with the new Jar punch and the saying  "Sending you a Paper Hug" from the new stamp set Comfort and Hope.  I love the way you can have the punched out jar full size or any other size (the little ones turn out so cute!)

Thought I'd also show you a card I made up with the "Comfort and Hope" stamp set, as it's quite a grungy stamp set.
You could easily make up a set of cards like this with any of your favourite patterned cardstocks, I used 3x4" pieces then layered them on top of plain card that blended well, then used pieces of other blending colours and ribbons to either mat under them or create interest

I hope this inspires you to find some pretty patterned papers and have a go too!
God Bless love
Heather xox

Something Saturday - 2 from 1 Stripes & Trees

  Hi there Creators Today I'm doing one cut with my Designer Paper and creating 2 different cards - gotta love it when you can get 2 for...