Create a Camera Shutter card

 Hi there Creators,

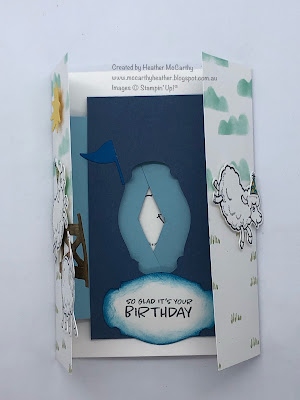
Well my Something Saturday this week is showing you how to create a Camera Shutter Card (I'm not sure if that's what it's called but that's what I'm calling it 😀), so here is the card.....

Camera Shutter Card, Stampin' Up!, Counting Sheep

Camera Shutter Card, Stampin' Up!, Counting Sheep

The photos above are the finished card from the video, I did add a little to this one.

Anyway the basic ingredients are:  

You will need 1 piece of A5 card for the card base, you'll need to "gate-fold" this, which means scoring at 5.25cm in on each edge.  It gives you the usual A6 size card but the opening is in the middle.

You'll also need 2 pieces of 7.4cm x 10.5cm, which need to be scored on one side in by 1cm

And one piece of 14.8cm x 7cm, scored in at the top and bottom by 1cm

You'll also need an appropriate punch ideally one that's fatter in the middle and tapers towards the ends slightly.

Also a pencil, rubber, ruler and glue  Oh and some images to stamp

I've used the really cute Sale-a-Bration Counting Sheep stamp set and Sheep Dies (you can only get each of these by purchasing $90 of other Stampin' Up! goodies - so worth it, and the bonus is that you end up with heaps of goodies all in one go lol)

I recommend decorating your outer card and single strip (the one measuring 14.8cm x 7cm) before you put your card together, if there's any other parts you want to decorate do them too!

I've taken a heap of photos of the stages, so I'm putting them below, but feel free to watch the video it should be clearer!

first up the pieces you'll need:

As I said earlier make sure you've stamped and decorated all the bits first before putting your card together.  The 2 middle pieces (10.5cm x 7.4cm) have one side scored at 1cm, make sure this is well folded (use the bone scorer)  the fold needs to be upwards on your card, put glue on it then flap the side part of your card down onto it, repeat for the other side (make sure the 2 sides line up)
next close your card up and mark (lightly with pencil) the middle of the card
open one side and mark the yellow (in my case) piece
repeat for the other side
now draw a line from each corner to the dot
now test to see if it will close properly with the flaps intertwined
Next take the 14.8cm x 7cm piece and mark where the punched shape should go, then punch it out, and attach 1 end only of this piece to your card.

After this you position what ever you want under the punched shape in place, then glue down the remaining flap.   Voila your card is done! 

I'm going to be teaching this to the kids at my youngest sons school, so I thought I'd show you a couple of other pictures I've taken too.....


Very simple all done with white cardstock and I've just drawn lines on with my Stampin' Write markers to give interest to the layers  I was thinking theirs would look cute with photos of themselves in the middle bit, and I'm sure they'll want to decorate them their own way.

Anyway I hope this inspires you to have a go and create your own Camera Shutter Cards!

God Bless love

Heather xox


6 quick and easy Christmas Cards

 Hi there, 

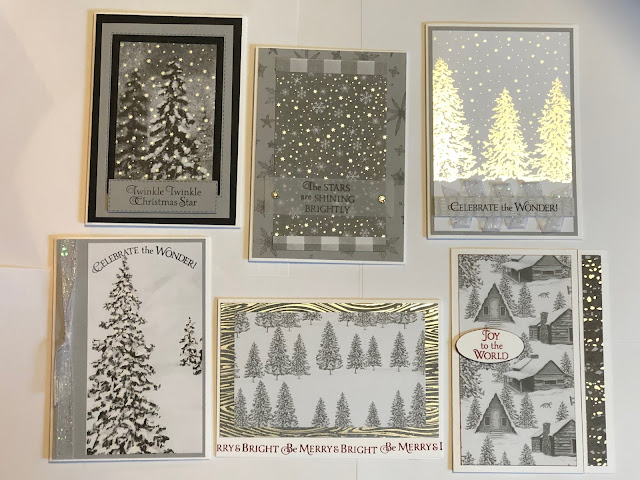
well my "Something Saturday" this week was these 6 Quick and Easy Christmas Cards using the elegant Peaceful Place Specialty Paper, the Stars are Shining Stamp set  and the fabulous White Glittered Organdy Ribbon and I promised in the video that I would pop the measurements up on my blog, so here goes.......

Peaceful Place specialty Paper, Being CreateAble with Heather, Stampin' Up!

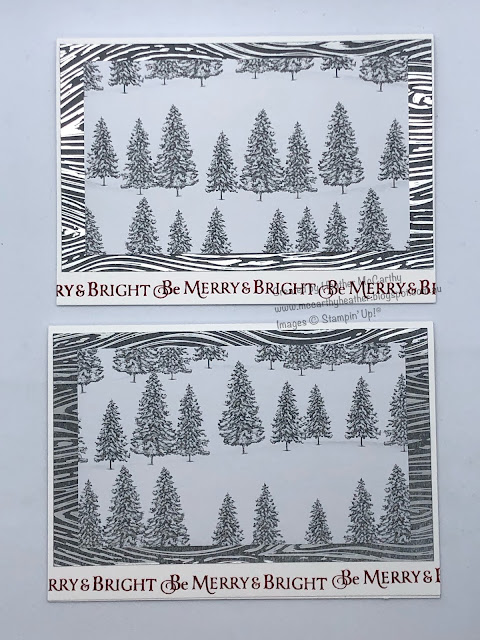
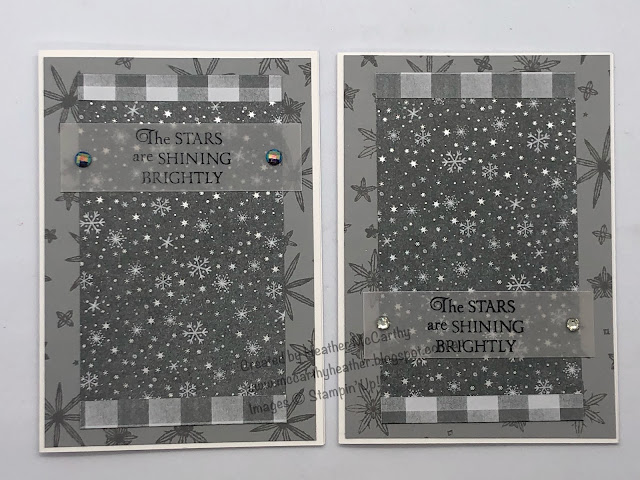
 Those are the 6 cards, however as I did repeat them all I've then taken photos of each with it's "pair", so I can give you the instructions for both if they ended up different.

Peaceful Place specialty Paper, Being CreateAble with Heather, Stampin' Up! 
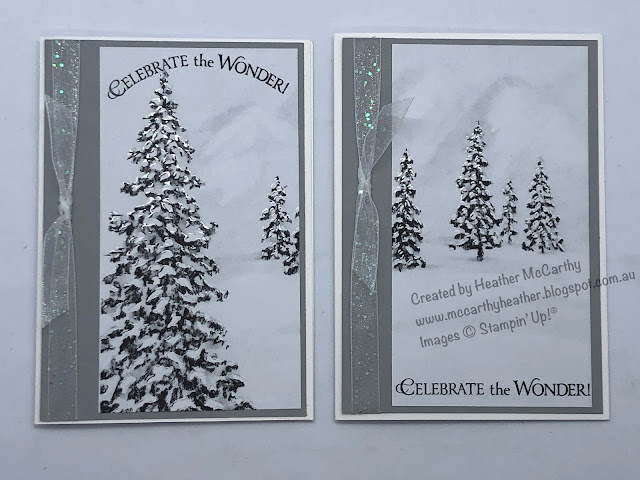
however this first card didn't end up much different!  This card I've cut the same paper and used both sides, the underneath piece is cut to 3.5" x 14.5cm (sorry about the combination of cm and inches!)
the top piece with the trees is 3" x 5" Then I've just stamped the saying across the bottom of the card.
Peaceful Place specialty Paper, Being CreateAble with Heather, Stampin' Up!

This next card has a base of Smoky Slate, cut to 14.5cm x 10cm, then the specialty paper is cut to 6" x 9.5cm  with 1/2 " cut off the long end bringing it down to 5.5", this is then turned over to add the saying to it.  On the card in the video I show adding the ribbon under the saying on the second card, just a case of adding a line of Tear & Tape Adhesive under the saying, and concertina'ing the ribbon back and forth, then trimming off when you've got enough.

Peaceful Place specialty Paper, Being CreateAble with Heather, Stampin' Up!

This card looks kind of dark in the photo, but there are a lot of silver stars, so it's not quite so dark!  The Smoky Slate card is cut to 10cm x 14.5cm, and the Specialty paper cut to 6" x 3", then 1cm folded over at each end, and stuck down.  I've stamped using smoky slate ink onto the background piece (stars from the same stamp set).  Then the Vellum piece is 2.5cm x 9cm, and stamped with Stazon Black. and as you need to use a couple of glue dots to hold it in place. you'll want a couple of blingy bits to cover the dots so they don't show through the vellum.

Peaceful Place specialty Paper, Being CreateAble with Heather, Stampin' Up!

This sheet was an interesting one to use as it has a pattern that is repeated 4 times on the 12x12" sheet, so I've cut it down to the 6x6" square then in 1/2 at 3", and trimmed it down to 5.5" (1/2 " off the end).  Again it's got the Smoky Slate under it 10cm x 14.5cm.  The ribbon is attached down the side of the smoky slate piece.  The great thing with the stamp set is that as it's photopolymer, you can curve the words!

Peaceful Place specialty Paper, Being CreateAble with Heather, Stampin' Up!

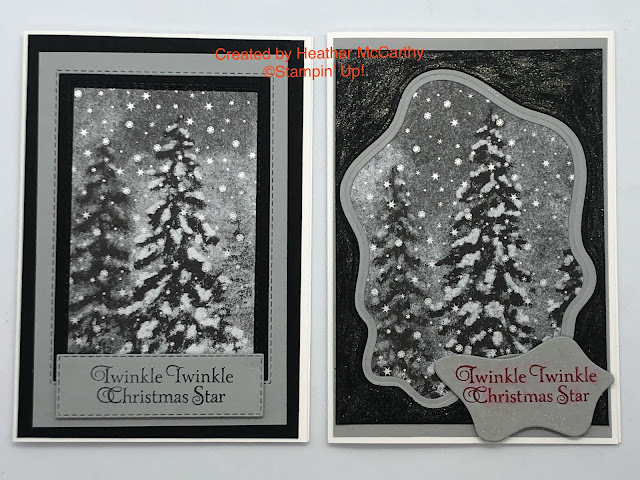
This one I originally made using the Diorama dies (one on the right), but I wasn't so keen on it and felt the Stitched Rectangle dies would give me more what I was looking for.  I do prefer it, what do you think?  This one didn't really have specific measurements for the specialty paper, however for the one on the left I cut black card to 10cm x 14.5cm and the smoky slate to 9cm x 13.5cm.

Peaceful Place specialty Paper, Being CreateAble with Heather, Stampin' Up!

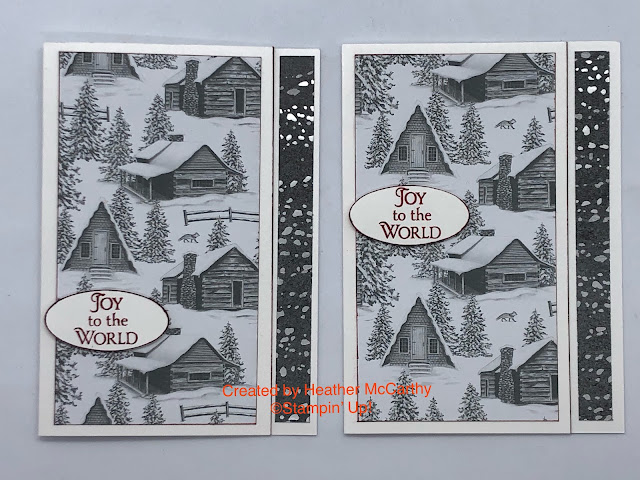
And the last ones!  So with this one I've cut the specialty paper to 3.5" x 6", then taken 1/2" off the bottom, then 1/2" off the side.  I've then taken 3/4" off one side of the base card, and attached the long strip of specialty paper on to the gap left in the card.  And the main block of specialty paper to the front of the card.  I did discover that Joy to the World fits nicely into the Double Oval Punch!

Did you know that at the moment we have Sale-a-Bration?  for every $90 of products you purchase you get to pick a FREE Sale-a-Bration product - yay!   So potentially if you liked these cards you could order the Peaceful Place Paper ($26), Glittered Organdy ribbon ($14.75) and the Stars are Shining Bundle (punch and stamp set for $53) which totals $93.75!  you'd qualify for a FREE extra product from the sale-a-bration list, check out what you could choose here: Sale-a-Bration products.

If you are placing an order and it's UNDER $250 and you'd like to be in the draw for the host freebees, use this host code:  44QKXGUZ. If your order is over $250 don't use the host code as you'll qualify for your own free goodies.  

Alternatively why not think about joining Stampin' Up! and my team The CreateAbles?  For $169 you can choose $235 of goodies plus if you join during Sale-a-Bration you get to pick an extra Bundle from a choice of 12 bundles in the new mini catalogue!  Ask me for more info if you're interested.

I hope these cards inspire you to create.

God Bless love

Heather xox


Creating a Faux Stained Glass Window

 Hi there!

In my latest YouTube/Facebook Video I showed how to create a faux stained glass window on the top of one of the new Stampin' Up! Kraft Gift Boxes.  These boxes are fabulous as they actually fit cards and envelopes in them!  Yay!, as I quite like to give some of my cards as presies from time to time I'm really stoked that these are the right size.

They have a little window at the top of them, which is where the stained glass bit comes into play....

Faux Stained Glass, Stampin' Up!, Angels of Peace

So how do you do this?

Before you put the box together, using Black Stazon Ink stamp the image onto one side of the window, then use a black permanent marker pen to draw on the rest of the stained glass bits.

Turn the box over, and on the opposite side colour in the parts with Stampin Blends (alcohol markers)  NB do not colour in the side that has the stazon on it!  if you do the stazon will run, and you'll end up with muddy colour.

Pop your box together and viola one stained glass window effect.

Faux Stained Glass, Stampin' Up!, Angels of Peace

Faux Stained Glass, Stampin' Up!, Angels of Peace

Just in case, you do want to check out the video:

I have used the new Angels of Peace Stamp set, so pretty!  and there's heaps of fabulous goodies in the new Mini Catalogue, have you checked it out yet? and did you know that until 30th September for every $90 you purchase you can pick out a FREE Sale-a-Bration item?   Or, if there's so much you want, that getting a discount would be worth it, why not join my team, The CreateAbles, during Sale-a-Bration when you join not only do you get the amazing deal of pick $235 of products and only pay $169! but also you can choose from one of 12 new bundles from the mini catalogue! (bargain) let me know if you want more details!
 

I hope this inspires you to create, and have a go!

God Bless love Heather xox


Giving Gifts Dies

 Hi there!

In my random extra Facebook video I did yesterday I was creating this card: (because the new mini catalogue is out and I couldn't resist sharing some of the Christmas goodies in it)

Giving Gifts Dies, Stampin' Up!
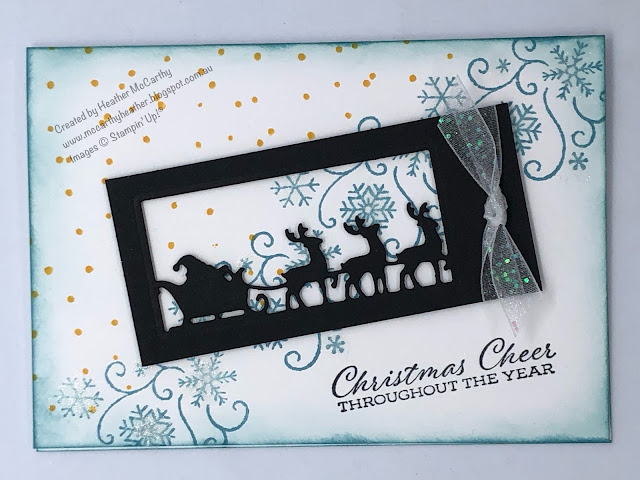
In the video I mention that I intended to make up cards with the other dies in this set, and that I would show them off once made......so yay I've made them! I've continued using the whole bundle, check it out here:  Time of Giving bundle  how cute are the little reindeer and sleigh?

The funny thing with this Giving Gifts Dies is that I didn't really think properly when I was looking at them in the catalogue, I was expecting for some reason much bigger dies, possibly the name should have given it away lol!  they really are around gift tag size, but I'm really happy putting gift tags onto cards.........so here goes...

the next card I made up uses the leaves, I had the idea to cut it out of a rectangle of card, then have a second rectangle under it, and colour this in autumnal colours with daubers (I love autumn colours) I've also used a couple of the Brushed Metallic Adhesive backed dots, as they tone in so well

 
Next one I created was using the little baubles, I really wanted something sparkly behind it, and thought yea! I can use the Whimsy and Wonder Designer Series Paper, then realised it's white and I was using Vanilla, ummm, however white card can be coloured..... and the iridescent stripes on this are amazing!  I've used 3 colours and applied them with my blending brushes, I've also used the Treasured Tags Punch to create the beautiful end to the tag.
Giving Gifts Dies, Stampin' Up!

And the last card uses the snowflakes and I couldn't resist using the new Sale-a-Bration Be Dazzling Paper, OH wow what a shine! Purchase $90 of Stampin' Up! goodies and you can pick this paper out for free!  I've used the Hammered Metal 3D embossing folder as I thought it tied in really well with the Be Dazzling paper, which is kind of mosaic'ish, again I've coloured this up with my blending brushes

Giving Gifts Dies, Stampin' Up!

I'm hoping this will link to the video I created!  FB live video it is a little blurry in places (sorry obviously facebook don't let you have a non-blurry video!)

Did you know that until 30th September for every $90 you purchase you can pick out a FREE Sale-a-Bration item?   Or, if there's so much you want, that getting a discount would be worth it, why not join my team, The CreateAbles, during Sale-a-Bration when you join not only do you get the amazing deal of pick $235 of products and only pay $169! but also you can choose from one of 12 new bundles from the mini catalogue! (bargain) let me know if you want more details!

 I hope this inspires you to create and use tags on your cards! 

God Bless love
Heather xox


Decorative Mask Wows

 Hi there,

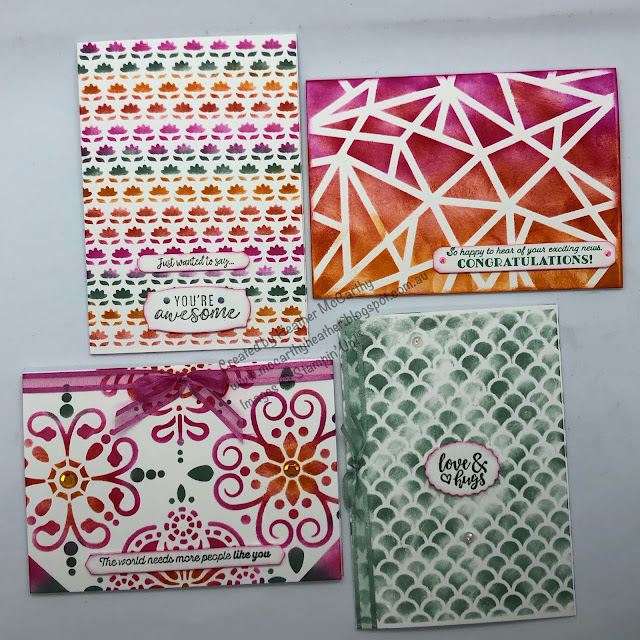
its been a while since I put anything on here usually it would be my monthly class, but when we got locked down again, my Christmas In July class got moved, so now it's "Christmas in August" lol.  So I thought as today I had only done the background for the cards I was showing on my Something Saturday video (Facebook or Youtube), I should show you how the cards actually turned out.

As I mentioned in the video I've just received these Plenty of Patterns Decorative Masks, actually one of my fabulous customers ordered herself some and I couldn't resist adding some in for myself (at only $14 why not!)  In my defense, I had been eyeing up the geometric patterned one for some time! 

Here are the 4 cards all finished, then I'll move on to telling you what's been used on each.....

Decorative Masks, Stampin' Up!, Being CreateAble with Heather
I have to say the colours just pop!  I used Pumpkin Pie, Poppy Parade, Magenta Madness, and Soft Succulent.

the first card I created in the video was with the geometric design:

I kept them all very simple, but this one especially so as the colours are so vibrant, I don't think the photos do it justice, as I mentioned in the video I've taken the Many Happenings and Many Messages stamp sets and cut out with the matching Messages Dies, gives me heaps of different sayings, then I can mix and match them up with my cards and still have more left over for other cards (gotta love that!), On this saying I've added a couple of the beautiful 2021 -2023 In colour Jewels, which give the card a bit of sparkle (gotta have bling!)

 
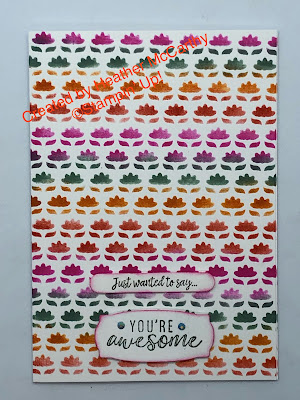
The next card I show in the video is the Little flowers mask, I had planned to try and get the leaves in green and flowers in "flower colour" but that didn't work, and I'm again really pleased with the way it turned out, again the same colour combination, really packs a wow!, I've just let the colour speak for itself with the card, and added the sayings with again a couple of the 2021 -2023 In colour jewels
Decorative Masks, Stampin' Up!, Being CreateAble with Heather
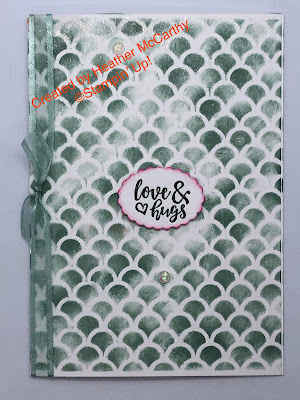
The 3rd Card I made up was the one I think looks like mermaid scales, so I stuck to the Soft Succulent with the colour then got carried away adding Wink of Stella over the top, Oh my! in real life it sparkles...., I've also added 3 of the beautiful Opal rounds (got a bit of a soft spot for opals as my engagement ring has a Opal in it), and also some of the matching Soft Succulent ribbon down the side.
 
Decorative Masks, Stampin' Up!, Being CreateAble with Heather

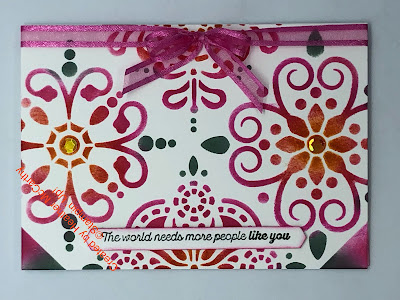
then the last card has the larger design patterns, again the same colours, plus some of the Polished Pink ribbon which seems to go nicely with the Magenta Madness, and a couple of the Artistry Blooms Adhesive Backed Sequins, just in the centre of the 2 main patterns

Decorative Masks, Stampin' Up!, Being CreateAble with Heather

 And that's it!  remarkably simple cards to create, but really pack a punch (at least that's what I think)😀
What do you think?
I hope these inspire you to create.
God Bless love
Heather xox


Christmas In July Mega Class

 Hi there,

As you may (or may not) know I do a Mega Class in July (and January) each year, July's one is looming on the horizon, and I thought I'd better share it with you!  If you get my emails you'll already have details of it, if you don't get my emails let me know and I'll add you to my list!

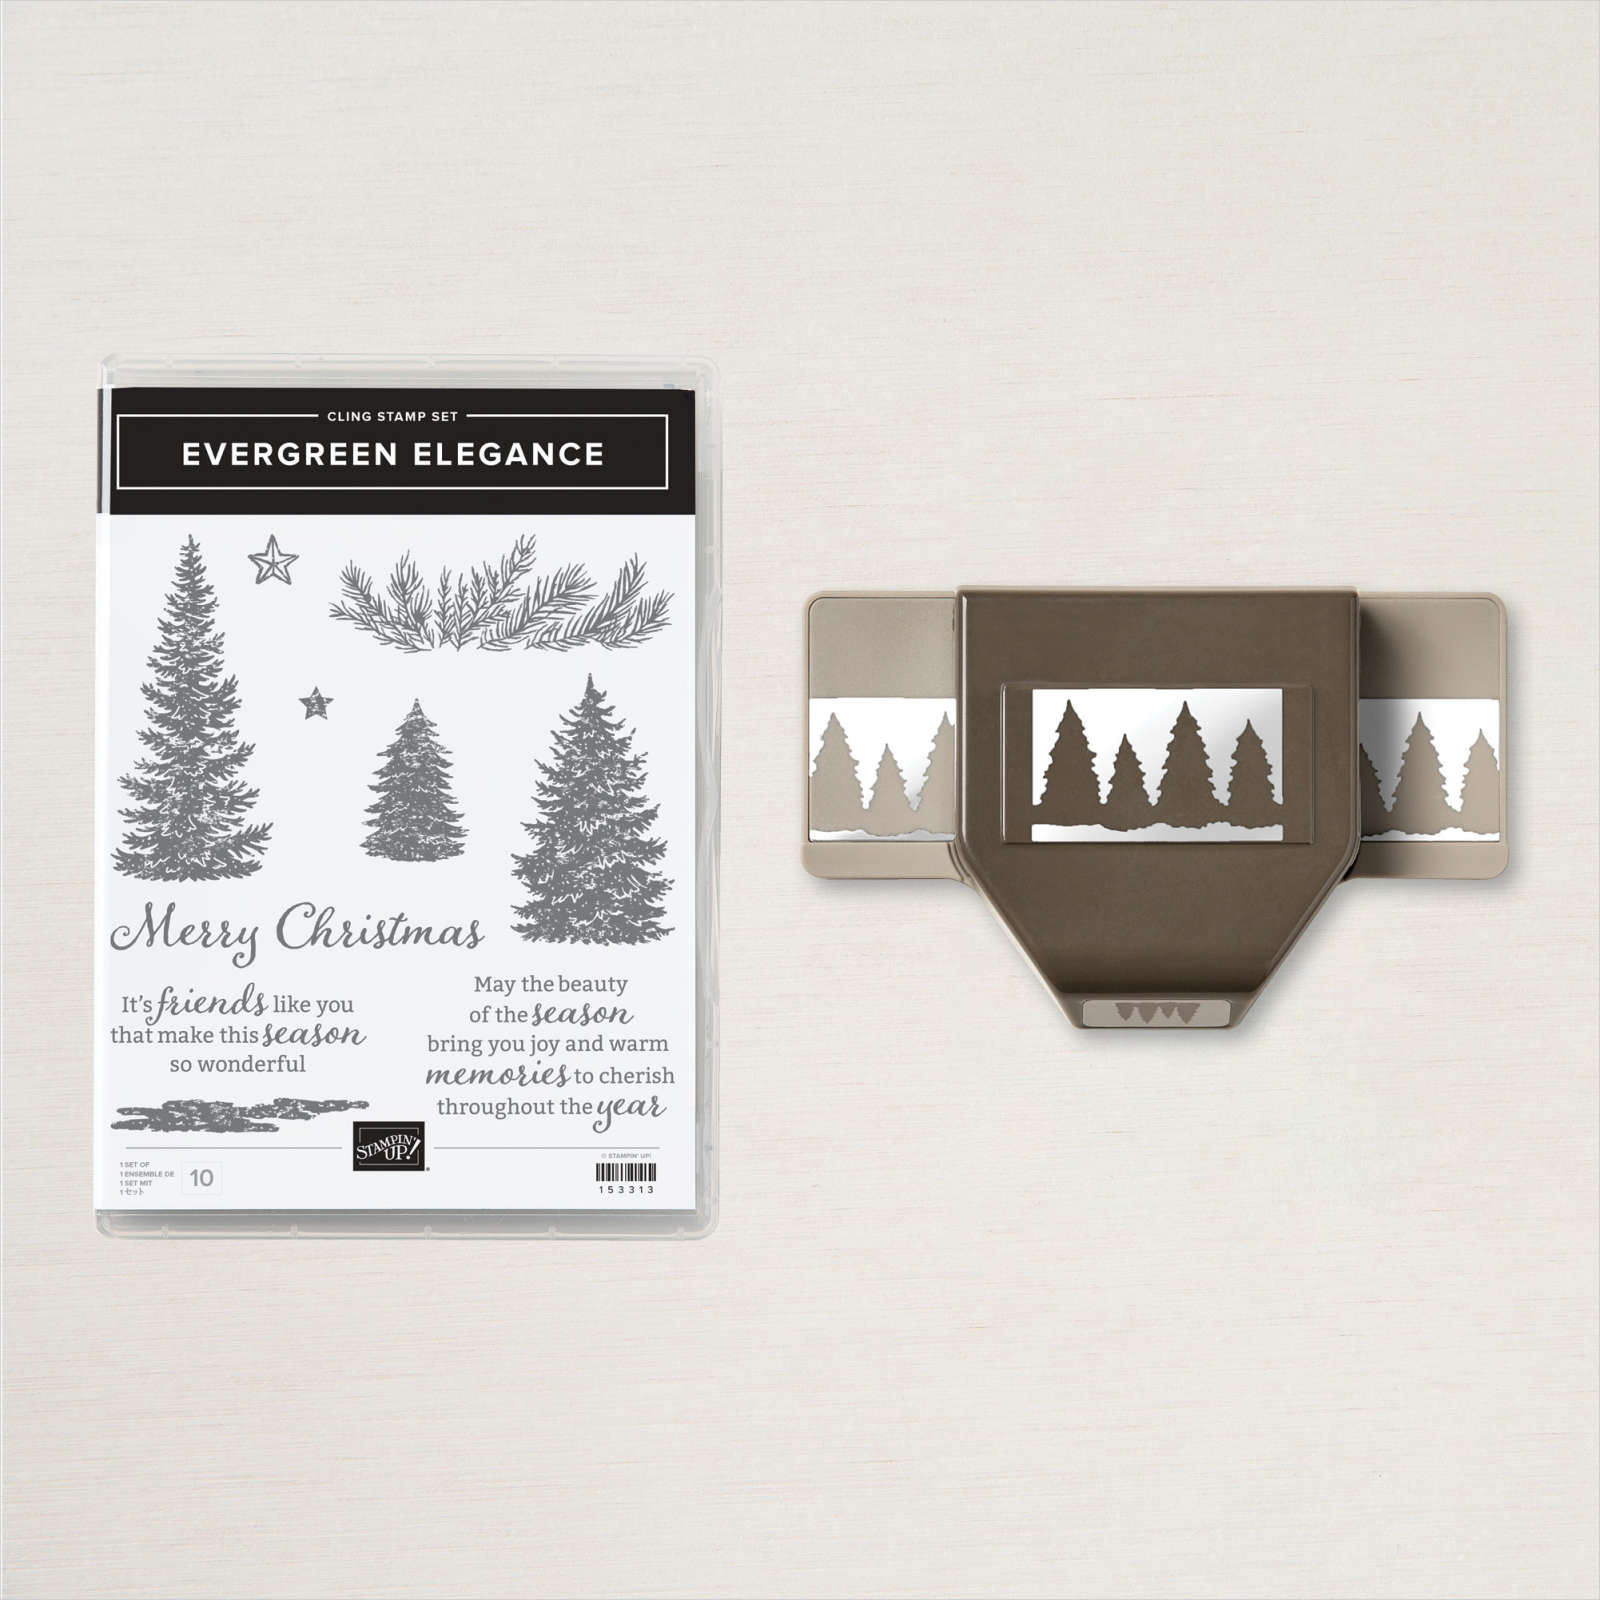
My Christmas in July Mega Class details are below, this is the stamp set and punch: Evergreen Elegance, that you'll be receiving as part of the class (amongst other goodies)

EVERGREEN ELEGANCE BUNDLE (ENGLISH)

  • Saturday 24th July 10.30am till 3.30pm. 
  • At Laanecoorie Mechanics Institute (middle of Laanecoorie)
  • We'll be making 12 individual cards (with envelopes) 2 of which are fancy fold cards. 
  • Included in the cost of this class is your own stamp set and punch (Evergreen Elegance Bundle), full instructions, plus all the trimmings to make the 12 cards, and lunch is included in the price, so if you have special dietary needs you'll need to let me know when you're booking your place.
  •  Cost for the day is $125 if you book and pay for your place before 30th June.
  • After that the price rises to $135  and the final cut off date is: 9th July to ensure I can have your products ready for you
  • This is available by mail too, the "by mail" cost will be $115 and this will include postage

And here is a peek of the cards you'll be making 

Christmas in July Cardmaking, Stampin' Up!

My Mega Classes are so much fun, so do come expecting to have fun, make new friends and just enjoy yourself!

what you'll need to bring if you have it
  • Clear blocks - all the stamps individually will fit onto a D size block (some diagonally), but you might want a selection with you
  • silicone craft mat
  • Pin tool or tweezers (if you use them)
  • Excited/ can do attitude 

If you want to join in, book your place soon as "in person" spots go pretty fast!

God Bless love 

Heather


Rosette Tree Christmas in June Craft Alive Bendigo

 Hi there Creators,

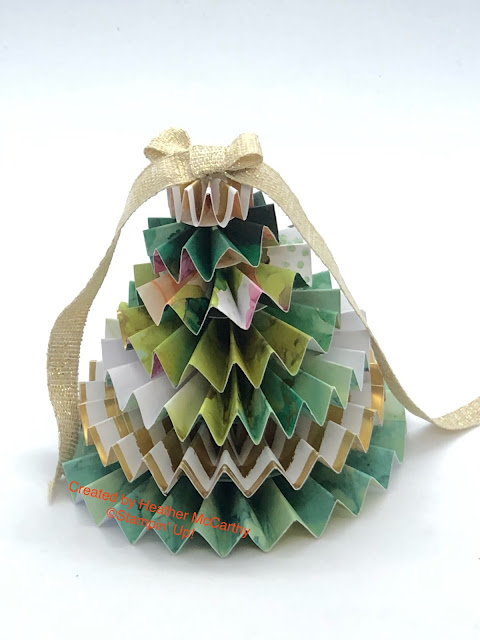
I have done a Facebook video on this cute Rosette Christmas Tree and promised to share the measurements in a blog post, so here we are.... first up the tree!  I will aim to add the video to my YouTube channel too!

#craftalivebendigo, Stampin up,  Expressions of Ink

#craftalivebendigo, Stampin up,  Simply Elegant

It's a really sturdy little tree when you put it together with hot glue.

You will need ideally 12 x 12" Designer Series Paper, the first one I made uses the beautiful Expressions in Ink Specialty Designer Series Paper, and the second one I've used the Simply Elegant Specialty Designer Series Paper the suites that go with both of these are just gorgeous!


You'll need to cut each of the following:

  • 12" x 1/2"
  • 12" x 3/4"
  • 12" x 1"
  • 18" x 1 1/4"
  • 18" x 1 1/2"
  • 24" x 1 3/4"
  • 24" x 2"

I recommend for the last 2 that are 24" you cut double the width of the 12x12 card stock, then score it and then cut it in 1/2 (just saves an extra step).  Each piece you need to score and concertina at 1/2" intervals I thoroughly recommend using the Simply Scored Board (makes the job really easy)

Now you need to glue each piece in a circle like this:

Press each one down to form a rosette (I recommend having the silicone craft sheet under your work at this point!), as you now need to use hot glue to hold the middle of the rosette together.

Do this with all the rosettes: (there is 1 missing from this photo, should be 7 in total)

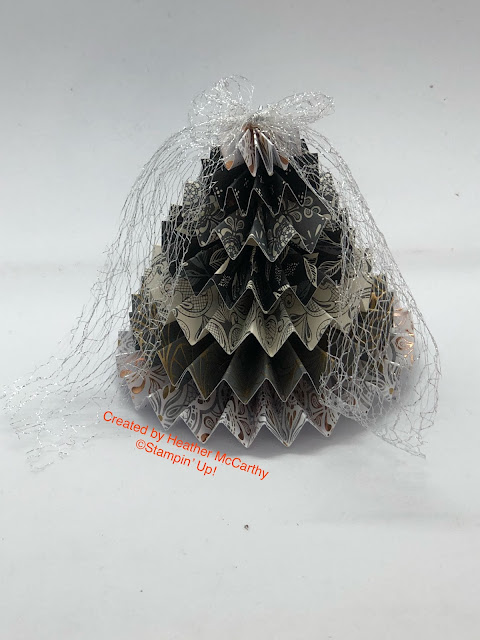
I then cut some circles and glued these on the top of all, but the top 3 rosettes, (it gives a bit more stability to the tree)  Then glue them all together to form the tree, and add something nice on the top, I used The lovely Gold Fine Art Ribbon on this one:

#craftalivebendigo, Stampin up,  Expressions of Ink

then the incredibly soft Metallic Mesh ribbon on this one:

#craftalivebendigo, Stampin up,  Simply Elegant

Before I head off, I should just let you know that if you're planning to order this month I do have a special for you:  orders over $100 I will be sending you a pack of the beautiful 2021-2023 In colour Jewels, and if you are ordering under $250 use this host code to go in the draw for the free host $'s : CQ6JWZ3Q.  If you plan to order over $250 don't use my host code as you'll be entitled to your own benefits, Or, have you thought of joining and ordering the starter kit? (pay only $169 for $235 of products!) 

Let me know if you have a go at this, I hope it inspires you to create!

God Bless love 

Heather xox

Something Saturday - 2 from 1 Stripes & Trees

  Hi there Creators Today I'm doing one cut with my Designer Paper and creating 2 different cards - gotta love it when you can get 2 for...