Something Saturday - Brightest Beauty (Wattle next?....)

 Hi there Creators

I'm not sure if this set is specifically meant to be Wattle, but it sure looks like it!  Here in Australia (in case you're from a different part of the world)  the Wattle has been flowering beautifully out in the bush recently, here's one of the photos I took recently: (might have been good had I taken my phone out of it's red cover to take the photo, or even checked the photo after I took it! but I've never claimed to be a photographer, and didn't have my glasses with me - at least that's my excuse)

Anyway on to the cards.... Using the Brightest Beauty Bundle  I make up this card in the video, nice and simple just a bit of stamping, I thoroughly recommend using the Stamparatus to line up/position and stamp the yellow (fluffy bits) commonly called blossom 🤣  And I love using the linen thread with natural looking stamps.

Stampin' Up!, Brightest Beauty Bundle

After finishing the video I then made up these 2 cards:

This uses some of the pieces I had already cut out, and again the linen thread with a double bow, I love the background triangle pieces stamp 😍
Stampin' Up!, Brightest Beauty Bundle

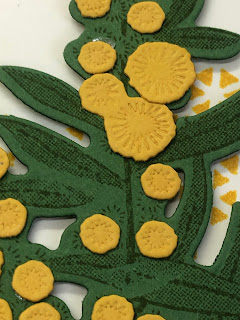
And you can see the little yellow cut out pieces have debossing in them to give them that "fluffy" appearance.

Stampin' Up!, Brightest Beauty Bundle
Then I decided that actually it didn't need to be completely yellow, so thought I'd use up the last pieces of greenery with purple blossoms (and again the linen thread)  And how lovely is the tag for the saying? it also has a little bit of de-bossing texture at the top and bottom.


Stampin' Up!, Brightest Beauty Bundle

If you missed the video, here it is....


I hope this inspires you to purchase this bundle (from me 😉) 😀  I don't know if it'll make it into the next catalogue - here's hoping 🤞 so if it doesn't you only have potentially till 4th January. (you can click on the links above to check out what I used)

God Bless love

Heather xox

Something Saturday - Strip Christmas Trees

 Hi there Creators

Umm might not have picked the right name for this one 🤣  What I actually mean is Christmas trees made from strips of Designer Papers.  Phew we're not going to make our Christmas trees strip!

I had a few strips of the Boughs of Holly Designer Papers that were (in theory) 1cm strips, so I thought I'd have a go at something I used to do with washi tape.

The idea is to have strips of paper that are slightly shorter each time so when you attach them down you end up with the typical pyramid tree shape.

Here's the card I made up in the video.  I teamed it up with the Decorated with Happiness bundle (stamps & dies) Oh and the Adhesive-Backed Seasonal sequins  I do like sequins without holes in the middle for adding to cards!

Stampin' Up!, Boughs of holly designer paper

Then after the video I made up this card, as I still had some scraps left over.  This time I also stamped the branches from the stamp set in the background, which I rather like, I'm looking forward to doing more with this set (it only arrived a couple of days before I did the video!)  I tried to stamp the saying directly onto the card with Stazon Black, but it really didn't show up, so ended up covering it with vellum, and punching the ends with the Handmade Tag Punch.  As I mentioned in the video I often do these cards so that the tree is a little skewiff or wonky, I kind of like the effect it gives.

Stampin' Up!, Boughs of holly designer paper
the stars have some rather nice detail in them as you can see:

Stampin' Up!, Boughs of holly designer paper
If you missed the video here it is:


I hope this inspires you to have a go too, feel free to share what you make, I do love seeing what I've inspired in others 😊


God Bless love

Heather xox

Something Saturday - Really cool Sunlight effect

 Hi there Creators,

Well I really didn't know what to call this, but the effect reminds me of sunlight streaming through gaps, so I'm running with that 🤣 (or at least walking fast - if I'm running there's something seriously wrong...)

The card I start making in the video is this one;  in the video I show how to create this effect in the baubles, it's actually remarkably easy, all you need is a shape cut out of spare cardstock, then sticky notes, ink and a blending brush.  I think it might be easier for you to watch the video than for me to try and explain it, but suffice it to say it's easy and creates a fabulous effect!  I've used the Spruced Up Outline dies (which are so fabulous)

Stampin' Up!, Spruced Up Outlines

After that I felt I should try and use most of the dies in the Spruced up Outline dies, so I went on to make these 2 cards....  I love the way you get the outline of the die, as well as the inside 😍  and of course looking at them on here I kind of wish I'd done the same effect with the trees - Oh well, famous last thoughts........

Stampin' Up!, Spruced Up Outlines


And this card......

Stampin' Up!, Spruced Up Outlines
I think there ended up being 3 dies I didn't use from the set (not bad going!)

If you missed the video here it is......

I hope this inspires you to create, and try out the "sunlight effect" for yourself

God Bless love

Heather xox


Something Saturday - Christmas Tree Box

 Hi there Creators,

Today I'm showing you how to create a little box with a Christmas Tree standing up on top of it, this is actually one of the projects my Craft@Home group have to create this month (if you would like more details about my Craft@Home group, just ask)

Stampin' Up!, 3D, boxes, Twinkling Lights dies

You could give a Christmas presy in this box, and then it can be stored to use as a decoration, the ribbon is a belly band around the box, so it will slide on and off, and the tree can be stored inside the box when it's been packed away

Stampin' Up!, 3D, boxes, Twinkling Lights dies

How to make this?  well...... you're going to need 

  • 3 (or more) symmetrical trees for the tree decoration, I've used Twinkling Lights Dies, you can also buy them as part of a bundle with a stamp set too (bundles give you a 10% discount) Christmas Lights Bundle. 😍
  • Something to colour your trees with, I used Garden Green, Pear Pizzazz and Shaded Spruce inks brushed on with a blending brush.  (Although I'm now thinking they'd look good cut from Designer Papers.)
  • An A5 sheet of real red card (21cm x 14.8cm) scored in on each side at 5cm.  This is the base of your box
  • A piece of Garden Green card (14.1cm x 8cm)  scored in on each side at 1.5cm, this is the lid of your box
  • 3 (or more if you're using more trees) 2.5cm x 1cm strips of Soft Suede
  • piece of wide ribbon, or strip of card that goes all the way round your box (although it won't store so well in the box)

 Ironically the first one I made, the tree stood up nicely, then the one in the video had complications, it could have something to do with trying a different glue!  I recommend Tombow rather than the fine tip glue pen that I tried out.

Anyway, make the box up, using the measurements above, wrap the ribbon round, and secure the ends together with tear & tape adhesive.  Cut out the trees and colour them up, then fold them in 1/2 coloured side on the inside of fold , add the small strips of soft suede to the bottom of them to create the tree trunks, make sure that the folds are in the same place with each, so when its all joined together and stands up they'll all be the same length.

then glue them back to back so they stand up as a little tripod tree.

Next you can glue the tree to the ribbon, if it really doesn't want to glue, you could add a stitch to it.

Then decorate up your tree 😊

Here are both boxes I made up:

Stampin' Up!, 3D, boxes, Twinkling Lights dies
And here is my second tree, that didn't want to stand up properly, I ended up adding brads to attach it down, then another piece of cardstock under it to give a bit more stability, although I'm not sure how well it'll pack away now 🤔
Stampin' Up!, 3D, boxes, Twinkling Lights dies

If you missed the video here it is:


I hope this inspires you to have go too 😊

God Bless love

Heather xox

Cards for November class

 Hi there Creators

Iust realised that I haven't done a blog post yet for the cards we'll be creating in class on Wednesday 2nd at 10.30am Laanecoorie, Thursday 3rd at 7pm in Laanecoorie, and Saturday 5th at 10.30am in Maryborough.

This month we're ramping it up for Christmas with 3 Christmas cards and one other (which is so cute!)  lets go the cute one first 😀  I've used the Glad We're Friends stamp set, I just think the dog (which reminds me of a corgi) is so cute! then I've teamed it up with the Artistic Mix Decorative Masks.  If you'd like to see the full list of what I've used in this card, click here:  What Heather Used

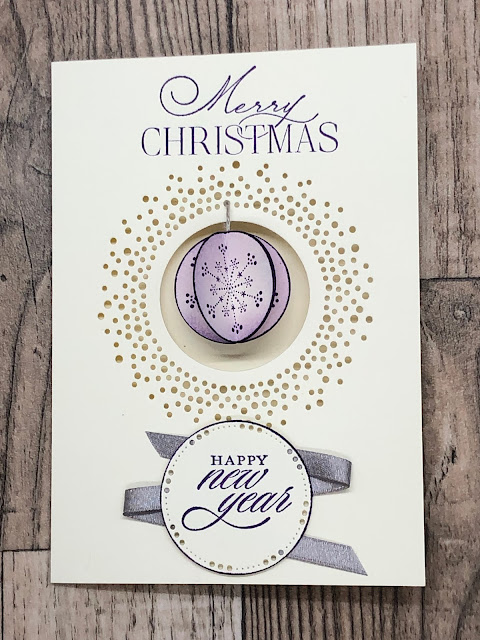
Next up are our Christmas Cards, I absolutely love this circular die in the Brightest Glow Bundle, and it works perfectly to add a dangly bauble in the middle to see what I used click here:  What Heather Used
stampin' Up!, Brightest Glow, Christmas Lights

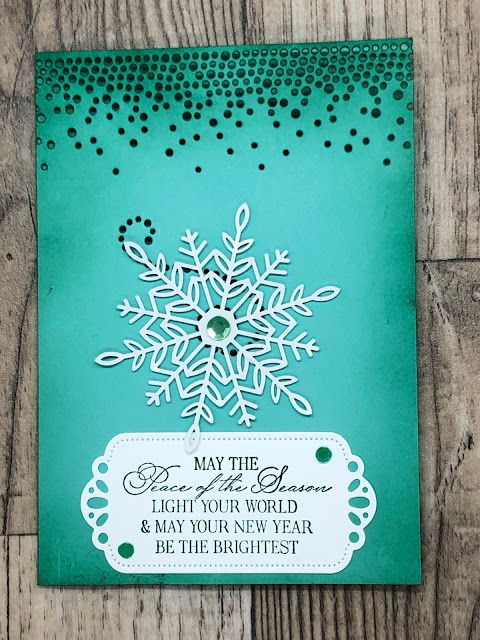
The next also uses the same dies from the Brightest Glow Bundle and this pretty Wonderful Snowflake, check out what I used here: What Heather Used

Stampin' Up!, Brightest Glow bundle
And the last card I thought we'd do a spot of origami....

Using the gorgeous Lights Aglow designer paper, and also the Starlit punch, check out the list of what I used here:  What Heather used.

Stampin' Up!, Lights Aglow DSP, Starlit punch

 Let me know if you can make it along to a class, it would be lovely to see you!

I hope these cards inspire you to create in your own space.

God Bless love

Heather xox

Something Saturday - 2 Step Stamping

 Hi there Creators, 

My video today was on 2 Step Stamping, which I'm sure most people if you've been stamping for a while would have done, but not everyone would have realised there actually is a name for it!  The basics of it is that you stamp one image then stamp another one on top, usually it would be an outline image then a fill in image on top, which is what I'm showing using the Hand Penned Petals Stamp set today, I mention in the video that it does come as a bundle, however it appears I was wrong 😳  oops, apparently that was last year, now it's separate, so..... you can also get dies that go with it, called Penned Flowers Dies that cut out the various images.  Do check them out with the links I've added.

 Anyway, on to the cards, I decided in the video to use the same colours for each one, and I've got to say, I absolutely love the way these have turned out, I hope you do too.

I've used Evening Evergreen for the leaves/ stems and outline, stamped off once to create the infill for the leaves, then Melon Mambo for the flowers.

Stampin' Up!, 2 step stamping, Hand Penned Petals

 I ended up picking a trifecta of greys for the mat on the 3 cards, the first card uses Gray Granite, then the second card has Smoky Slate and the last one uses Basic Gray.  The first card I kept ultra simple, added the saying with the matching Evening Evergreen, and some bling (more about that later)
Stampin' Up!, 2 step stamping, Hand Penned Petals
 
This second card uses the Smoky Slate, and the lovely Gray Granite Shimmer ribbon (I know it doesn't match exactly but I like the slight contrast)
 
Stampin' Up!, 2 step stamping, Hand Penned Petals

Then the last card kind of got ramped up a bit, I decided to add some of the flowers to the background, by inking with the basic gray and stamping off once, then stamping onto the card twice to get the faded effect.
Stampin' Up!, 2 step stamping, Hand Penned Petals

I mentioned the bling earlier, I've used the Iridescent Pearls on each card, they are gorgeous, nicely understated I think, I didn't want anything overpowering on these cards, but I thought these would add to the elegance, what do you think?

If you missed the video, here it is 😃

I hope this inspires you to create,
God Bless love
Heather xox

Something Saturday - Faux Tiling

 Hi There Creators,

Well somewhere I saw someone had done Faux Tiling, and it kind of fascinated me, so I've been experimenting......

to begin with I wasn't impressed with the results and eventually I realised that it's because I like to see the grouting looking white, or at least, contrasting with the "tiles", so I discovered that if I added extra colour to the background it worked for me 😃  enter, Watercolour shapes stamp set, perfect to give a smidgen of colour!

Here are the 2 cards I completed before the video to show off the technique, I used the large rectangle watercolour shape for these. The top card uses Edens Garden, Jar of Flowers, and Charming Sentiments Stamp sets and the bottom card uses the Charming Sentiments, and Painted Poppies Stamp sets (along with the Watercolour Shapes)

Stampin' Up!, Faux Tile Technique

Then I also made this one, which I'm not so keen on, I used the circle watercolour shape for the background on this one, and moved onto Good Feelings Stamp set, and the Stitched Rectangle dies

 Stampin' Up!, Faux Tile Technique

I had made up the tiled part of this card before the video, I'm not sure if you can tell in the photo but I made the tiles shiny on this one (because although I know you can get matte tiles, it just seems wrong to me 🤣 I need the shine!)

Stampin' Up!, Faux Tile Technique

In the video I show making the tiled part of this card by scoring it at intervals (I went with 1.5 and 2.5 cm gaps, and showed how to make it shiny, very simply, just add some of the fine tip glue pen, and let it dry, it dries slightly raised and shiny.  I added some extra scored lines into the background to add a bit of interest to the card but not take away from the focal point.

Stampin' Up!, Faux Tile Technique

Stampin' Up!, Faux Tile Technique

It's funny I tried and tried to get this look which kind of reminds me of that blue china you can get, (threw out a few attempts) then eventually gave up, and lo and behold I happen to pick out Starry Sky in the video...... 

Word of warning when you are stamping, choose a stamp that has a lot of surface area, make sure the ink pad is not really wet, as otherwise it will fill in the "grouting" areas, and don't stamp heavily or for too long.  

If you missed the video here it is.....


 I hope this inspires you to have a go too.

God Bless love

Heather xox

Something Saturday - 2 from 1 Stripes & Trees

  Hi there Creators Today I'm doing one cut with my Designer Paper and creating 2 different cards - gotta love it when you can get 2 for...