Hi there Creators,
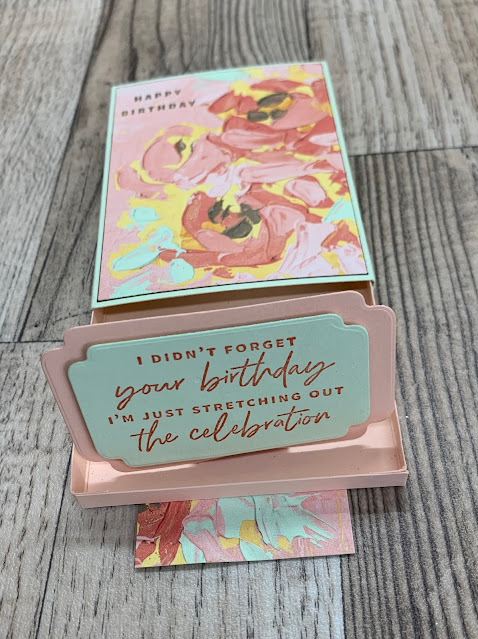
In today's video I showed off how to create a large matchbox with a Pop Up element inside, so when the person opens the box it pops up. It took me a little while to work this out and I've been thinking about it for ages since a friend showed me something sent to her kids for their birthdays, which had a pop up element inside a box, but theirs also shot out confetti bits into the air (haven't got that part worked out lol)
It's a little difficult to show in photos, but here goes......
Step 1 box is closed:
Step 2: pulling the box openThen in the video I make up this one:
I've used some of the new goodies from the Mini: Fancy Flora Designer Paper, and the Alphabet A La Mode Dies (oh my goodness the designer paper is sooooo pretty) Check out all the "ingredients" I used for this one here: What Heather Used
And just one more example before the measurements (as the measurements are taken from this (slightly more perfected) one:
To see what I used for this card/box click here:What Heather usedAnnnnd finally, the measurements, first a photo with all the components you'll need:
and now:
A: 20cm x 10.5cm scored at 4,5,13 and 14cm
B: 10.5cm x 9.5cm scored at 0.9cm in each side
C: 9cm x 2.5cm scored at 4.5cm
D: (Designer Paper) 4" x 3" (it's easier in inches for the Designer paper as it's 6x6' paper)
E: (Designer Paper) 4" x 2"
Plus you need
- a die cut/cut rectangle or punched piece to fit in the box (it's ok to be just shorter than the width of the box, but you definitely want it shorter than the length of the box so it pops out before you get to the end of pulling out the box, if that makes sense!) I 've used Something Fancy Dies
- A words stamp set, I've used Something Fancy Stamps (which conveniently comes as a bundle called "Something fancy Bundle"
- you need a small punch I've used Best Label (you'll need 2 of these)
- Also you need to raid your hubbies shed, or the local hardware store and find a wire coil spring, I discovered 3 (in Tom's shed) that were around 1cm diameter and 2cm high (fairly flexible and easy to squish, not hard) So I've taken those (and already used them 🤣 no backing out now!)
So then the basic instructions are:
- make up the box base (B)
- wrap A round the base to create the matchbox
- do your stamping and cut out with dies/ punch whatever you're using
- Attach D to the top of your box
- Attach E to create the slide out puller bit (it goes under the box base) there is a reason it's so long, as a shorter one will catch when you push it back in.
- Attach C to the back of your "in the box" saying making sure the fold is at the bottom
- hook your small punched pieces into either side of the metal spring, and using enough glue attach inside C.
- then attach this inside the box, make sure glue has set before trying it out.
here's the video in case you missed it:
What do you reckon? are you going to have a go?
I hope this has inspired you to create
God Bless love
Heather xox

.JPG)
.JPG)
.JPG)
.JPG)
.jpg)
.jpg)


.JPG)

No comments:
Post a Comment