Hi There Creators,
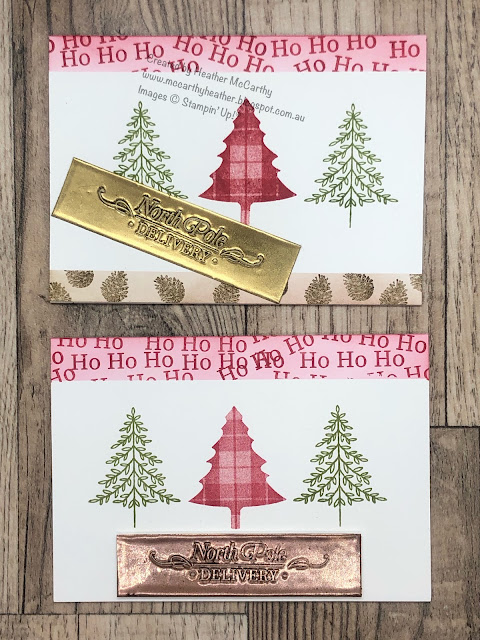
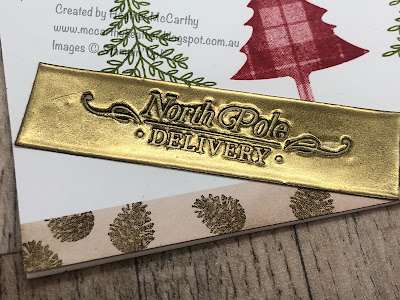
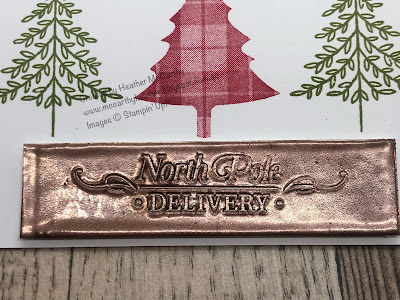
This week my "Something Saturday" video was on Stamped Heat De-bossing, I'm not sure if it's called this but I can't think what else to call it!
This is it, there's no ink used in the saying, just heat embossing powder and a stamp.
I think it creates a really cool look.
These are the finished cards the top card is the one I actually make in the video
:
Anyway I'm sure if you haven't viewed the video that you're wondering how I've done this.
It's actually quite simple if you know how to heat emboss!
Take your piece of card, wipe it over with your Versamark ink pad, then cover it with heat embossing powder, and heat emboss it.
Then repeat the process so (in my case) the Gold or Copper gets thicker, I've done mine 3 times, then on the last time you need the stamp ready and waiting, while the melted embossing powder is still hot, press the stamp into it firmly. If you find that you've ended up with a partial image, heat it up again till the stamped bit "melts out" and try again. I'm not sure how many times you can re-heat it before the embossing powder doesn't like you, but I did have to do this once in the video!
Let me know if you have a go! I'm putting a link below to all the products I used making these cards, and don't forget until 30th September (not long now) for every $90 you order you do get to pick a FREE Sale-a-Bration product! (bargain!)
ALSO if you love everything (like me) and want heaps more, why not join my team? You get to pick $235 of goodies, only pay $169 PLUS until 30th September you get to pick a free bundle from the mini catalogue, then you get an ongoing 20% discount rising to 25% after a certain amount of rolling "sales" (I joined for the discount 13 years ago.....lol) Check out this link:
WHAT HEATHER USED TO MAKE THESE CARDS
I hope this has inspired you to have a go, and have fun with your cardmaking and scrapbooking!
God Bless love
Heather xox


.JPG)

.JPG)
No comments:
Post a Comment