Posts

Something Saturday - Click Clack Concertina Card

Image
 Hi there Creators Well I was sitting last night wondering what to do for my Something Saturday, and playing around with a bit of paper, ended up designing this card, I've made similar cards before like the cascade cards, this is probably a bit more basic, but I'm happy with it and it's way simpler to create, but still packs a cool Woah factor🤣  I've used Sentimental Christmas Designer Series Paper which is on the last chance list. I decided it needed a sentiment so picked out this one from Sweetest Star Stamp set (last chance list again), because it has 6 words (1 for each panel!😃) and these Adhesive backed Snowflake Assortment are also on the last chance list and happen to be reduced to 1/2 price (woo hoo!) Ok, onto measurements.... You'll need a sheet of A4 for the base card, score it at 9.9cm either end, then cut in 1/2 at 10.5cm, fold so each piece is concertina'd into 1/3rd's then each folded piece needs a cut that goes 1/2 way up the card (in the...

Party Puffins, Cards for June class

Image
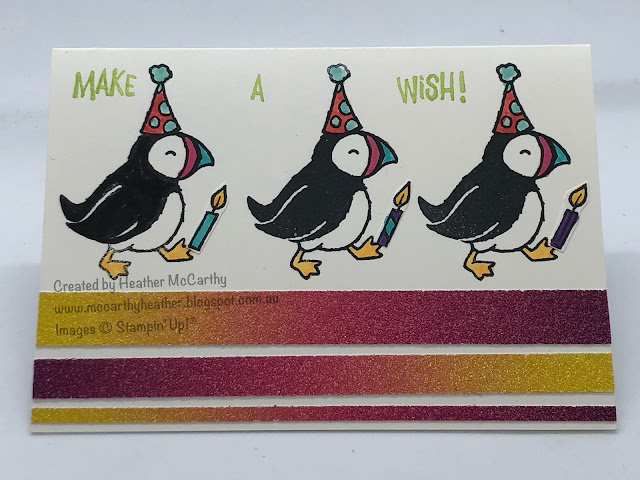
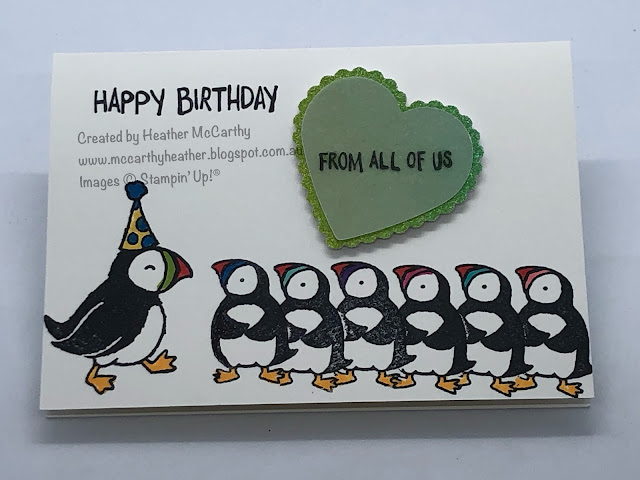
 Hi there Creators,  I thought for a change this month we'd do some kids cards, Sam (10)  has been to a couple of parties recently, and I've really enjoyed using this stamp set making up cards for them.  The Party Puffins are so cute! (I'm pretty sure they'd appeal to big kids too lol) So here we go..... Card 1:  I like doing fancy fold cards and they're always a winner with kids! Card 2:  Sparkly stuff!, also a winner with kids lol, I've used some of the Rainbow Glimmer Paper with this card, so pretty!, and as it's rainbow there's also a greeny/blue section which would work nicely for a boy! (and these sparkles don't get everywhere, bonus!)   Card #3 also uses a bit more of the sparkly Rainbow Glimmer Paper behind the vellum heart (some of the green this time!)  A spot of masking and you have a heap of small cute puffins! And the last card I thought would be fun to showcase the candles, if you coloured the candles in pinks I reckon it would ma...

Hydrangea Hill Cards for May

Image
 Hi there Creators the Hydrangea Hill Designer Series Paper is so beautiful that I thought I'd make it a feature of the cards for our May class, plus I've added in a couple of new items......😊(which will be available from 4th May, yay!) This first card uses some of the new Pale Papaya open weave ribbon (very pretty) and it's funny as when I first saw this colour I really didn't think much of it, but it's not as wishy washy as I thought it looked, it actually has a nice peachy tone to it.  Oh and the saying is from a new set too called "Elegantly Said" The second card is this one, again new goodies, I've used some of the Pale Papaya card behind the saying, then there's also new stamp set and punch: Flowers of Friendship Stamps and matching Flowers & Leaves Punch (I like punches!)  and lastly there's the new Linen Specialty Paper, this was an interesting one, I didn't realise it's sticky backed, I rather like the way it allows the pa...

3D tutorial, Coffee Cup

Image
 Hi there Creators,  I did a Facebook Live on Saturday (Easter Saturday) where I showed how to make this Coffee Cup, it's quite easy but can look really great with a couple of choccie eggs in it (or other things!)  so I thought I'd share it here with you too: Do watch the video below to learn how to create these, let me know if you have a go!, and don't forget to follow me on Facebook for my Something Saturday videos. Being CreateAble with Heather Facebook   I hope this inspires you to create! God Bless love Heather

Fancy Fold - Corner Fold with Easel Card

Image
 Hi there Creators,  well a week or so ago I posted this video for my Something Saturday Facebook live, and I'm a bit late in putting it up here! Here are the cards I've made using this fancy fold that I saw at the Picture to Page show recently.  This is the first one I made up with the new Butterfly Bijou Designer Series Paper, which is sadly sold out at the moment! (very popular) Currently the card I made in the video has gone walkies, however I did make this card up using the same World of Good Designer Series Papers that the one in the video is made with.  I love the brass foil designs that are on some of the sheets. Rough instructions are that you start off with a square piece of card, score it in 1/2 both ways (so it has 4 small squares), cut one of the score lines up to the centre point.  If you have that cut line down the bottom, you then fold the top 2 squares diagonally backwards, and that's pretty much all the folding!   Do watch the video b...

In Bloom Bundle/ UFO's

Image
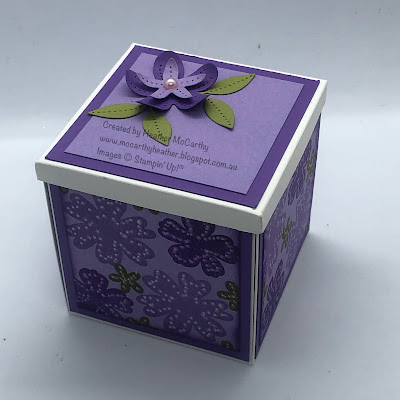
 Hi there Creators, Today I've been trying (unsuccessfully) to clean up my desk, it's one of those jobs that you get started on then find things you haven't finished off....  So instead of cleaning I ended up finishing off a couple of things, hence the UFOs Unfinished Objects, as it turns out I end up using the In Bloom Bundle for both of them. The first one was this card, which I'd previously stamped but hadn't got any further, so I added the ribbon and the gorgeous Artistry Blooms sequins and finished it off: The other project is a 3D one, for which I had the "bones" made up, specifically the outside box bit, but I had plans for the inside which hadn't happened, so finally I chose the colours and what I was going to decorate it with, and here's the finished article...... I admit I did do the inside first, however you get to see the outside first lol, it's a bit purple as I was thinking about a couple of friends who love purple (plus I curre...

Sand & Sea Cards for Classes in April

Image
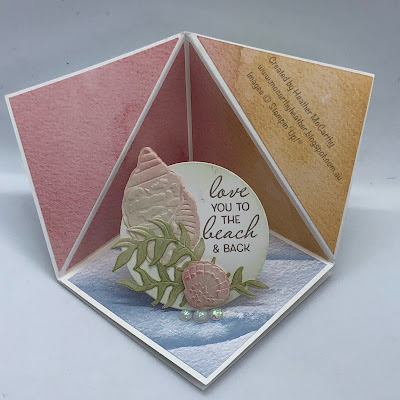
 Hi there, Well I've chosen to do my card class in April using the fabulous Sand & Sea Suite collection .  I just love the way the stamps match the dies and even the embossing folder. Oh and the fabulous Pearlescent Specialty Paper...... When you use them, just so you know; Cut, Stamp then Emboss! Anyway on to the cards that you'll be creating in my classes this month...... I'm really happy with the way this card turned out, I really wanted this big conch shell to stand out on the card, as totally unique.  In "real life" the shell has the beautiful pearl look from the Pearlescent paper. This next card I was hoping would work as either a guy or gal card, I hope you can see the gold flecks in the card stock (looks even greater in real life lol)   Then the last card is a 3D corner fancy fold card, using some of the Sand & Sea Designer Series Paper   I also love these little Opal rounds that I've used here to prop up the easel part of this card  (they'...

Cute Pop-Open Box

Image
 Hi there Creators, I did a Facebook live video a couple of weeks ago on this cute pop open box, and thought I'd share it here for you too, I've finally got round to uploading it to YouTube today! Here is the first box I made: I've used the beautiful Hydrangea Hill designer series paper, then I made this one in the video I had been scrolling around on the internet and found it but of course it was American and used imperial measurements not metric, so I've converted it to metric - specifically tailored to an A5 sheet.   This is my roughly written out instructions that I use, however just in case the markings aren't making enough sense..... Take your sheet of A5 in landscape, and score it at 1cm and 10cm, Then in portrait score it 2cm in one side and 2.5cm the other side On the 2.5cm side you need to cut at 6cm and 16cm (only up to the 2.5cm scored line) trim off the little bits as shown in the 1cm scored portion Using a bone folder you'll need to score the diago...