Hi there Creators,
Today I've been trying (unsuccessfully) to clean up my desk, it's one of those jobs that you get started on then find things you haven't finished off....
So instead of cleaning I ended up finishing off a couple of things, hence the UFOs Unfinished Objects, as it turns out I end up using the In Bloom Bundle for both of them.
The first one was this card, which I'd previously stamped but hadn't got any further, so I added the ribbon and the gorgeous Artistry Blooms sequins and finished it off:
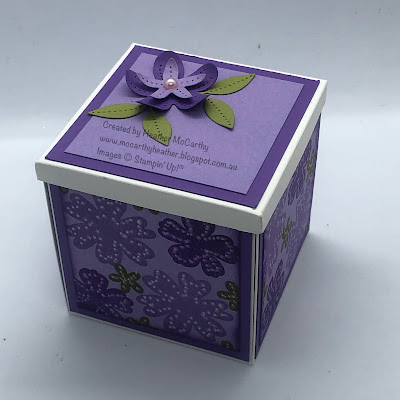
The other project is a 3D one, for which I had the "bones" made up, specifically the outside box bit, but I had plans for the inside which hadn't happened, so finally I chose the colours and what I was going to decorate it with, and here's the finished article......
I admit I did do the inside first, however you get to see the outside first lol, it's a bit purple as I was thinking about a couple of friends who love purple (plus I currently have almost a full pack of Gorgeous Grape and 1/2 a pack of Highland Heather cardstock) I love the stitched look with these Pierced Blooms dies, so as I'd stamped the side panels I thought I'd add a white stitched look to them too, just using the White Stampin' Chalk Marker.
The inside is the bit that Tom (hubby) and the kids all said "Cool" to 😀
I was so chuffed with the way it turned out! I've used some of the small flower dies on the top, and another flower to create the green leaves under it. With some of the beautiful Pastel Pearls.
Got a couple more photos of it too: bit more of an outside of the box shot, to show the stamping in more detail:
And a quick shot showing how the lid fits on:
Well What to do you think? Do you want to have a go? it's not actually as hard as it looks lol
I hope it inspires you to have a go at something different!
God Bless love Heather xox


.JPG)

No comments:
Post a Comment