Something Saturday - Stamping with water!

 Hi there Creators,

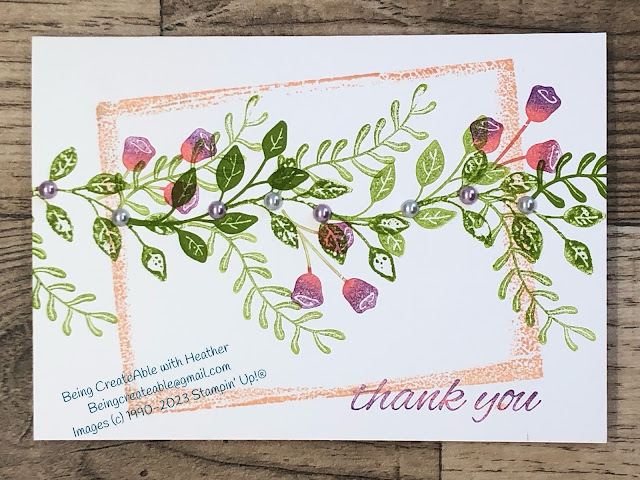
Yep stamping with water!  I was messing around with my water painters trying to do something different with them (which didn't work out), when I discovered that if I stamp an image in ink on some of our Thick White Cardstock, then stamp another one on top using water, it does something rather cool!

So here's the card I made before the video...

In Bloom, Watercolour Shapes, Stampin' Up!

Aren't the images in the middle of the flowers and leaves cool?  In order to get this overlay image I "inked" it up with water, then stamped and held the stamp down for 10 - 15 seconds.

So here is the one all made up that I did in the video:

In Bloom, Watercolour Shapes, Stampin' Up!

As you can see I've also used the Loose Flower Flourishes, which I thought went nicely with it (not sure I've actually used them before!).


In Bloom, Watercolour Shapes, Stampin' Up!
 
Then I discovered that the small diamantes will fit nicely in the middle of the big Flower Flourishes (bonus!!)
In Bloom, Watercolour Shapes, Stampin' Up!

 I also discovered that once you stamp you can draw on water with the small water painter, see the leaf with the veins.

If you missed the video and want to see it - here it is...


 I hope this inspires you to have a go!

God Bless love

Heather xox


Something Saturday - Rolling Waves Card

 Hi there Creators,

So, today I was showing how to make the most of the Stamparatus and create a Rolling Waves card, using the main waves image in the Waves of Inspiration stamp set, and repeating it to create that look of a wave a surfer might go through.

Here are the 2 cards I made top one is the one I created with what I made in the video, bottom one was my initial go at it.  I mentioned at the end of the video I might add another colour with it, which is what I did and I love the blend of colours, even though they're on top of each other

Waves of Inspiration, Stampin' Up!

Anyway how did I do it?, I took a couple of photos for you in case you didn't see the video

I lined up the stamp onto the stamparatus as far right as I could, inked it up, then used a dauber to blurr the edges, so they wouldn't be so "sharp" once stamped, then stamped my strip of cardstock, once.

Next I moved the plate to the next position along the top rung, and repeated the process all along till I had a whole line


 If you haven't seen the video and would like to, here it is😃


I hope this inspires you if you have a stamparatus to dig it out and have a go!

God Bless love

Heather xox


Something Saturday - Clear Blocks are more than just for Stamps!

 Hi There Creators

join me today as I show you how to make the most of your clear blocks!

Before the video I had actually managed to create a couple of cards - yay go me!!

Which were these ones;

To find out what I used on this first card click here:  What Heather Used

Alternate ways to use clear Blocks, Stampin' Up!,  Biggest wish
 

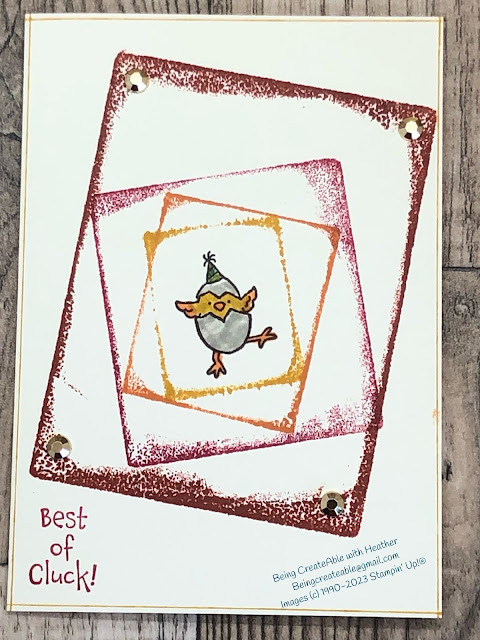
To find out what I used for this Chick Card, click here: What Heather Used

Alternate ways to use clear Blocks, Stampin' Up!, Hey Birthday Chick

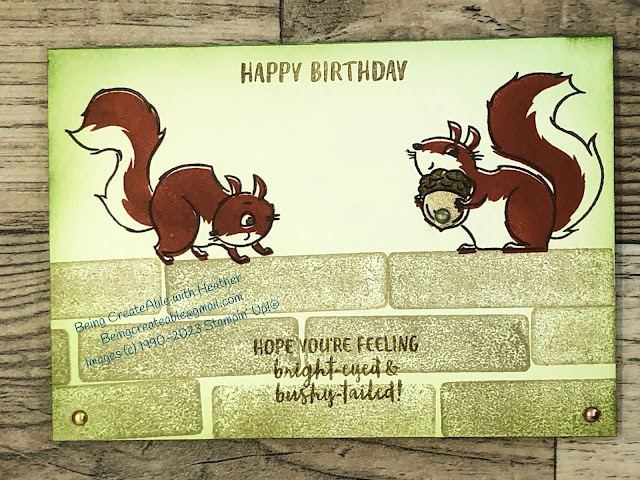
 Then in the video I showed how to create this wall using clear blocks, to see what I used click here: What Heather used  In the video I mention when one of us at work gets distracted one of the other girls has a catch phrase for it "Oh look a squirrel!"  After having mentioned that, I thought, Oh squirrels would look good on top of the wall! 🤣 (good job I have squirrel stamps!)

Alternate ways to use clear Blocks, Stampin' Up! Nuts about Squirrels

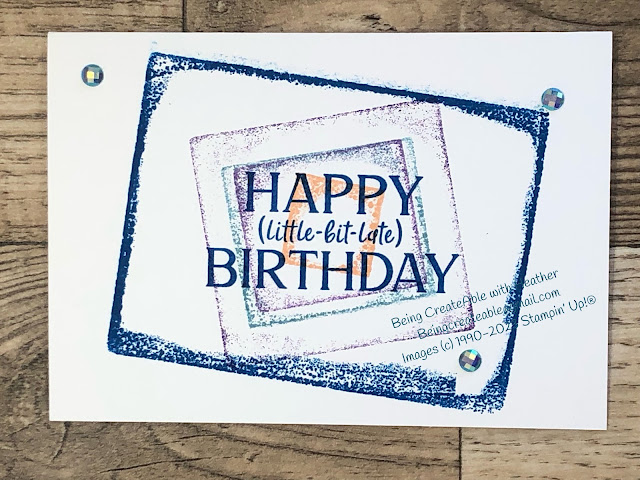
and for this card I show how to create these frames, to see what I used clear here:  What Heather used

Alternate ways to use clear Blocks, Stampin' Up!, Happiest of Birthdays

 It's actually easy to use your clear block to create cool backgrounds or as in the squirrel card, bricks.  All you do is forgo the stamps on your blocks and add ink directly to the block, then stamp it.

In the last card and the chick card I've just inked up the edge of the block to create a frame, then stamped it.

Check out the video here:


 I hope this inspires you to ink up those clear blocks!

God Bless love

Heather xox


Something Saturday - Reverse Stamping

 Hi there Creators

I thought I'd do a spot of reverse stamping this week, there's a really lovely stamp set: Elegantly Said, that has this cute little die that looks like 1/2 a butterfly, so if you know how to reverse stamp you can create the butterfly quite easily.  In the video I show creating the pink butterflies, I've then added the Pool Party Butterflies and the large flourish in the corners is also reverse stamped for the upper corner.  check out what I used here:  What Heather used

Stampin' Up!, Elegantly Said, Reverse Stamping

This next card uses the Boughs & Blossoms stamp set, the leaves only go in one direction and as it's not a photopolymer set I can't bend them in the other direction, so reverse stamping allows me to get them to wave their way across the page (they'd make a pretty good wreath I reckon if you kept stamping them round!)  check out what I used for this card here: What Heather Used

Stampin' Up!,  Reverse Stamping, Boughs & Blossoms

 Anyway, nitty gritty, how do you do this?  Easy peasy, stamp your main image 1/2 strength onto your base card (ie stamp off once before stamping on your card), this will give you a lighter image which will match your reverse stamped image.

Then take a piece of Cellophane, make sure your stamp is well inked and stamp really carefully onto the cellophane (make sure it doesn't move as you stamp or it will smudge the image)

Then turn the cellophane over and rub it down onto the card where you want the image to go, Voila reverse stamped image!

Check out my video here:


I hope this inspires you to create

God Bless love

Heather xox


April Class cards

Hi There Creators,

oops I keep forgetting to add this post with next months class cards! (apparently I completely forgot last month, I'm so sorry!) Next months classes are: Wednesday 6th at 10.30am in Laanecoorie, Thursday 7th at 7pm in Laanecoorie, and Saturday 9th at 10.30am in Maryborough, class cost $20 for all 4 cards.

Ok, well as many of you already know, the retiring list is out!  Products from the annual catalogue (check them out here:  Retiring products)  there's some fabulous discounts to be had!

And would you believe it but 2 out of 4 stamp sets I picked are retiring and discounted!

First up In Bloom Stamp set now 1/2 price at $15!!! wow what a bargain, it's such a cool set this, I love the block images as you can do so much with them, and create your own patterns inside them, which is what I'll be showing how to do with this card.

Stampin' Up!, In Bloom stamps

 Next is the ice cream 😢 such a useful set for anybody's birthday (I mean who doesn't like a bit of ice cream every so often?!)  Anyway the Sweet Ice Cream stamps are 1/2 price also at $15 now, and the Ice cream cone builder punch is now also 1/2 price at $15.50 (what a bargain!)

Ice Cream bundle, Stampin' Up!
Then come the 2 cards with the continuing products (mainly because they're from the mini catalogue, or just been released🤣)  So this card uses the gorgeous Flowering Tulips Bundle and some of the new blue foils cardstock (from the Waves collection)
flowering Tulips bundle, Stampin' Up!
As you can see from this next photo it has a bit of a step in the front, so the tulips can stand clear and reflect into the foil.
flowering Tulips bundle, Stampin' Up!
Then last but not least, this is such a pretty delicate stamp image using the Flowing Flowers stamp set, and one of my favourites but sadly retiring Everyday Label punch 😢 (however it is reduced to $24.80 from $31, so some bonus for those who don't have it!)  As you can see, choice of colours.....
flowing flowers, Stampin' Up!

 If you can make it to one of the classes do book your place, space is limited especially in Laanecoorie.

I hope these inspire you to create

God Bless love

Heather xox

Something Saturday - Tulip Dies

Hi Creators,

Well this week I thought we'd check out the gorgeous Tulip Dies they're a bit different in that 3 of them have special folds, which I felt needed a bit of explanation (in other words I had to check out what others had done too 😉)

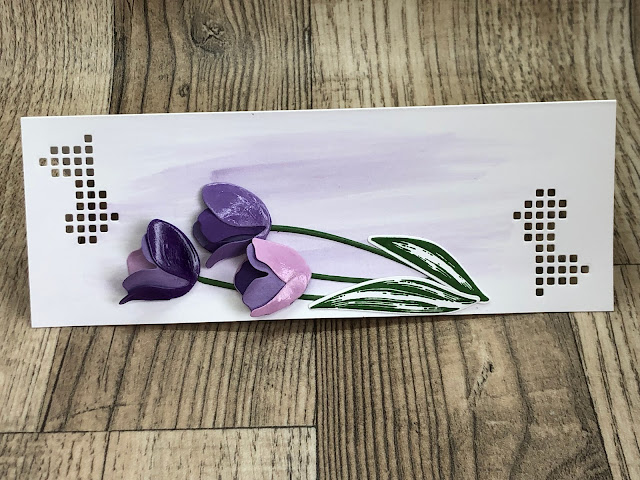
So here's my "take" on it...... this is the card I made before the video

Tulip Dies, Stampin' Up!

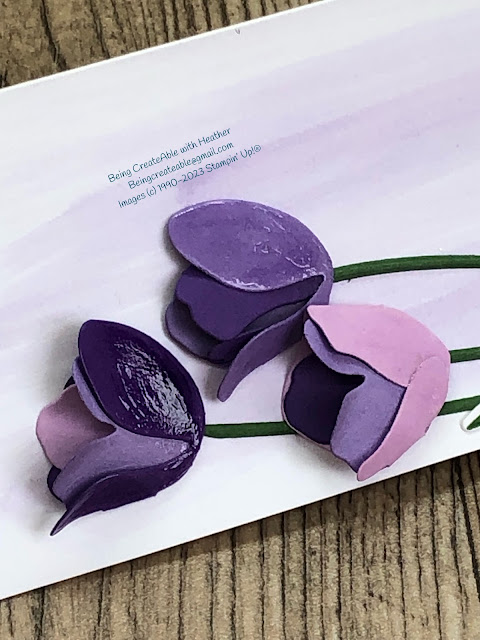
I love the idea of the tulips being a bit 3D, so I've curled the card, and added the glossy stuff, which on the left hand tulip is the Shimmery Crystal Effects and the other 2 are done with the Fine Tip Glue Pen.  Mine sadly got all gunked up in the lid,  (there is a pin that's meant to go into the extremely fine tip, and the pin got a bit mangled!)  anyway more than one way to get round things, so I unscrew the lid and use a toothpick to apply it 😃 gives a lovely glossy finish.

Tulip Dies, Stampin' Up!

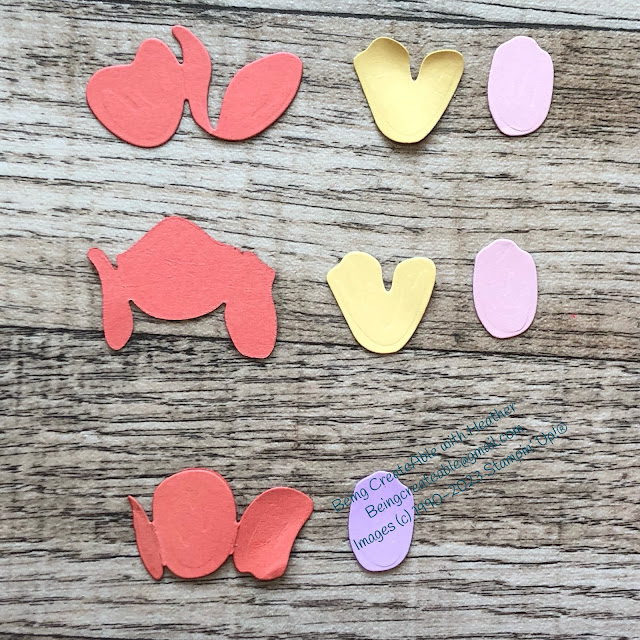
Then in the video I show the components I used to create these 3 flowers: Here is the line up......

tulip dies, Stampin' Up!

Then in the video I make up the flowers for this card...

tulip dies, Stampin' Up!
 

I think the die that produces this squares pattern is pretty cool (and bonus! it's in with the tulip dies!!)


tulip dies, Stampin' Up!

tulip dies, Stampin' Up!

I was thinking it might make quite a nice sympathy card, but I think I'll leave it till I decide who I'm giving it to.  As you can see in the background I've added a purple wash using the thick water painter brush from the set, I didn't think it needed much in the background and I'm happy with the way it turned out - which card out of these 2 is your favourite?

 Check out the video, to see how I put the flowers together


 I hope this inspires you to create

God Bless love

Heather xox


Pokemon Ball Easel Card

 Hi Creators,

Well in this weeks Something Saturday I show you how to create a really easy (and simple) Pokemon Ball Easel card.  If you have someone in your life who's a Pokemon fan, they'll love this card!

I made one last month for one of Sam's friends (youngest son), and as he was so impressed with it I thought I'd better make one for him too.  Of course you can't do the same card twice, so his ties in another interest - Dinosaurs😃

Here's the first card I made for his friend:


I have to admit most of it was made with retired goodies (just as well I kept those dinos!)

Here's the finished card.....

Stampin' Up!, Pokemon Ball, Easel Card

Stampin' Up!, Pokemon Ball, Easel Card
As you can see, if it wasn't an easel card it would roll around and fall over (being a ball!),  I figured this was the perfect way to display the ball.

You can see I've added a small circle of card that I stamped grass onto, folded it in 1/2 and stuck it down.  I've then added some of the Matte dots which I thought were still current catalogue items, oops my bad, apparently they were from the Christmas catalogue, so in fact the only current items I've used are the cardstocks!🤣

Ah well just goes to show - that you should dig out your older stuff every now and then and use it (I haven't used the dinos for a couple of years or so)

The base card is really easy to make too, you need to cut out a circle from a folded card, but leave the top so it's joined, then you fold inwards a section on one side, and find something to stick in the middle of the unfolded side, then "prop" it up like an easel, and decorate the front of the card (the video explains better!)


I hope this inspires you to create!

God Bless love

Heather xox

Something Saturday - Shepherds Care meets Snowy Delights Masks

Hi there Creators,  Today I thought I'd play around with a couple of my latest goodies, Shepherds Care Stamp set and Snowy Delights Mas...