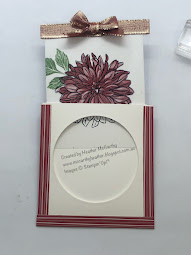
Magic Slider card using Delicate Dahlias

 Hi there Creators, 

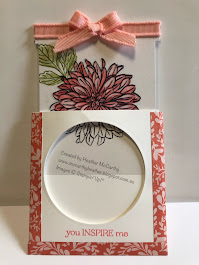
my "Something Saturday" video this Saturday was on this Magic Slider Card, in the video I mention that I'll pop the instructions/measurements here too.

However first up the photo....  As you can see I ended up making it in 3 different colours, I just think it's so pretty using the Delicate Dahilas stamp set!  Remember you only have until the end of this month (September) to get this stamp set as it's one of the Sale-a-Bration sets, to get it for free you need to purchase $180 of goodies then you can pick it for Free!

Magic Slider Card, Stampin' Up!, Being CreateAble with Heather

 I promised the dimensions and I've done a Photgraphic "journey" of some of the way I've made it, so I'll pop this below, If you want to see the products I've used click on the links at the bottom and you can easily add the ones you need to your shopping card.

First up you'll need

  • a 1/2 sheet of A4 (cut longways), should measure 29.7cm x 21cm score it at 9.9cm in from both sides, so it folds into 3 equally.
  • you'll also need a piece of card 9.5x11.5cm
  • And a piece of window sheeting the same size 9.5x11.5cm
  • cut a hole in the front of your card I used the Layering circle dies (you'll see them in the link below)
  •  now you need to create the bit that will hold the slider part of your card in position (so it doesn't fall out of the card)  Open the full card out, and on the top end (away from the circle), you need to create a small fold inwards, I went with 1/2cm square, check out the photo
  • Next you want to create the same sort of thing in the corner opposite it, so cut a slit 1/2 cm long, then fold it inwards as shown in the photo below
  • when you fold it up again it should look like this:

  • Next create the slider, card should measure 9.5x11.5cm, you need to cut a chunk out of each side, it's shown here with the longest side on the top, I've left 1.5cm on one end and 1cm on the other end and gone in by about 0.5cm (not an exact science!)

  • this is how it should look measured up against your card
  • you then need to flap the front down and draw round the circle to know where to place your image
  • I then had to use my stamparatus to line things up properly, so, fit your card into the stamparatus (up into the corner) lay the stamp onto it where you want it then pick the stamp up with one of the plates, ink it up and stamp it with whatever colour you want.
  • replace the plate with your other stamping plate, and line up the next stamp directly on top of the stamped image, again pick it up with your stamping plate, However this time lay the window sheeting on top of your stamped cardstock and stamp the outline image using stazon directly onto the window sheet.
  • now you want to add any extra stamps to the white sheet (I added leaves)
  • then you need to join the 2 images together, I used a strip of tear & tape adhesive, which I pulled part of the end up, so I could line up the images first before removing the rest of the backing:
  • now to assemble your card!  The white piece goes in the back 1/3 of the card base, once its in you can glue the first small flap you cut kind of round and behind it (sorry I couldn't photograph it, best to view the video, it'll make more sense on that!)
  • The window sheeting part goes behind the circle cut out if for some reason it doesn't slide up and down easily you may need to trim the sides of the window sheeting slightly

  • now you can decorate up your card (if you plan to daub around the circle, you'd be wise to do that before putting the card together - now she tells us lol!)
  • I've used 10x2cm strips of DSP, and scored in 1/2 at 1cm.  Attached to the 2 sides then across the bottom.
  • Last but not least ribbon!  I've measured the ribbon round the top of the slider section and cut off the amount I needed, then run a line of tear & tape adhesive all the way along the ribbon, allowing it to come off either side, then trim it down (the tear & tape will stop your ribbon from fraying) attach it along the top of your slider section, then create a bow and stick this on top.

Phew I think we're done!  If you make one let me know.  I'd love to see your creations - you're welcome to post them onto my facebook page Being CreateAble with Heather 

Looking for the products I used? Click the appropriate photo or heading for it's "ingredients"


Polished Pink Slider Card

Magic Slider Card, Stampin' Up!, Being CreateAble with Heather


Flirty Flamingo Slider Card

Magic Slider Card, Stampin' Up!, Being CreateAble with Heather

Cherry Cobbler Slider Card

Magic Slider Card, Stampin' Up!, Being CreateAble with Heather
 

I hope all these links work! and this inspires you to have a go and create your own magic slider cards

God Bless love

Heather xox

I'm Dreaming of a Pink Christmas

 Hi there Creators

Well maybe not "dreaming of a Pink Christmas", but with these cards, Pink looks good for Christmas lol!

Whimsy & Wonder Suite, Stampin' Up!, Being CreateAble with Heather


I have put together a special kit for you, 6 cards plus the box.  In this kit you'll receive

  • The Kraft Gift box to decorate
  • 1/4 pack of ribbon (more than you'll need)
  • 6 base cards with envelopes
  • 1 page of snowflakes (more than you'll need)
  • 1 pack of Basic Pearls (more than you'll need)
  • 1/2 Pack of the Whimsy & Wonder Specialty Designer Series Paper
  • Paper Instructions included with the kit 
  • Video Instructions YouTube link emailed to you.

All the card stock will be cut and scored appropriately for you.   And the kit will be mailed out to you.  Order your kit by Friday 17th September,  I will order over the weekend, and hope to have the order by (fingers crossed 27th depending on mail, so will aim to have the kits in the mail on 29th, but will keep you informed if there's any changes to that)

There are a couple of options to this kit:

  1. Purchase the kit as a "Stand Alone" Card kit  $50
  2. Purchase the Whimsical Trees Bundle $89 (click on the link to view it and purchase it so it comes direct to you), and purchase the kit from me for $35 and receive instructions for a further 6 cards (emailed to you)
  3. Or Purchase the Whimsy & Wonder Suite $139.50  (click on the link to view it and purchase it so it comes direct to you), and EITHER choose to receive all the instructions for the 12 cards emailed to you for free (with videos), OR purchase the kit from me for $35, and receive instructions for a further 6 cards emailed to you.
 Bear in mind that until the end of September, Sale-a-Bration is still on, so for every $90 of goodies you purchase you get to pick a FREE Sale-a-Bration product!!

 HOW TO PAY?

You can deposit direct to my CBA account, the exact amount plus your name

Heather McCarthy; 063828 10092273

Or you can use one of these payment links (I do pass on the fee I'm charged, which is 1.75% plus 30c)

Pink Christmas Full Kit without Bundle purchase ($50 option)

Pink Christmas Kit I've purchased the Bundle or Suite separately ($35 option)


 Click this link to see a list of all the products I have used to create these cards:

What Heather used 

 This is the photo of the "extra" cards for those who order the bundle or suite:

Whimsy & Wonder Suite, Stampin' Up!, Being CreateAble with Heather

If you're reading this, and part of my Stampin' Up! Team (The CreateAbles, you will have access to the instructions and videos for this class, if you still want the kit contact me!)  If you're not part of my team, why not join?  Sale-a-Bration is an amazing time to join with extras - check it out here:  Join my Team

I hope these cards inspire you to create (and make it a "Pink Christmas"😃)

God Bless love

Heather xox
Nuts about Squirrels

 Hi there Creators

There's Something about squirrels.... (Mary doesn't do it for me 😂) 

So when this cute little Nuts about Squirrels set came out I knew it would end up in my collection.   Coming from England to Australia it's one those creatures that aren't over here, when I took the boys back to England a few years ago they were fascinated by the squirrels in one of the London parks, although most are now Gray squirrels I still prefer the red ones.

Check out the Stamp set with this link: Nuts about Squirrels (you can purchase it from there too, and at only $30 what a bargain!!)  Oh and while I'm thinking of it for every $90 you purchase you get to pick a free Sale-a-Bration product, check them out in this link: Sale-a-Bration Products.  Till the end of September.

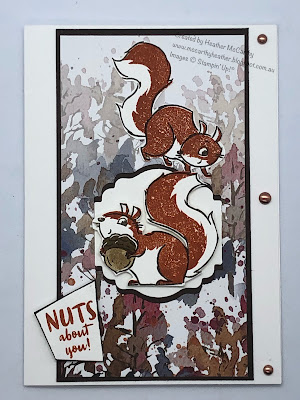
Ok, so my first card I made is this one here:  this one I just stamped directly onto my card, then stamped 3 spare nuts, and cut these out by hand, and the saying stamped and cut by hand, I liked the idea of the saying being in an asymmetrical "box", I think it adds to the cute/cookieness of the stamp set. I've used the following inks: Early Espresso, Cajun Craze, Soft Suede and Garden Green, plus of course some dimensionals to pop up my saying and nuts 😉

Nuts about Squirrels, Stampin' Up!
 

Then I remembered this paper.....  Beauty of The Earth Designer Series Paper (click on the link to check it out)  Oh my goodness you would think this paper was made for the Squirrels!  I've also added in some of the beautiful Brushed Metallic Adhesive backed dots (again check out the link) Oh and the squirrel fits nicely on the Label Me lovely Punch, it's a great size for larger images this punch! This card I also used some Early Espresso papers to "mat" my Beauty of the Earth paper (and a bit of Multi-purpose Liquid Glue)

Nuts about Squirrels, Stampin' Up!, Beauty of the Earth DSP
 

One of the other designs in the pack, and this is the card I showed on my Something Saturday video this week you can view it on my YouTube channel or on My Facebook page, again some of the Brushed Metallic dots (although I do end up cracking up laughing when I put the first dot down - oops might not have been the best placement behind the squirrels bottom!  I've used Cajun Craze card to back my Beauty of the Earth with this card, and the sayings on all cards are dipped in the corresponding ink pads, to create the "edging" to them.  Of course I also use my trusty Paper Snips to cut out my squirrels (it's fabulous having such sharp scissors).

Nuts about Squirrels, Stampin' Up!, Beauty of the Earth DSP

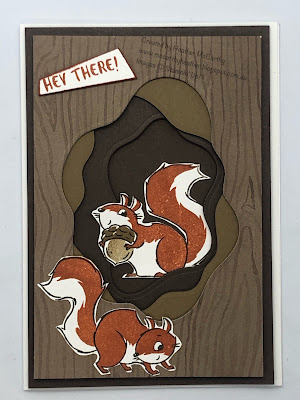
 Ok after being inspired by Pinterest, I made this card too, someone else had made one with a "hole in a tree" and I loved this idea so made one of my own using the Layering Diorama dies and again using the Beauty of the Earth Designer Series Paper - how handy is this wood grain side of the paper?

Nuts about Squirrels, Stampin' Up!, Beauty of the Earth DSP

 I love this stamp set and it's one of those ones I'll be keeping long after it retires.

If you love what I've made you can order all the goodies I've used just by clicking on the link below: (you can tick and untick things as you like on the link and it'll add it directly to your shopping cart, bear in mind for every $90 you spend, you get to pick a free Sale-a-Bration item - Yay!)

What Heather Used

And if you're thinking of spending a heap, why not just join to get the regular discount, plus you'll get $235 of goodies for only $169 AND during Sale-a-Bration you get to pick out an extra bundle from the mini, Wowsers hows that for value?!  any questions just ask me! or go here:  Join Heather's Team The CreateAbles.

 I hope these cards have inspired you to create

 God Bless love

Heather xox

Adding colour to Patterned Papers

 Hi there Creators,

Have you ever thought about adding colour to your designer series paper?

I was playing around last night and gave it a go..... (you can tell when I'm on holiday my brain starts trying new things lol)

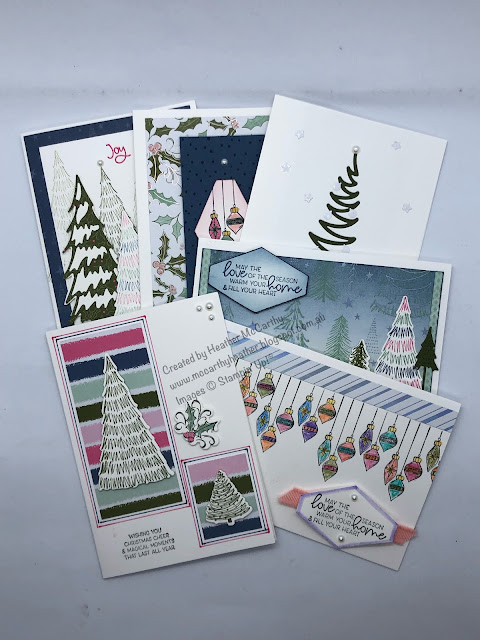
Whimsy & Wonder DSP, Stampin' Up!, Being CreateAble with Heather

So I've used the Whimsy & Wonder Specialty Designer Series Paper (keep your eyes out for something else coming soon with these papers)  How stunning are the papers! they have iridescent designs on each sheet, WOW!

The top piece with the trees on it I've used my Blending brushes to blend some Misty Moonlight into the top of it, then some Mint Macaron into the bottom, then the bottom piece I've used Polished Pink to really make the stripes Pop!

Give it a go and let me know how it turns out.  And don't forget to join my mailing list, so you know when I post more.

Hope this inspires you to create

God Bless love
Heather xox
Click on this link to check out what I used: What Heather Used


Create a Camera Shutter card

 Hi there Creators,

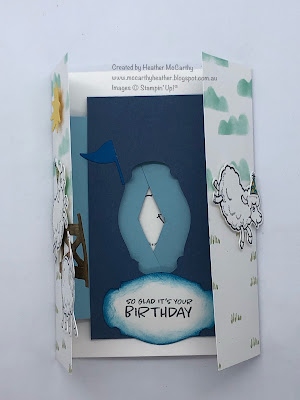
Well my Something Saturday this week is showing you how to create a Camera Shutter Card (I'm not sure if that's what it's called but that's what I'm calling it 😀), so here is the card.....

Camera Shutter Card, Stampin' Up!, Counting Sheep

Camera Shutter Card, Stampin' Up!, Counting Sheep

The photos above are the finished card from the video, I did add a little to this one.

Anyway the basic ingredients are:  

You will need 1 piece of A5 card for the card base, you'll need to "gate-fold" this, which means scoring at 5.25cm in on each edge.  It gives you the usual A6 size card but the opening is in the middle.

You'll also need 2 pieces of 7.4cm x 10.5cm, which need to be scored on one side in by 1cm

And one piece of 14.8cm x 7cm, scored in at the top and bottom by 1cm

You'll also need an appropriate punch ideally one that's fatter in the middle and tapers towards the ends slightly.

Also a pencil, rubber, ruler and glue  Oh and some images to stamp

I've used the really cute Sale-a-Bration Counting Sheep stamp set and Sheep Dies (you can only get each of these by purchasing $90 of other Stampin' Up! goodies - so worth it, and the bonus is that you end up with heaps of goodies all in one go lol)

I recommend decorating your outer card and single strip (the one measuring 14.8cm x 7cm) before you put your card together, if there's any other parts you want to decorate do them too!

I've taken a heap of photos of the stages, so I'm putting them below, but feel free to watch the video it should be clearer!

first up the pieces you'll need:

As I said earlier make sure you've stamped and decorated all the bits first before putting your card together.  The 2 middle pieces (10.5cm x 7.4cm) have one side scored at 1cm, make sure this is well folded (use the bone scorer)  the fold needs to be upwards on your card, put glue on it then flap the side part of your card down onto it, repeat for the other side (make sure the 2 sides line up)
next close your card up and mark (lightly with pencil) the middle of the card
open one side and mark the yellow (in my case) piece
repeat for the other side
now draw a line from each corner to the dot
now test to see if it will close properly with the flaps intertwined
Next take the 14.8cm x 7cm piece and mark where the punched shape should go, then punch it out, and attach 1 end only of this piece to your card.

After this you position what ever you want under the punched shape in place, then glue down the remaining flap.   Voila your card is done! 

I'm going to be teaching this to the kids at my youngest sons school, so I thought I'd show you a couple of other pictures I've taken too.....


Very simple all done with white cardstock and I've just drawn lines on with my Stampin' Write markers to give interest to the layers  I was thinking theirs would look cute with photos of themselves in the middle bit, and I'm sure they'll want to decorate them their own way.

Anyway I hope this inspires you to have a go and create your own Camera Shutter Cards!

God Bless love

Heather xox


6 quick and easy Christmas Cards

 Hi there, 

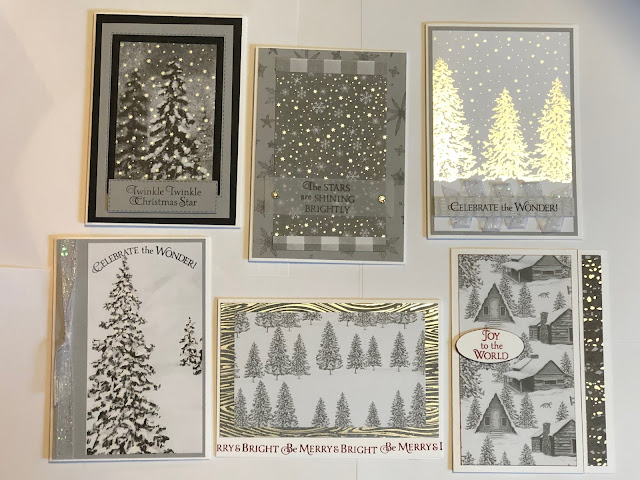
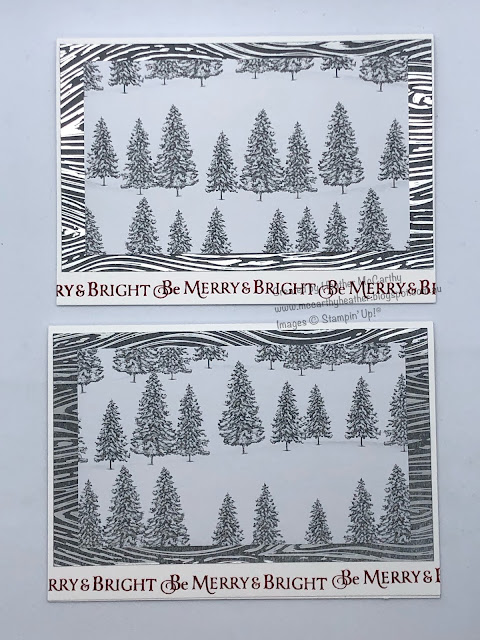
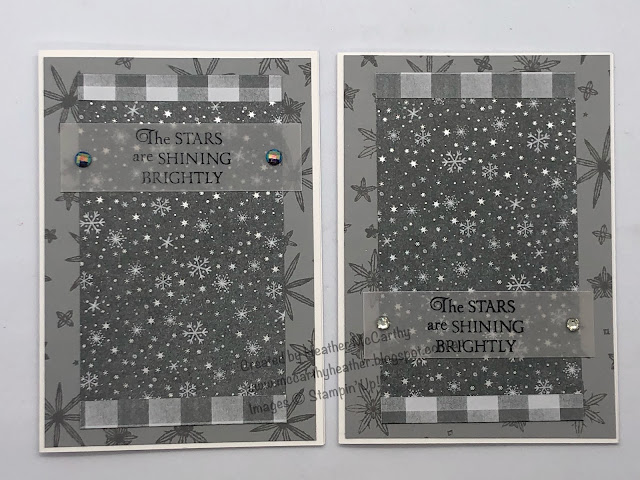
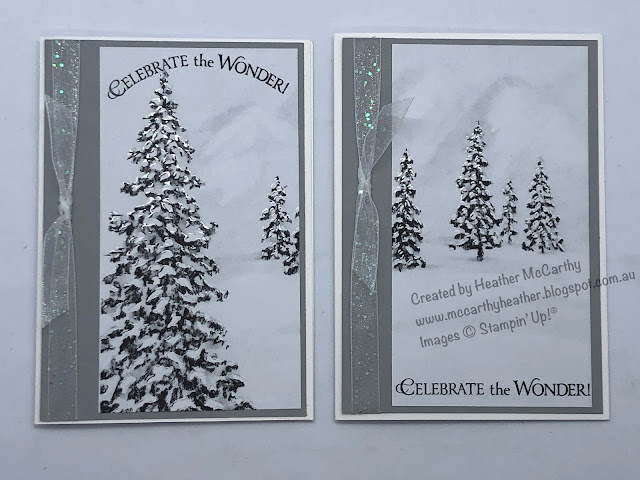
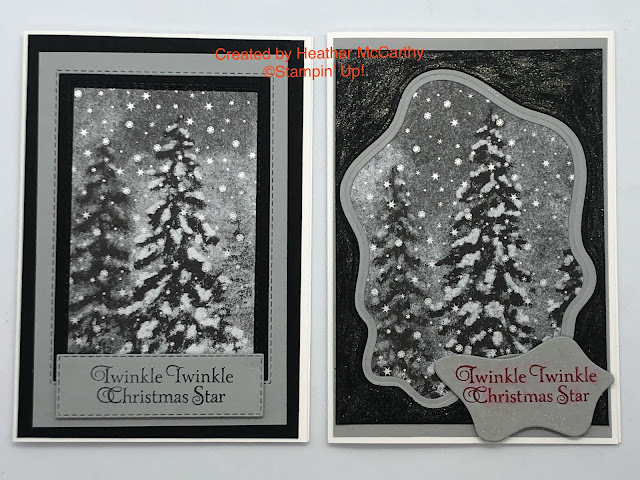
well my "Something Saturday" this week was these 6 Quick and Easy Christmas Cards using the elegant Peaceful Place Specialty Paper, the Stars are Shining Stamp set  and the fabulous White Glittered Organdy Ribbon and I promised in the video that I would pop the measurements up on my blog, so here goes.......

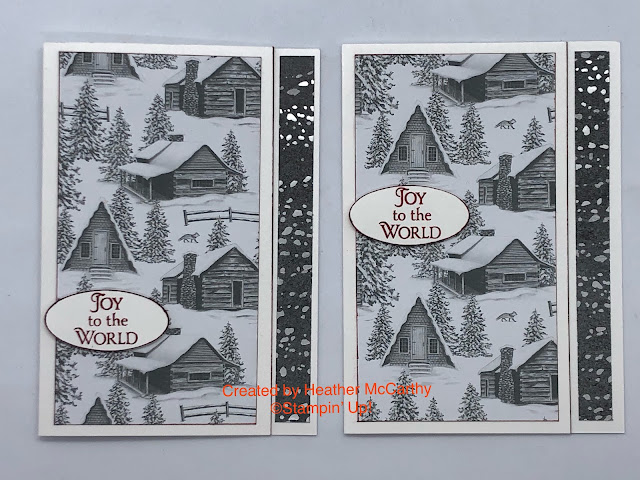
Peaceful Place specialty Paper, Being CreateAble with Heather, Stampin' Up!

 Those are the 6 cards, however as I did repeat them all I've then taken photos of each with it's "pair", so I can give you the instructions for both if they ended up different.

Peaceful Place specialty Paper, Being CreateAble with Heather, Stampin' Up! 
however this first card didn't end up much different!  This card I've cut the same paper and used both sides, the underneath piece is cut to 3.5" x 14.5cm (sorry about the combination of cm and inches!)
the top piece with the trees is 3" x 5" Then I've just stamped the saying across the bottom of the card.
Peaceful Place specialty Paper, Being CreateAble with Heather, Stampin' Up!

This next card has a base of Smoky Slate, cut to 14.5cm x 10cm, then the specialty paper is cut to 6" x 9.5cm  with 1/2 " cut off the long end bringing it down to 5.5", this is then turned over to add the saying to it.  On the card in the video I show adding the ribbon under the saying on the second card, just a case of adding a line of Tear & Tape Adhesive under the saying, and concertina'ing the ribbon back and forth, then trimming off when you've got enough.

Peaceful Place specialty Paper, Being CreateAble with Heather, Stampin' Up!

This card looks kind of dark in the photo, but there are a lot of silver stars, so it's not quite so dark!  The Smoky Slate card is cut to 10cm x 14.5cm, and the Specialty paper cut to 6" x 3", then 1cm folded over at each end, and stuck down.  I've stamped using smoky slate ink onto the background piece (stars from the same stamp set).  Then the Vellum piece is 2.5cm x 9cm, and stamped with Stazon Black. and as you need to use a couple of glue dots to hold it in place. you'll want a couple of blingy bits to cover the dots so they don't show through the vellum.

Peaceful Place specialty Paper, Being CreateAble with Heather, Stampin' Up!

This sheet was an interesting one to use as it has a pattern that is repeated 4 times on the 12x12" sheet, so I've cut it down to the 6x6" square then in 1/2 at 3", and trimmed it down to 5.5" (1/2 " off the end).  Again it's got the Smoky Slate under it 10cm x 14.5cm.  The ribbon is attached down the side of the smoky slate piece.  The great thing with the stamp set is that as it's photopolymer, you can curve the words!

Peaceful Place specialty Paper, Being CreateAble with Heather, Stampin' Up!

This one I originally made using the Diorama dies (one on the right), but I wasn't so keen on it and felt the Stitched Rectangle dies would give me more what I was looking for.  I do prefer it, what do you think?  This one didn't really have specific measurements for the specialty paper, however for the one on the left I cut black card to 10cm x 14.5cm and the smoky slate to 9cm x 13.5cm.

Peaceful Place specialty Paper, Being CreateAble with Heather, Stampin' Up!

And the last ones!  So with this one I've cut the specialty paper to 3.5" x 6", then taken 1/2" off the bottom, then 1/2" off the side.  I've then taken 3/4" off one side of the base card, and attached the long strip of specialty paper on to the gap left in the card.  And the main block of specialty paper to the front of the card.  I did discover that Joy to the World fits nicely into the Double Oval Punch!

Did you know that at the moment we have Sale-a-Bration?  for every $90 of products you purchase you get to pick a FREE Sale-a-Bration product - yay!   So potentially if you liked these cards you could order the Peaceful Place Paper ($26), Glittered Organdy ribbon ($14.75) and the Stars are Shining Bundle (punch and stamp set for $53) which totals $93.75!  you'd qualify for a FREE extra product from the sale-a-bration list, check out what you could choose here: Sale-a-Bration products.

If you are placing an order and it's UNDER $250 and you'd like to be in the draw for the host freebees, use this host code:  44QKXGUZ. If your order is over $250 don't use the host code as you'll qualify for your own free goodies.  

Alternatively why not think about joining Stampin' Up! and my team The CreateAbles?  For $169 you can choose $235 of goodies plus if you join during Sale-a-Bration you get to pick an extra Bundle from a choice of 12 bundles in the new mini catalogue!  Ask me for more info if you're interested.

I hope these cards inspire you to create.

God Bless love

Heather xox


Creating a Faux Stained Glass Window

 Hi there!

In my latest YouTube/Facebook Video I showed how to create a faux stained glass window on the top of one of the new Stampin' Up! Kraft Gift Boxes.  These boxes are fabulous as they actually fit cards and envelopes in them!  Yay!, as I quite like to give some of my cards as presies from time to time I'm really stoked that these are the right size.

They have a little window at the top of them, which is where the stained glass bit comes into play....

Faux Stained Glass, Stampin' Up!, Angels of Peace

So how do you do this?

Before you put the box together, using Black Stazon Ink stamp the image onto one side of the window, then use a black permanent marker pen to draw on the rest of the stained glass bits.

Turn the box over, and on the opposite side colour in the parts with Stampin Blends (alcohol markers)  NB do not colour in the side that has the stazon on it!  if you do the stazon will run, and you'll end up with muddy colour.

Pop your box together and viola one stained glass window effect.

Faux Stained Glass, Stampin' Up!, Angels of Peace

Faux Stained Glass, Stampin' Up!, Angels of Peace

Just in case, you do want to check out the video:

I have used the new Angels of Peace Stamp set, so pretty!  and there's heaps of fabulous goodies in the new Mini Catalogue, have you checked it out yet? and did you know that until 30th September for every $90 you purchase you can pick out a FREE Sale-a-Bration item?   Or, if there's so much you want, that getting a discount would be worth it, why not join my team, The CreateAbles, during Sale-a-Bration when you join not only do you get the amazing deal of pick $235 of products and only pay $169! but also you can choose from one of 12 new bundles from the mini catalogue! (bargain) let me know if you want more details!
 

I hope this inspires you to create, and have a go!

God Bless love Heather xox


Something Saturday - 2 from 1 Stripes & Trees

  Hi there Creators Today I'm doing one cut with my Designer Paper and creating 2 different cards - gotta love it when you can get 2 for...