Something Saturday - Brightest Birthday Kit

Image
  Hi there Creators Today we're checking out one of the new kits, I have to say WOW!, maybe it's the holographic blingy bits (ooooo bling....🤣)  if you're a regular reader of my blog or watch my YouTube or Facebook channels then you'll know I can't resist bling.  Anyway check out the kit here: Brightest Birthday Kit And here are the cards it makes.... oh and their matching (also blingy) envelopes. Then you'll notice on the first card with the balloons it has a box that has the holographic outline, which is actually a sticker, so in the video I show you how to get the sticker off and onto a separate piece of card without having to pick it off and re-piece it yourself. And this is the card I made with it:  I probably should have used the same Azure Afternoon colour, but I had this piece of Shy Shamrock hanging around my desk, so chose to use that instead, and seeing as the star stamp hadn't been used I figured I should put it into action.  Its not a bad littl...

Something Saturday - Night Sky Pastels

 Hi there Creators,

Continuing on our Pastels journey, I have "night sky" pastels to show you this week, I was amazed at how well the pastels show up on dark cardstock.

Here are the cards I made up....

Night Sky Pastels, Stampin' Up!, Home & Garden Bundle

this first one I made up with a black background, and really wanted it to be looking out of a window (this is when I wish I had Window Flower Box dies)  however I used the exceedingly useful Stitched Rectangle dies instead😃, as I wanted it to look like the inside of a shed I've "hung" a few tools off the window sill (courtesy of the Home & Garden bundle) and used the Brick & Mortar 3D embossing folder for the wall.


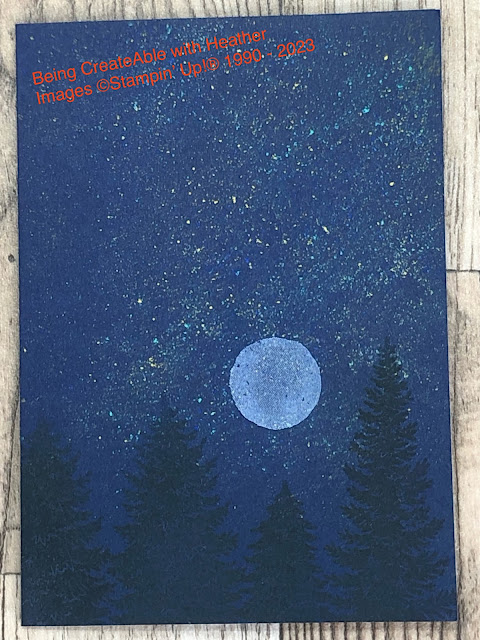
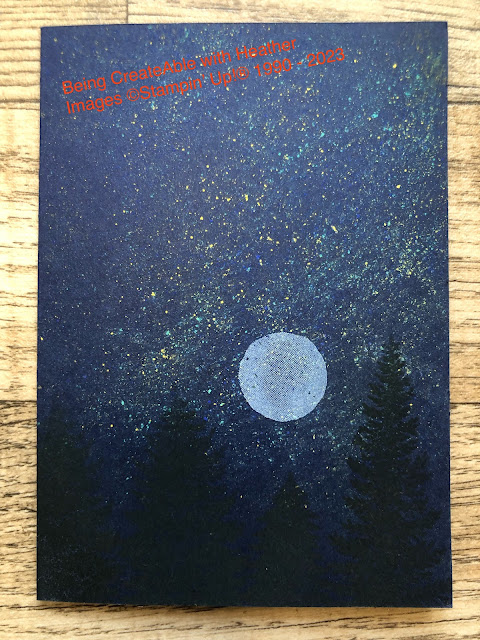
Night Sky Pastels, Stampin' Up!, Evergreen Elegance
then this is the card I made up in the video (couple of photos as I couldn't make up my mind which was better 🤣), Here is the link to the products I used in this one: What Heather Used

Night Sky Pastels, Stampin' Up!, Evergreen Elegance
So, down to the nitty gritty, how do you do this?

Take a dark coloured cardstock (I used Night of Navy in the video), then lightly grate pastels onto it (I used a serrated knife to scrape mine), which creates a dust of colour on your card, I used Daffodil Delight, Coastal Cabana and a bit of Night of Navy (not sure that one showed up on this, but it works on the black).

Take a piece of baking paper, and carefully cover the dust, press it down well into your card (I used my bone scorer) try not to move it as you do this or you end up with it smudging.

Take some hairspray, and spray this over the card (this will set the pastel in place, otherwise it will wipe off) let it dry then decorate your card however you wish.

Check out the video here:


 I hope this inspires you to create!

God Bless love

Heather xox


Comments

Popular posts from this blog

Crafty Collaborations Sale-a-bration Blog Hop

Class cards for May

Something Saturday - Twisted Star Ornament