Whale Done Bundle Focus for October

 Hi there Creators,

For October I have created a kit to go with the Whale Done Bundle, it's actually such a useful bundle as you can use it for anyone - men, women & kids!

the Whale Done bundle itself costs $54.75.  

Option 1: With the kit I'm offering you, the Whale Done bundle, also a 1/2 pack of the beautiful Whale of a Time Sequins (approx 750 in a pack!), and a 1/2 pack (24 sheets) of Whale of a Time Designer series Paper, and the supplies and instructions to create 6 gorgeous cards, 2 of which are fancy fold cards.  Total cost for this kit is $80.00 click this link to order

Whale Done Bundle, Stampin' Up!

Whale Done Bundle, Stampin' Up!

Option 2: If you already own the Whale Done Bundle, good news! you can still order the kit which includes the 1/2 pack of sequins, 24 sheets of Designer Series Papers, the supplies and instructions to create the same 6 cards, for $40 click this link to order

Option 3: If you're part of my Stampin' Up! Team, The CreateAbles you'll have access to the instructions anyway, but if you'd like the Kit including the Designer Series Papers, sequins and other cardstock all ready to go (same as option 2)  I'm happy to do this for $30.  Click this link to order

You will need, glue, scissors, ink pads and Clear Stampin' Blocks to put your cards together.

Place your orders by Friday 9th October as I'll be ordering all the goodies then, I'm hoping that the mail won't be totally abysmal!  so that I can get the kits out from 26th October 😊  

I hope even if you can't join in these cards inspire you to create!

God Bless love

Heather xox


Hand-made Birthday present

 Hi Creators, 

 I had to wait to share this with you till after I'd given it to my friend Jenny.  While Sam (my youngest son - 9 years old) and I were doing schooling over the last months, I bought some coloured clay which we made a few little bowls with, they're really cool!  I wanted to make a sort of swirly look with the clay which I think we achieved. 

So when I was thinking about Jenny and her birthday I know how much she loves purple, and I thought I'd like to make her a purple bowl, I love that when I make something for someone, I get to think about that person while I'm making it and the great times we've spent together!

I was remembering some of the Stampin' Up! events that we've been to together, Jenny was the first person to join my team, and I've been so blessed to have her there with me through so many fabulous events!

Anyway I'm sure by now you're saying - get on with it Heather, let's see the photos!  So based on my ramblings, guess which one I made for Jenny?

Yep the purple one in the left bottom corner!  then I had some clay left over, but not enough to make another bowl, so I made some beads with it, which excitingly was enough to make a necklace with, yay gotta love that!  Then Yay I had an old Stampin' Up! box that fit the whole lot perfectly, decorate up the box, and voila.......


I'm hoping that she liked it as much as I enjoyed making it!  I specifically made one of the cards from the last post for her too, after I realised it was turning purple, so this uses the Plush Poinsettia Specialty Paper.


I hope this inspires you to create!

God Bless love
Heather xox


How to colour in Flocked Vellum

 Hi there Creators,

I've added a new video to my collection that I thought I'd share here with you too, (and the "still" photos)

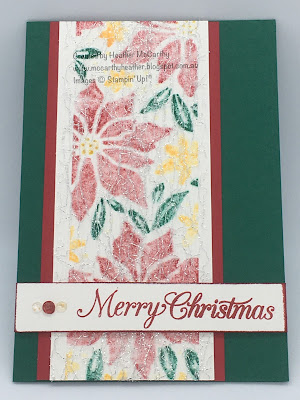
In the August to December "mini" catalogue there is this gorgeous flocked Vellum called Plush Poinsettia Specialty Paper.  It's so pretty on it's own, but I really wanted to work out ways to colour it in too, so I've devised 3 ways you can do this, as I mention in the video I don't recommend using Stampin' Blends on the flocking itself as if you overdo it it'll rub it right off.


Hence my first method is using the normal ink pads and daubers, where you rub the colour into the flocking, Here's how it turns out:

How to colour in flocked vellum, technique

How to colour in Flocked Vellum

The second technique is where you turn the vellum over, putting it onto a dark surface and colour on the back using Stampin Blends (alcohol markers), this is how this technique turns out:

How to colour in Flocked Vellum
And the last technique is to colour directly onto the flocking with Stampin' Write Markers, (very carefully!)  and this is how this one turns out:

How to colour in Flocked Vellum 

With this technique you have the added bonus of squishing out the excess ink onto spare card stock (I run mine through my Cut & Emboss machine) and making up more cards/projects with it, like this one:

How to colour in Flocked Vellum

Well I hope this inspires you to dig out your flocked vellum if you have any and have a play with it, if not, I thoroughly recommend getting some!😀

God Bless love

Heather xox

Bikers Father's Day card

 Hi there Creators Happy Father's Day!

some of you may know that my husband Tom, has an Indian Dark Horse motorbike, he recently got a new helmet for it (which at the time I said, you know that's your Father's day presy!)  anyway I thought I'd make an appropriate "biker" card - here is the bike! (he's keen on matt black)

So I figured I could maybe make a helmet card, my initial attempt wasn't too successful and after checking with child #2 Josh (also loves motorbikes) it got re-vamped and here is the final result, which I'm pleased to say Tom was impressed with :)

Bike helmet card
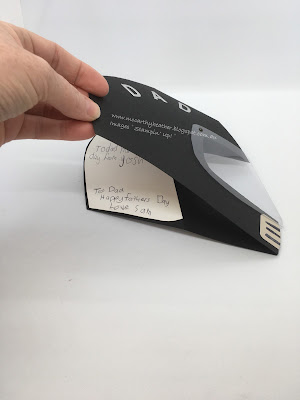
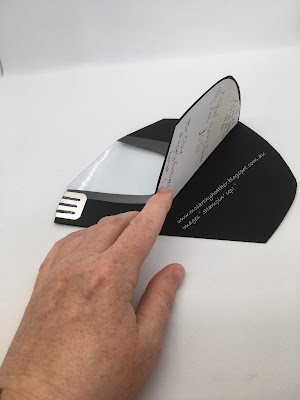
As you can see I've used some window sheeting for the visor with a couple of brads -one each side so the card bottom can separate, and the visor can go up and down (I was pretty cuffed to be able to do this!)
Bike Helmet card
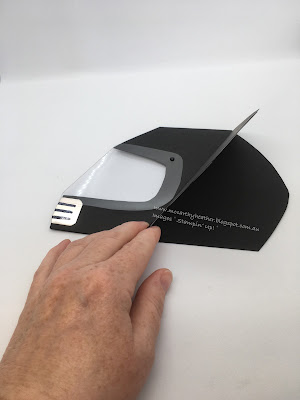
Although the main join is at the top (I started with an A4 sheet folded in 1/2, and cut from that)  I've added the silver mouth breathing piece, this does join up one side of the card, which then limits how you can open the card.
Bike helmet card
so I turned the card over and scored a line that could be flapped back.
Bike helmet card
which I then attached a piece of white for the boys to write on
bike helmet card

And that's that!  the most difficult parts of it was getting the shape right and working out how to cut the visor, I ended up having to review the real helmet a number of times.

Have you tried making a card that has a rather different shape to it?  show me what you've made!

I hope this inspires you to have a go!

God Bless love

Heather xox


Easy Shaker Card with tutorial

 Hi there Creators,

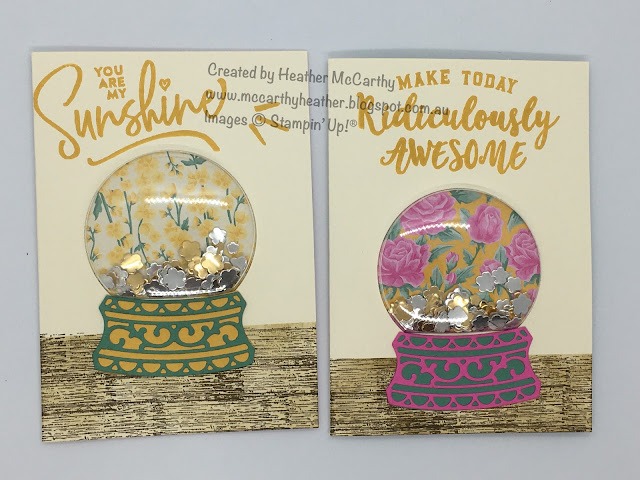
Thought I could inspire you (and give me a break from home-schooling) with an Easy Shaker Card (with video tutorial), I've always had a spot of bother with shaker cards where the shaker'y bits stick to the glue round the outside and then don't move at all (not a good look for a shaker card lol).  So with this in mind I've tended to steer away from them, however.... bless them Stampin' Up! have bought out Shaker frames, and a couple of cute stamp sets to go with them!  The stamp sets are: Still Scenes and Zoo Globe, and the dies that match are called Snow Globe Scenes dies (click on the links to check them out!)

Whilst I haven't used the "proper" stamp sets with these cards, I have made cards with them in the past, I've found a photo of one of them, using the Zoo Globe, the lady I made it for is keen on Giraffes, don't think I've shared it before as I didn't want to spoil the surprise!

Shaker Card, Zoo Globe, Stampin Up

However that card was not quite as easy as the ones I made for this Easy Shaker Cards!

https://s.tamp.in/R3XFQN

(if you click on the photo then the link it should take you to a list of all that I've used to make these cards, - learning new technology!, let me know if it works, it works for me and wow it's really cool!)

If you'd like to find out how I made them, check out this video tutorial I made:


 Do let me know if you have any questions about it, and I hope you enjoy the tutorial, and have a go at making your own shaker cards!

God Bless love

Heather


Something Saturday - Shepherds Care meets Snowy Delights Masks

Hi there Creators,  Today I thought I'd play around with a couple of my latest goodies, Shepherds Care Stamp set and Snowy Delights Mas...