Christmas In July Card Kit

Hi there Creative Peeps!

Well let's face it here in Australia, Christmas in July is a bit of a thing!, and the last couple of years I've done a Mega Christmas in July Class, for obvious reasons that's not possible at the moment, but I figured I can still make up a special Christmas in July kit.

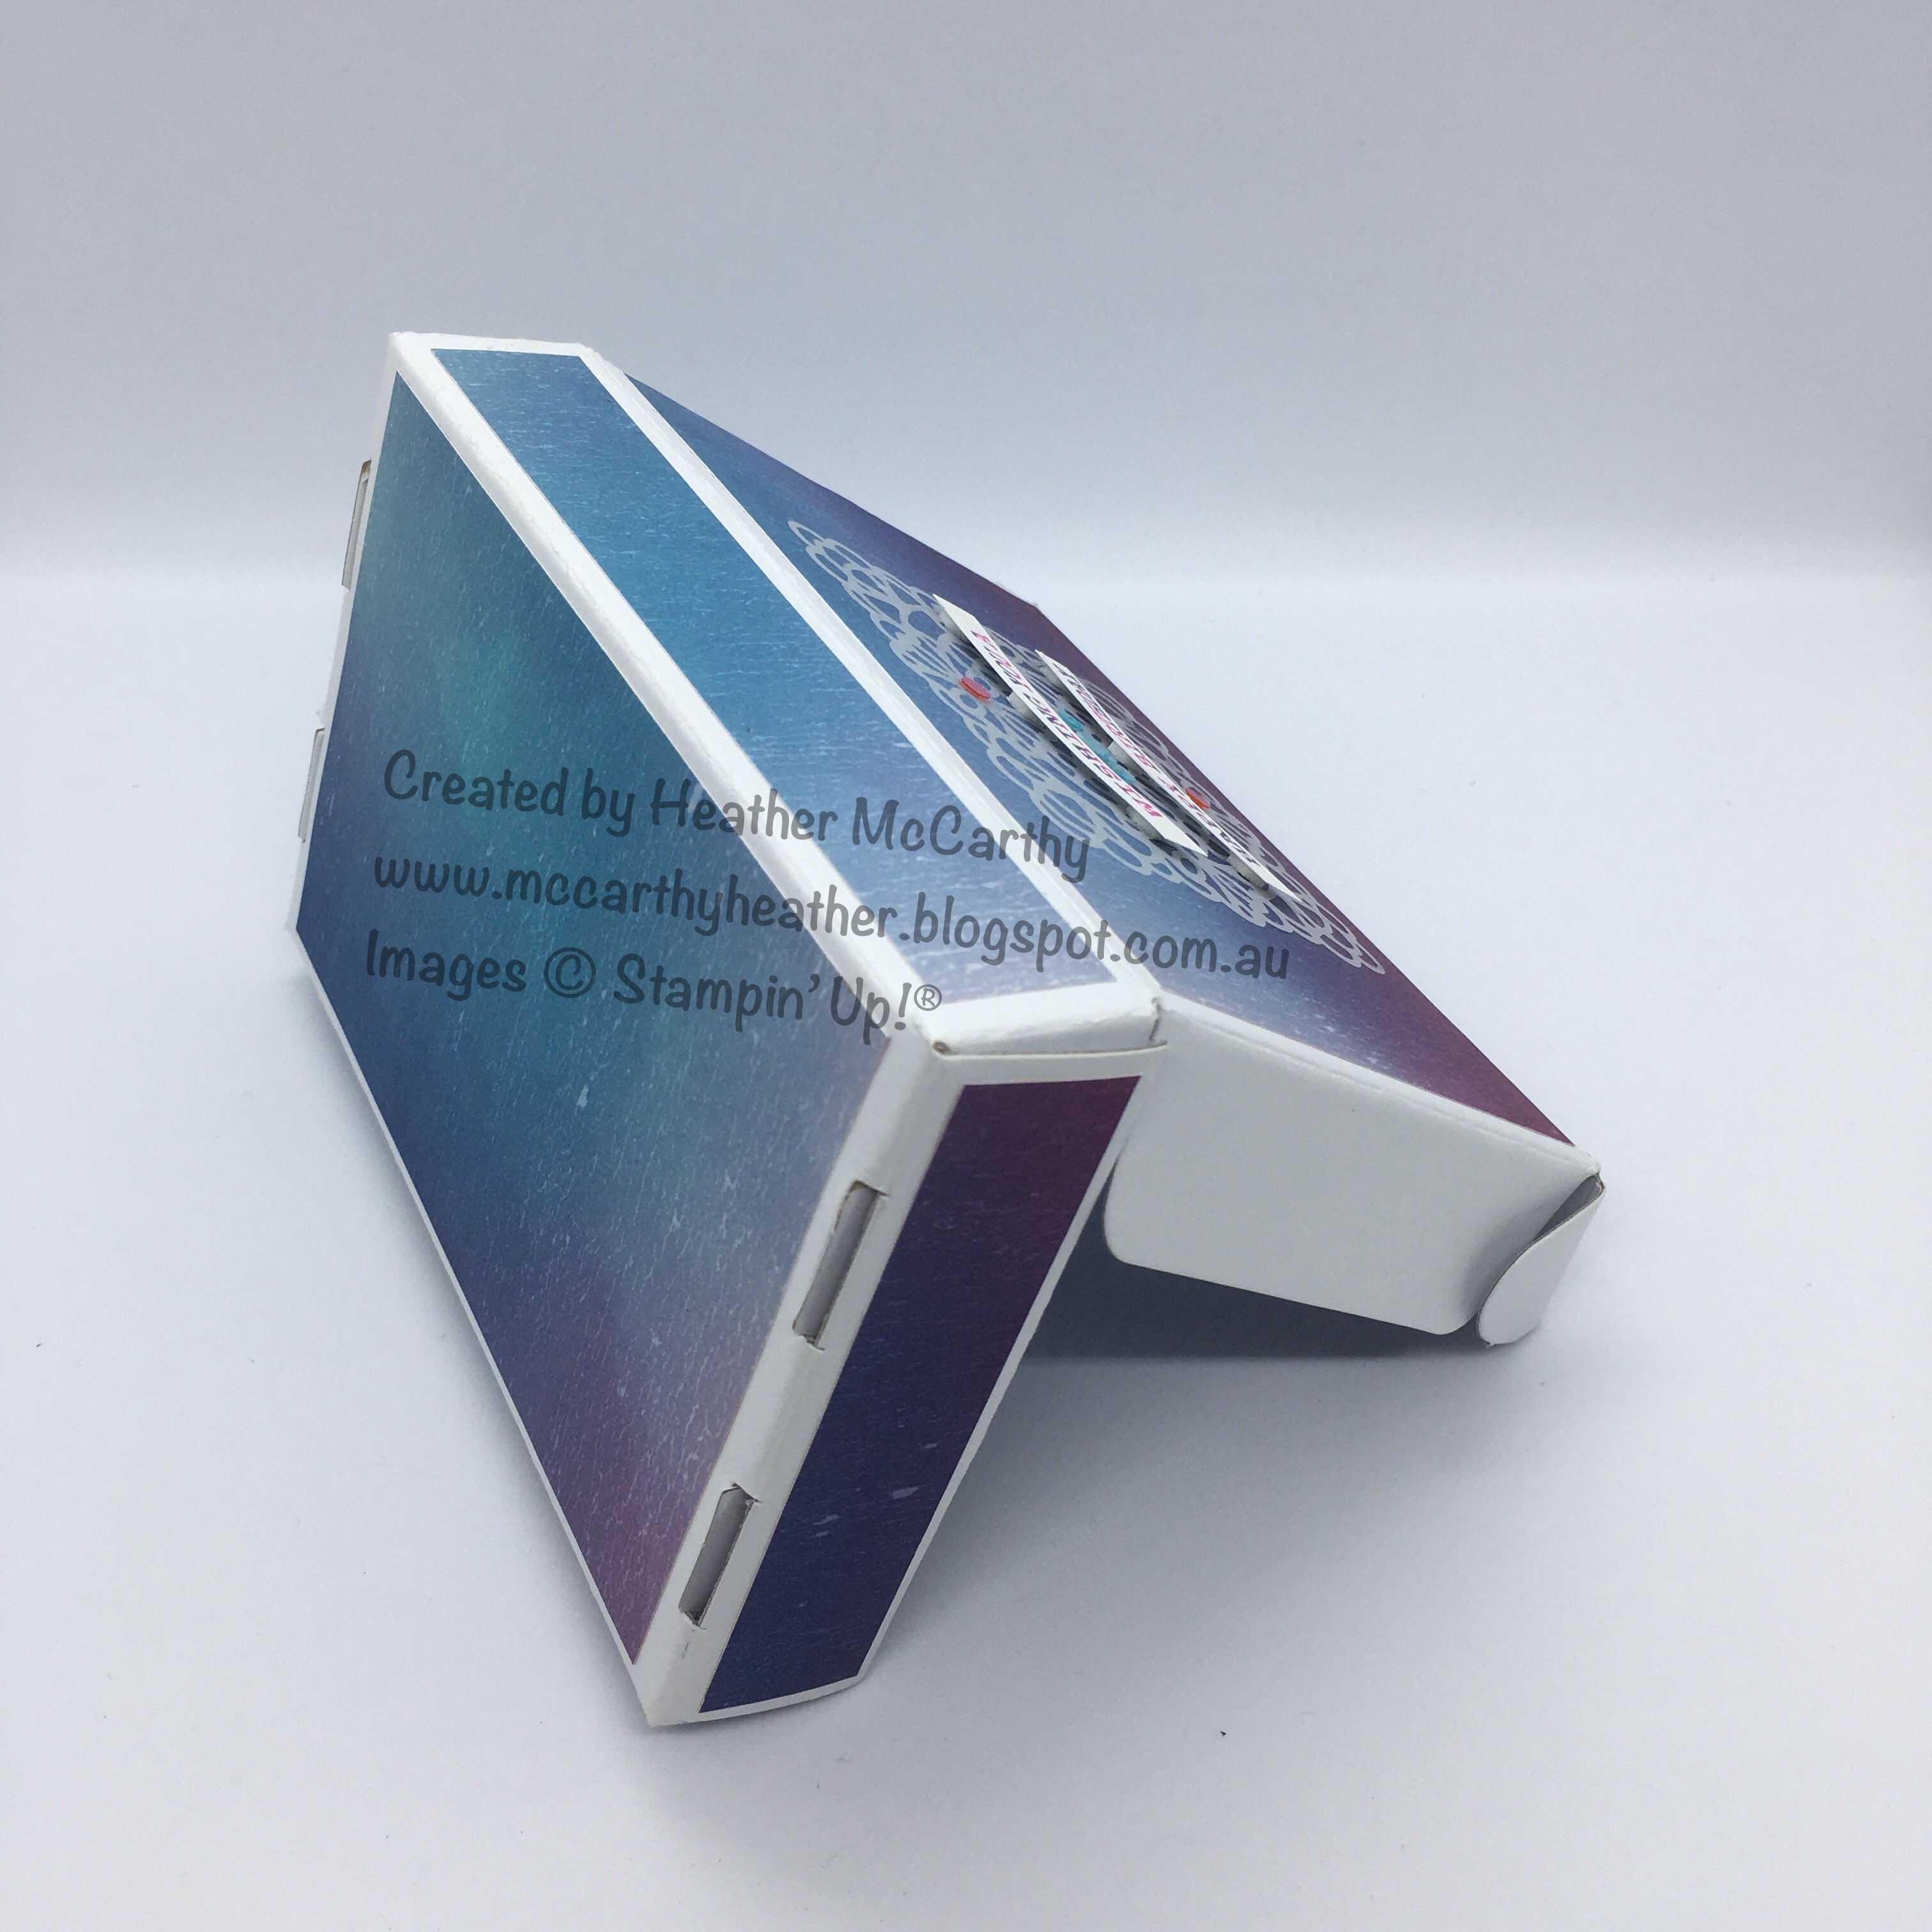
The details; this kit will give you 10 beautiful Christmas cards with envelopes to make. I've used traditional colours; Gold, Red, Green, and Silver. And a cute box to store them in, which you'll also be decorating up, so once you've given out the cards, you could use the box to wrap something special for someone in. You'll get full instructions and I plan to do a video, so I'll email the video out those who order it. Order by the end of the day Tues 14th July and I will be aiming to send out the packs on Friday 24th.

What you'll need: Multipurpose Liquid Glue, and Dimensionals, scissors, either the Itty Bitty Christmas Stamp set, which is $38, and I think is a must for Christmas sayings! or another appropriate stamp set, and ink pads.

The Cost:  The kit cost is $35, and postage for it will be $3.30, if you live nearby then I'll aim to deliver it next time I'm near your town😊  If you are part of my team the cost for the kit will be $25

And the Photos:
Christmas In July Card box

Forever Gold Laser Cut Specialty Paper
Let me know if you want to order a kit, and I'll pass on my bank details to you (make sure you're name is on the deposit!)

Hope these inspire you into starting your Christmas cards early πŸ˜€
God Bless love
Heather xox

Way to Goat

Hi there Creators,
Well I've got to say this was THE set I had to have!  Having raised goats on our property for quite a few years when I saw goats, that was it - "it floated my goat" (as we say in our household).

Let's get down to the nitty gritty...  The Stamp set "Way to Goat"...... the photos.....

This first one was inspired by my good friend Reyne, who said Oh I've got to get that set and make a Conga with them, I loved that idea, so here it is.....
Way to Goat
I've layered the sheet on the Artistry Blooms Patterned Paper, and used some of the dies from the Special Day dies (balloon & grass and saying bubble)
This next card cracks me up, the goat looks fed up and grumpy to me (although when I showed my husband he said the goat looks guilty and fat from eating, which I can see now too)
Way to Goat
 With this card I used the Flowers for Every Season patterned paper, and a bit of vellum.

And the last card, see I thought this goat looked a bit guilty (not that goats really show any kind of guilt, I think they just believe it's their right, kind of like cats!πŸ˜„), and having eaten the cake had now moved onto the flower bed....lol  I do remember our goats escaping occasionally and feasting themselves on Tom (my husbands veggie crops) I'm useless at gardening and it holds no interest for me, except for the food that's produced at the end!
Way to Goat
This was a really simple card, I've coloured the mat underneath with my Stampin' write marker (Magenta Madness), the rest is stamping with a spot of watercolour pencils.

What do you think? how cute are the goats!
Which is your favourite?

Hope these inspire you with your creating
God Bless love
Heather xox

Arrange a Wreath Bundle

Hi there Creators,
I'm making myself a bit of a challenge to make at least 3 cards with each set of stamps/dies that I've bought, so here we are onto day 4 (not sure how long I'll be able to keep it up, but so far so good lol)  I figured while I'm making them I'm going to share them with you all (hope you enjoy it and it inspires you).

Hence, I've moved onto the Arrange a Wreath Bundle today which consists of the Arrange a Wreath Stamp set and the Wreath Builder Dies.   If you end up with a bundle you save 10% on the cost of buying them (bonus) .  Anyway you're not here to hear me waffle!, on to the cards.....

Soooo...... the reason I bought this set was for the wreath's, and Christmas!  however it does come with this cute "Love" heart, and flowers....and bow!
Arrange a Wreath Bundle
For this card I've teamed it up with the Artistry Blooms Patterned Paper, which as I mentioned in the last post, I really love the grading in the paper!, also used the lovely Rainbow Glimmer Paper to create the bow (oh and the Artistry Blooms Sequins for the flower centres, really like the fact they don't have a hole in the middle of them!

Then of course I had to make Christmas cards, it's never too early to make Christmas cards lol!

Arrange a Wreath Bundle
For this card I didn't have any patterned paper that I felt would work behind the flowers, so I made some.  I've just taken my dauber (the paper and ink are both Old Olive) if you ink up your dauber and "puff" it round your card, then using the edge of the dauber, sort of scrape on extra lines, it gives quite a cool effect!  I've also taken one of the cut out pieces and used the piece it came out of to create a mask for the background of the card.  I did discover that the teeny tiny circle die that's in the set, is there to create a circle to go behind the centre of the flower! (who knew! lol)  Oh and I've used the absolutely stunning Brass Foil Sheets, and the Champagne Rhinestone Basic Jewels.

And for the final card I couldn't resist........... And a Partridge in a Pear Tree (did you sing it?)
Arrange a Wreath Bundle
So this card I've used the Artistry Blooms Patterned Paper again underneath, some Diamantes, which I had intended to use for the birds eye, but that didn't look right! (got to improvise lol)  Oh and the Lovely Labels Pick a Bunch punch for the saying, I've punched both ends, I will say with this, that if you're using a short piece of paper, make sure you check the back of the punch to ensure it's in the right place!
The pears are inked up with the Pear Pizzazz, I've used my real red dauber to add a touch of red to one side, then stamped (thankfully there's 2 pears per stamp 😊)

Did you have a favourite? let me know!
I hope this inspires you to get creating.
God Bless love
Heather xox

Friendly Silhouette Dies

Hi there Creators
I'm on a roll! 3rd day of blogging lol  this time I've use the Friendly Silhouette Dies - I know they're not new to the catalogue, but they are new to me πŸ˜€ I think they're pretty cool, there's 4 dies in the pack, 3 of them are large edgelit type dies, and create a scene, which I love.

Anyway you're probably not here to hear me waffle on, so we'll commence with the evidence......
Friendly Silhouette Dies
this first card uses the die that cuts out the palm trees, I've done this in white card, then masked a circle for the moon, brayered over the background, and attached it onto an Early Espresso piece of card, which then is attached to the main card, it's pretty effective isn't it?

Friendly Silhouette Dies
This second card uses the flowers die cut from white card, I've coloured it up with the markers and stuck it down onto the card, voila nice and easy!

Friendly Silhouette Dies
My last card is possibly my favourite, (ties with the palm trees! lol)  for this one again I've used white card, but used both the negative and positive parts of the cut to add more bulk. Again coloured with the Stampin' Write Markers.  I've mounted this directly onto the Old Olive cardstock.  Added bonus the Story label punch and the Label Me Fancy punch seem to happily sit together!

Thanks for joining me today, let me know which is your favourite!

Hope these inspire you to craft in your space.
God Bless love
Heather xox

Hand Drawn Blooms bundle

Hi there Creators,
Thought I'd share with you today the Hand Drawn Blooms Bundle, it's pretty amazing!  a pretty stamp set and really great dies, I've got a couple of cards to show you.

This first one is a nice simple card, the flowers and the stems are 2 different stamps in the Hand-drawn Blooms stamp set, but they fit together very easily, the sayings come in 2 lines, so with this card I've only inked up the one line, and lightly (and roughly) coloured in the flowers with the watercolour pencils.
Hand-Drawn Blooms Stamps

This second card uses the main die from Banner Blooms, how amazing is it?!  it doesn't have dies to separately cut out the saying, so I recommend that you stamp the saying on spare card, then lay the die over it, draw round them both, and cut them out by hand.  I've also used the fabulous Rainbow Glimmer Paper, wow this is amazing!  And if you love glitter, but don't like it coming off on you (or going everywhere) this one doesn't! it clings rigidly to the paper and not you lol
Banner Blooms Dies
And here's a close up to show you the beautiful rainbow glimmer.  Wow isn't it amazing?!
Rainbow Glimmer Paper
I've also used some of the Magenta Madness ribbon (it's one of the new In colours), pretty colour!

Both of these cards are really simple, Card 1, uses just the white cardstock (and obviously the stamp set with pencils)  I've cut an extra piece to stamp the flowers onto, but it wouldn't have to have that step.  Card 2, again uses white cardstock, glimmer paper, (with the die and stamp set) and a bit of ribbon!, so you don't have to have heaps of "ingredients".

I hope this inspires you to know that you don't have to make really complex cards for them to be "wow" cards!
Thanks for reading... till next time
God Bless and Happy Creating
love
Heather xox

Mini Paper Pumpkin boxes and Artistry Blooms Designer Series Papers

Hi there Creators
Just in case the title didn't give it away, we have Mini Paper Pumpkin boxes  which are only $13 for 10 of them!  they're so cute, you can fit the note cards and envelopes  (the link is for the white ones, but there are vanilla ones too) into it, so they're a fair size!  Also they're food safe, so you could put a biscuit in 😊  I've decorated this one up with the Artistry Blooms Designer Series Paper, funny really I didn't think much of this paper when I ordered it but I wanted to see what it was like, now I'm feeling a bit hooked! lol
Anyway on with the photos.....
Mini Paper Pumpkin box, Artistry Blooms DSP
I've cut the Artistry Blooms Patterned paper so the grading on it goes all the way round the box, starting with the flap, then top, back, underneath and lastly on the piece under the flap, then I've cut 2 separate pieces for the sides.  I do love the way this paper is graded up the page to the different colours.
Mini Paper Pumpkin box, Artistry Blooms DSP
On the top I've used one of the square vellum doilies, the saying is from the Hand-Drawn Blooms stamp set, and I've added some of the fabulous new Artistry Blooms Sequins, love the fact that they don't have a hole in the middle of them, so they look more like diamantes (and they've got their sticky bit underneath them)
Mini Paper Pumpkin box, Artistry Blooms DSP

I think these boxes are pretty cool, and I'm planning to use them for giving small pressies a special look.
What do you reckon?  I hope it inspires you with your gift wrapping.
God Bless love
Heather xox


Flowers for Every Season


Hi there Creators,well continuing the Patterned Paper journey.  I moved onto the pretty "Flowers for Every Season Designer Series Paper"  As this paper comes in 6x6" sheets I've cut mine to 2x3", and decided to have a go at making a card out of each piece (Challenge accepted, as they say! lol)

I've aimed to use the same stamp set, which is the Itty Bitty Greetings, such a versatile set!  then I strayed into the Itty Bitty Christmas set for the Christmas card.
They say a picture is worth a thousand words, so here goes.....
Flowers for Every Season Stampin' Up!

Flowers for Every Season Stampin' Up!

Flowers for Every Season Stampin' Up!

Flowers for Every Season Stampin' Up!

Pheww!  11 cards (as you can see I used 2 pieces on one card, I've also aimed to use the new colours in these, as they are featured in this paper pack.  Having said that my new ink pads haven't arrived yet, so I found that Shaded Spruce works well with the Just Jade, Night of Navy is ok with the Misty Moonlight and the papers also have Poppy Parade in them, which I already have (yay!)

Hope these inspire you to dig out your papers, cut them up and get creating with them!
God Bless love
Heather xox

Celebrate Sunflowers bundle

Hi there!
I've had a bit of an opportunity to play with some of my new bits, so thought I'd show you what I've been making up with my new Celebrate Sunflowers bundle (stamps and dies)
Celebrate Sunflowers Stampin' Up! bundle
 It's actually pretty cool the way the stamp lines up with the cut die image, so that's what I've gone with in this first card, and I really like the 2 branch/frond things.  Oh not forgetting the fact that there's new colours in this!  Bumblebee, and Just Jade.  If you can see the difference in the yellows, the flower itself is Bumblebee, and the centre of the flower is Crushed Curry.  I think the Crushed Curry is a little brighter than the Bumblebee.  also owing to the fact I don't have the ink pads yet, I've gone with Shaded Spruce for the ink colour, which really blends beautifully with the Just Jade.


Celebrate Sunflowers Stampin' Up! bundle
 this next card uses the new Magenta Madness cardstock (plus the Bumblebee, Just Jade and Shaded Spruce) I've used the Sunflower dies to cut out the under part of the flower and leaf, plus the flower and leaf "over pieces"  I've used crushed curry for the stamping in the background, such a lovely stamp!

Celebrate Sunflowers Stampin' Up! bundle
Celebrate Sunflowers
And this last card was a bit more complex I had to create 4 masks for the flowers, but it's made easy with the matching dies (gotta love that!)  I really felt like the saying needed a heap of flowers to work with the "bunch" part of the saying lol  this is probably my favourite card so far with this set, I've also used some of the Bumblebee In Colour ribbon with it too.

If you haven't seen this bundle yet, do check it out (click on the link above).
I hope this inspires you to create in your own space!

God Bless love
Heather

Something Saturday - 2 from 1 Stripes & Trees

  Hi there Creators Today I'm doing one cut with my Designer Paper and creating 2 different cards - gotta love it when you can get 2 for...