Hi there Creators
I'm on a roll! 3rd day of blogging lol this time I've use the Friendly Silhouette Dies - I know they're not new to the catalogue, but they are new to me 😀 I think they're pretty cool, there's 4 dies in the pack, 3 of them are large edgelit type dies, and create a scene, which I love.
Anyway you're probably not here to hear me waffle on, so we'll commence with the evidence......
this first card uses the die that cuts out the palm trees, I've done this in white card, then masked a circle for the moon, brayered over the background, and attached it onto an Early Espresso piece of card, which then is attached to the main card, it's pretty effective isn't it?
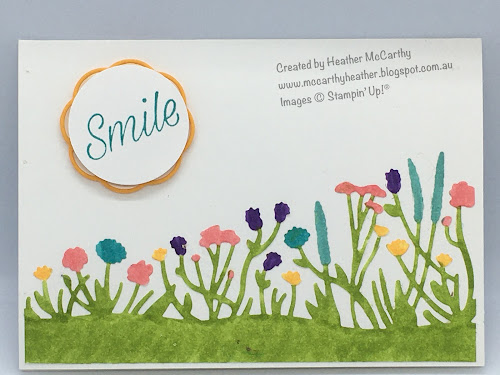
This second card uses the flowers die cut from white card, I've coloured it up with the markers and stuck it down onto the card, voila nice and easy!
My last card is possibly my favourite, (ties with the palm trees! lol) for this one again I've used white card, but used both the negative and positive parts of the cut to add more bulk. Again coloured with the Stampin' Write Markers. I've mounted this directly onto the Old Olive cardstock. Added bonus the Story label punch and the Label Me Fancy punch seem to happily sit together!
Thanks for joining me today, let me know which is your favourite!
Hope these inspire you to craft in your space.
God Bless love
Heather xox


.JPG)

No comments:
Post a Comment