Fancy Phrases Stamps

Hi there Creative Peeps,
Thought I'd show case Fancy Phrases stamp set today, funny thing with this one is that it wasn't on my list of "must have's" but then I was buying the one across the page from it (Arrange a Wreath) and happened to see it, it's such a pretty set with such lovely wording, and I had a few hostess dollars to spend (I think it was my pre-order and I get a bit carried away sometimes lol), so it suddenly catapulted to the top of my list, and here are some of the results......
I saw this set as a vintage type, the first thing I wanted to try was watercolour, I kind of like the way watercolouring bleeds outside of the lines (might just be me lol)
Fancy Phrases Stamps
I used some of the watercolour paper to stamp on then some of the new colours, Just Jade for the leaves and Bumblebee with Magenta Madness for the flowers

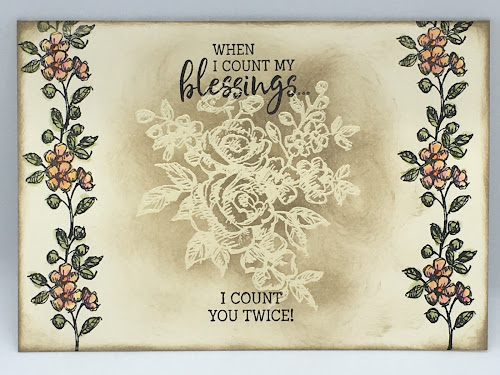
Fancy Phrases Stamps, clear heat embossing
Next I wanted to go a bit more vintage'y, starting off with the smaller flower spray in the stamp set, I've put them on top of each other, they actually joined really easily, I thought I'd missed a couple of times but it worked! this time I used watercolour pencils and a blender pen to smooth them over, then for the middle I went with a bit of clear stampin' emboss powder (I had thought I'd be able to watermark the middle with the versamark stamp pad, but it didn't show up enough, I think it's better on coloured card), then I've used a bit of crumb cake over top to make the image pop, and stamped with Stazon the saying, as anything else would rub off the embossed work

Then I had an idea......!
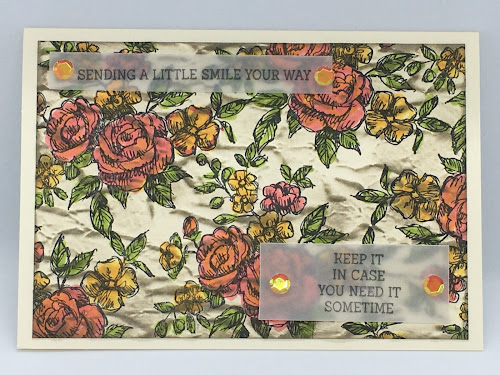
Fancy Phrases stamps, Old World Paper 3D embossing folder

Why not mix this stamp set with the Old World Paper 3D embossing folder?, after all I want it to look old 😊  So I stamped the image a few times with Stazon, coloured it in with the Brights Stampin' Write Markers (mainly Flirty Flamingo, Mango Melody, and Granny Apple Green), ran it through the embossing folder, and buffed over the top and round the edges with Gray Granite.  I love the way it turned out, however then the saying wouldn't show up (or for that matter, stamp on it), but I didn't want to lose the look by putting stark vanilla on top, so thank goodness for vellum! again using Stazon ink, and how fabulous are the sequins?  They're the Artistry Blooms sequins, I like the fact they have no hole in the middle, so they look more like gems.

All in all I'm pretty pleased I bought this set, although when I was typing up this blog I then discovered that I missed out on getting the Fancy Phrases Bundle, bother, as I'm bound to buy that Fancy Tag Topper punch anyway, Ah well - learn from my mistake, and check to see if there's a bundle involved (saves you 10% on the overall price)

So I hope this inspires you to play around with your stamp sets, and reminds you to look out the bundles in the catalogue!

God Bless love
Heather xox

Game On Stamp Set

Hi There Creative Peeps,
I had to get this set "Game On", as my oldest son plays cards, chess and generally likes board type games (the other 2 are more of the camouflage sort, as in yesterday's post).
I'm actually quite enjoying having time to create some cards that I wouldn't be able to teach (sorry!)
this first one was a bit of a challenge colouring the stamp in with the red and black as it's quite hard to see the image properly on the stamp, and I really wanted the colours to be more realistic, however after a bit of wet wipes I got there! and here's the result
Game On Stamps, Ridiculously Awesome Stamps,  In Good Taste Designer Series Paper
did you notice the little club in the right hand corner?, I kind of wish they'd added a little diamond, heart and spade too!  the saying is from "Ridiculously Awesome", another one of those nice large saying's sets, and the patterned paper behind is from "In Good Taste Designer Series Paper"

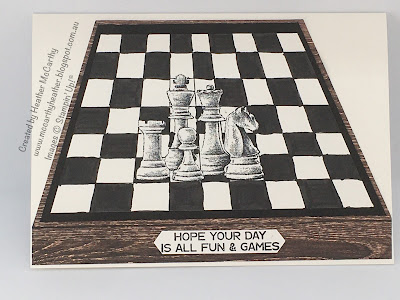
Next up I had an idea for the chess pieces.  I wanted to put them onto a chess board, but I knew it would need a bit of perspective, I think I achieved it, and the family seemed to think so too!, what do you reckon?  the saying is also from Game On, and fabulously it fits inside the Classic Label Punch, yay!  Again I've used the In Good Taste Designer Series paper.
Game On Stamps, In Good Taste Designer Series Paper

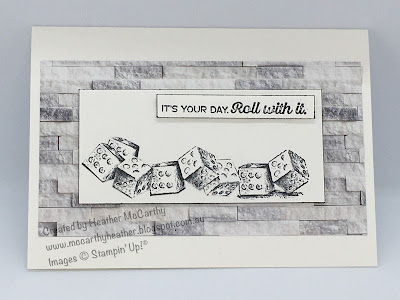
And lastly the dice! I really wanted to show them tumbling out, but as they have shadow underneath them the only way I could do this was to cut them individually, I'm actually looking at the picture now and thinking maybe I need to manually add shadow to the ones I cut out!  Again the saying is from the Game On stamp set, and the background paper is In Good Taste Designer Series Paper
Game On Stamps, In Good Taste Designer Series Paper
All in all I'm pretty chuffed with these cards I've created, what do you think?

I hope they inspire you to have a think with your stamp sets and work out what you want to see them doing on the paper for you (if that makes sense?!)
God Bless love
Heather xox
Camouflage Stamp

Hi there Creative Peeps,
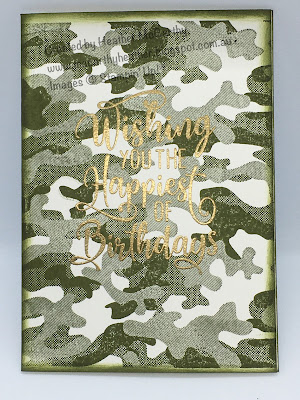
Well if you have any "boyzie boys" or "boyzie girls" (if you get my drift!) in your life I think this is a must have background stamp!  Camouflage is the stamp, and there's nothing to it but to show you what I made with it......  I've used the same stamp in the middle, from Happiest of Birthdays Stamp set, I really love the size of this stamp.  Sadly it doesn't show up on the photos terribly well with this green one! I embossed it with Gold embossing powder.  Oh and I used Mossy Meadow for the green.
Camouflage background Stamp, Happiest of Birthdays Stamps

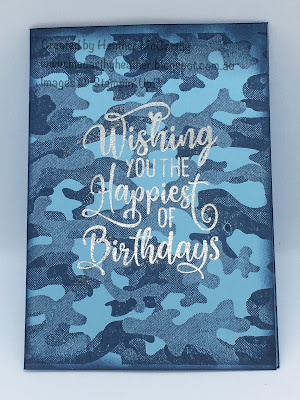
Next card; I wanted to make a matching card for the blanket I made for Sam (youngest son), and I noticed the base of it is blue in colour, so I started off with Balmy Blue cardstock, then used the Misty Moonlight to stamp the Camouflage, and silver embossing powder for the saying.  I have to say Sam was pretty chuffed with it and did proclaim it to look the same as his blanket.
Camouflage background Stamp, Happiest of Birthdays Stamps

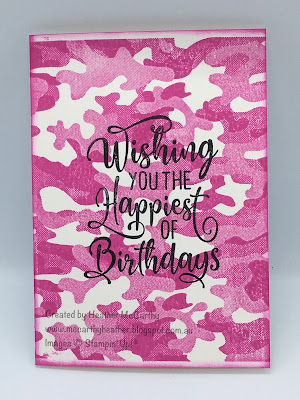
This last card I thought I should make a girlie camo card!  I know it's cliched but I still think of pink as a girlie colour!, this one I did with the Magenta Madness, it really is a fabulous bright pink, not sure the photo does it justice, this one I stamped the saying with Black stazon.
Camouflage background Stamp, Happiest of Birthdays Stamps
Ok, going to have to keep this one to a short post today as I can't stop my eye from watering, which is kind of hard to see the computer screen properly!

Hope you enjoy this spot of inspiration!  amazing what you can do with just 2 stamps eh?
God Bless love
Heather xox
Christmas In July Card Kit

Hi there Creative Peeps!

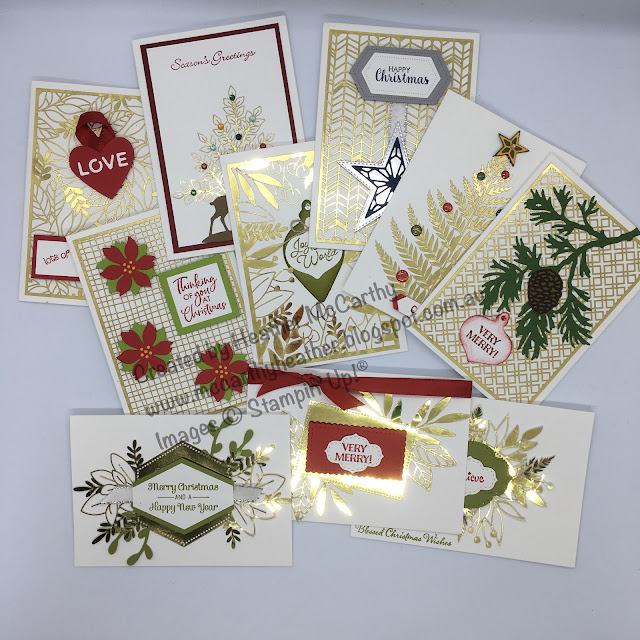
Well let's face it here in Australia, Christmas in July is a bit of a thing!, and the last couple of years I've done a Mega Christmas in July Class, for obvious reasons that's not possible at the moment, but I figured I can still make up a special Christmas in July kit.

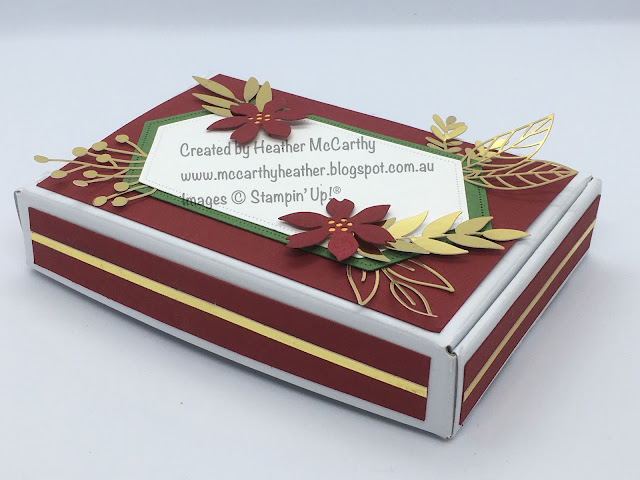
The details; this kit will give you 10 beautiful Christmas cards with envelopes to make. I've used traditional colours; Gold, Red, Green, and Silver. And a cute box to store them in, which you'll also be decorating up, so once you've given out the cards, you could use the box to wrap something special for someone in. You'll get full instructions and I plan to do a video, so I'll email the video out those who order it. Order by the end of the day Tues 14th July and I will be aiming to send out the packs on Friday 24th.

What you'll need: Multipurpose Liquid Glue, and Dimensionals, scissors, either the Itty Bitty Christmas Stamp set, which is $38, and I think is a must for Christmas sayings! or another appropriate stamp set, and ink pads.

The Cost:  The kit cost is $35, and postage for it will be $3.30, if you live nearby then I'll aim to deliver it next time I'm near your town😊  If you are part of my team the cost for the kit will be $25

And the Photos:
Christmas In July Card box

Forever Gold Laser Cut Specialty Paper
Let me know if you want to order a kit, and I'll pass on my bank details to you (make sure you're name is on the deposit!)

Hope these inspire you into starting your Christmas cards early πŸ˜€
God Bless love
Heather xox
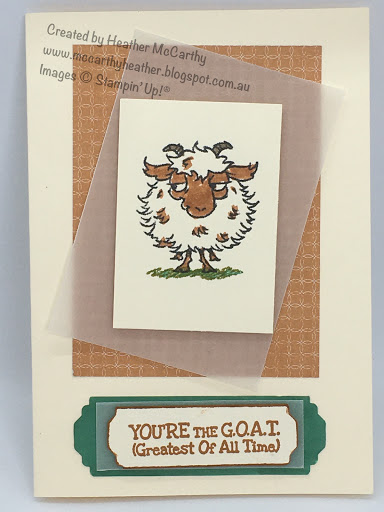
Way to Goat

Hi there Creators,
Well I've got to say this was THE set I had to have!  Having raised goats on our property for quite a few years when I saw goats, that was it - "it floated my goat" (as we say in our household).

Let's get down to the nitty gritty...  The Stamp set "Way to Goat"...... the photos.....

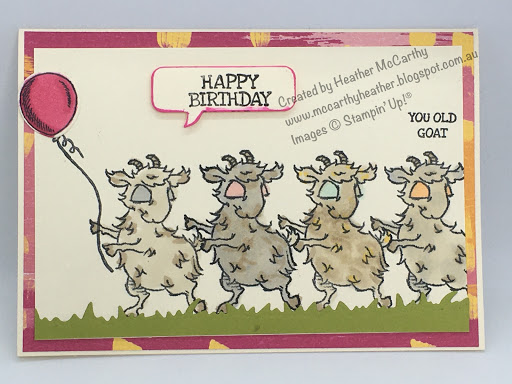
This first one was inspired by my good friend Reyne, who said Oh I've got to get that set and make a Conga with them, I loved that idea, so here it is.....
Way to Goat
I've layered the sheet on the Artistry Blooms Patterned Paper, and used some of the dies from the Special Day dies (balloon & grass and saying bubble)
This next card cracks me up, the goat looks fed up and grumpy to me (although when I showed my husband he said the goat looks guilty and fat from eating, which I can see now too)
Way to Goat
 With this card I used the Flowers for Every Season patterned paper, and a bit of vellum.

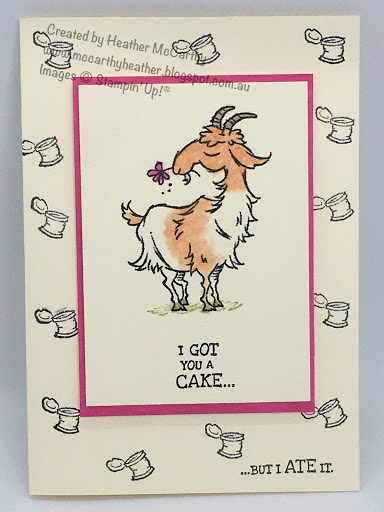
And the last card, see I thought this goat looked a bit guilty (not that goats really show any kind of guilt, I think they just believe it's their right, kind of like cats!πŸ˜„), and having eaten the cake had now moved onto the flower bed....lol  I do remember our goats escaping occasionally and feasting themselves on Tom (my husbands veggie crops) I'm useless at gardening and it holds no interest for me, except for the food that's produced at the end!
Way to Goat
This was a really simple card, I've coloured the mat underneath with my Stampin' write marker (Magenta Madness), the rest is stamping with a spot of watercolour pencils.

What do you think? how cute are the goats!
Which is your favourite?

Hope these inspire you with your creating
God Bless love
Heather xox
Arrange a Wreath Bundle

Hi there Creators,
I'm making myself a bit of a challenge to make at least 3 cards with each set of stamps/dies that I've bought, so here we are onto day 4 (not sure how long I'll be able to keep it up, but so far so good lol)  I figured while I'm making them I'm going to share them with you all (hope you enjoy it and it inspires you).

Hence, I've moved onto the Arrange a Wreath Bundle today which consists of the Arrange a Wreath Stamp set and the Wreath Builder Dies.   If you end up with a bundle you save 10% on the cost of buying them (bonus) .  Anyway you're not here to hear me waffle!, on to the cards.....

Soooo...... the reason I bought this set was for the wreath's, and Christmas!  however it does come with this cute "Love" heart, and flowers....and bow!
Arrange a Wreath Bundle
For this card I've teamed it up with the Artistry Blooms Patterned Paper, which as I mentioned in the last post, I really love the grading in the paper!, also used the lovely Rainbow Glimmer Paper to create the bow (oh and the Artistry Blooms Sequins for the flower centres, really like the fact they don't have a hole in the middle of them!

Then of course I had to make Christmas cards, it's never too early to make Christmas cards lol!

Arrange a Wreath Bundle
For this card I didn't have any patterned paper that I felt would work behind the flowers, so I made some.  I've just taken my dauber (the paper and ink are both Old Olive) if you ink up your dauber and "puff" it round your card, then using the edge of the dauber, sort of scrape on extra lines, it gives quite a cool effect!  I've also taken one of the cut out pieces and used the piece it came out of to create a mask for the background of the card.  I did discover that the teeny tiny circle die that's in the set, is there to create a circle to go behind the centre of the flower! (who knew! lol)  Oh and I've used the absolutely stunning Brass Foil Sheets, and the Champagne Rhinestone Basic Jewels.

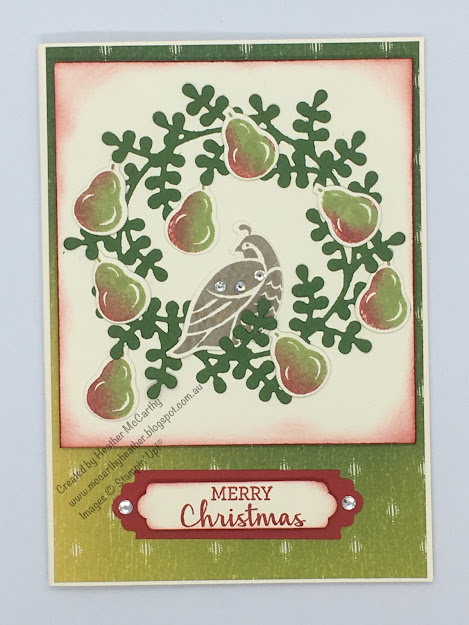
And for the final card I couldn't resist........... And a Partridge in a Pear Tree (did you sing it?)
Arrange a Wreath Bundle
So this card I've used the Artistry Blooms Patterned Paper again underneath, some Diamantes, which I had intended to use for the birds eye, but that didn't look right! (got to improvise lol)  Oh and the Lovely Labels Pick a Bunch punch for the saying, I've punched both ends, I will say with this, that if you're using a short piece of paper, make sure you check the back of the punch to ensure it's in the right place!
The pears are inked up with the Pear Pizzazz, I've used my real red dauber to add a touch of red to one side, then stamped (thankfully there's 2 pears per stamp 😊)

Did you have a favourite? let me know!
I hope this inspires you to get creating.
God Bless love
Heather xox

Friendly Silhouette Dies

Hi there Creators
I'm on a roll! 3rd day of blogging lol  this time I've use the Friendly Silhouette Dies - I know they're not new to the catalogue, but they are new to me πŸ˜€ I think they're pretty cool, there's 4 dies in the pack, 3 of them are large edgelit type dies, and create a scene, which I love.

Anyway you're probably not here to hear me waffle on, so we'll commence with the evidence......
Friendly Silhouette Dies
this first card uses the die that cuts out the palm trees, I've done this in white card, then masked a circle for the moon, brayered over the background, and attached it onto an Early Espresso piece of card, which then is attached to the main card, it's pretty effective isn't it?

Friendly Silhouette Dies
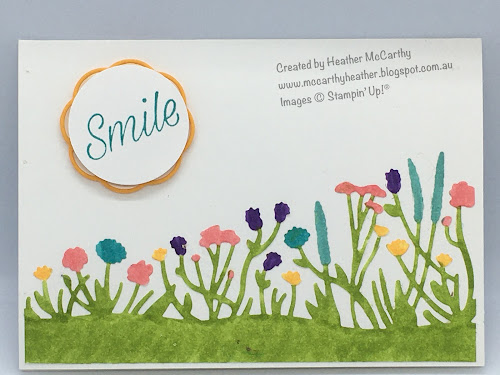
This second card uses the flowers die cut from white card, I've coloured it up with the markers and stuck it down onto the card, voila nice and easy!

Friendly Silhouette Dies
My last card is possibly my favourite, (ties with the palm trees! lol)  for this one again I've used white card, but used both the negative and positive parts of the cut to add more bulk. Again coloured with the Stampin' Write Markers.  I've mounted this directly onto the Old Olive cardstock.  Added bonus the Story label punch and the Label Me Fancy punch seem to happily sit together!

Thanks for joining me today, let me know which is your favourite!

Hope these inspire you to craft in your space.
God Bless love
Heather xox

Something Saturday - 2 from 1 Stripes & Trees

  Hi there Creators Today I'm doing one cut with my Designer Paper and creating 2 different cards - gotta love it when you can get 2 for...