Something Saturday - Delicate Desert sneak peek

 Hi there Creators

today I thought we'd delve into some of the upcoming "new" stuff.  I wanted to show off my favourite suite in the upcoming catalogue.  Although just so you know the retiring list is out so check out the absolute bargains you can grab on that and also on the Clearance rack which has also had items added to it:  Retiring goodies,   Clearance Rack

As I mention the video, because I went to the Stampin' Up! Onstage event I was then allowed to do something called a PPP order (Product Purchase Premiere)  so it meant I got some of my goodies before any of the demos that didn't attend the event (exciting)! 

If you're a demonstrator you can now order this suite as a pre-order, however if you're a customer you'll need to wait till 4th January.  But it's fabulous so, put this on your list!

Here is the board I made to show whats in the suite:

Delicate Desert, Stampin' Up!
There's stamps, dies, velvet ribbon and gold sequins
 

In the video I show off how I've coloured in the flowers on this card 

Delicate Desert, Stampin' Up!

As I used Bermuda Bay instead of the Cherry Cobbler, I ended up making this card with the flowers I'd created:

Delicate Desert, Stampin' Up!
 

Then I also made up this card using the fabulous long Aztec type design stamps to create the background

Delicate Desert, Stampin' Up!

Then lastly I promised to make a zipper card using the long die, and here it is.....  I really thought it would make great zipper look, and I've used the end of the diamond'y shaped die to create the zip puller.  I'm really pleased with the way it turned out, I do think it makes and effective zipper, what do you think?

Delicate Desert, Stampin' Up!

Delicate Desert, Stampin' Up!

If you missed the video here it is:

I hope this inspires you to create (and if you want to find out more about being a demonstrator and getting to order things earlier πŸ˜‰ just ask me)
God Bless love
Heather xox

Something Saturday - Birthday Card Organizer Kit

 Hi there Creators

Today I showed off this fabulous Birthday Card Organizer kit. The size of the Card holder is actually quite big at 8x10", so even if you make larger cards or slimline cards they should fit in fine.  The idea is to have one place to pop all your Birthday cards in waiting, under the correct month.  And everything is included in the kit to create all the cards, and label up the Organizer.

In the video, I unpacked the box it comes in and show off making the 2 varieties of card included with it (there are supplies for 12 cards)

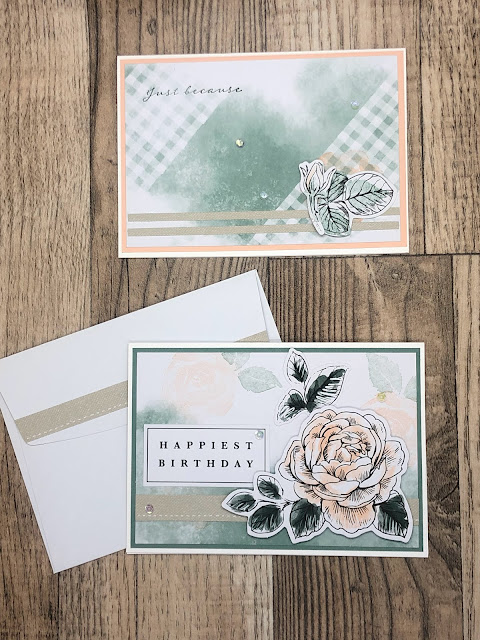
Here are the 2 cards I made up as they're shown in the kit:

Stampin' Up!, Birthday Card Organizer Kit

 Then in the video I mention that I plan to make something different with a couple more of the cards, so here is my "different" take on these......

The green based card (soft succulent colour) actually has a really nice front and back, so I've cut it in 1/2 and used both parts to create 2 cards, I've also used the beautiful True Beauty Stamp set lightly in the background.  The top card uses some cut off pieces from the kit to create the 2 lines, and the bottom card I cut the "ribbon" strip in 1/2 so I could use some on an envelope.

Stampin' Up!, Birthday Card Organizer Kit

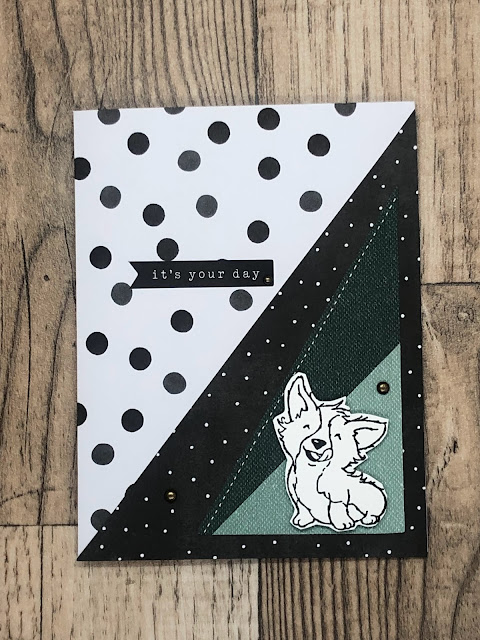
 Then this black & White card I really wanted to be more "male" focused, and I just love this little dog from Glad We're Friends, so I've fussy cut him out, and chose not to add more colour (wasn't really sure a green dog was the way to go lol) I decided against the sequins, and added some Rustic Metallic Adhesive backed dots instead, and swapped the sentiment over with the 2 cards

Stampin' Up!, Birthday Card Organizer Kit

If you missed the "unpacking" video, here it is....


If you have any kits I hope this inspires you to come up with different ideas for the cards too.

God Bless love

Heather xox

Something Saturday - Show & Tell

 Hi there, 

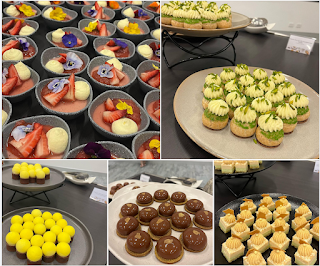
As I mention in the video I've just recently been to a Stampin' Up! event called OnStage Local, this one was held in Sydney, and was a one day event, with an evening before for Leaders called "CentreStage".  I was blessed to be involved with both.  The CentreStage event was lovely, catching up with other leaders and some really cute little desserts. Yummm

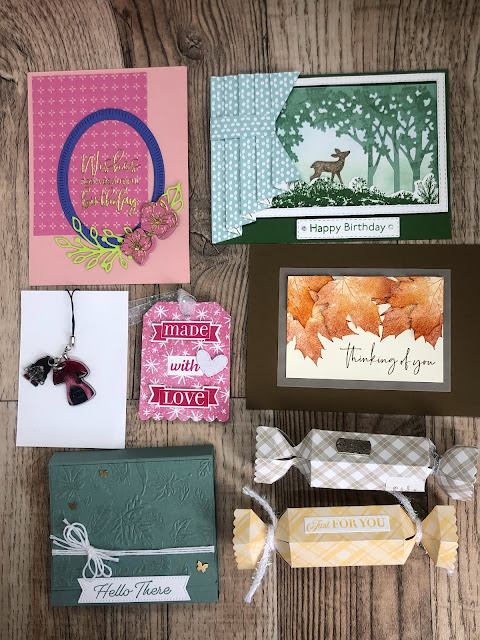
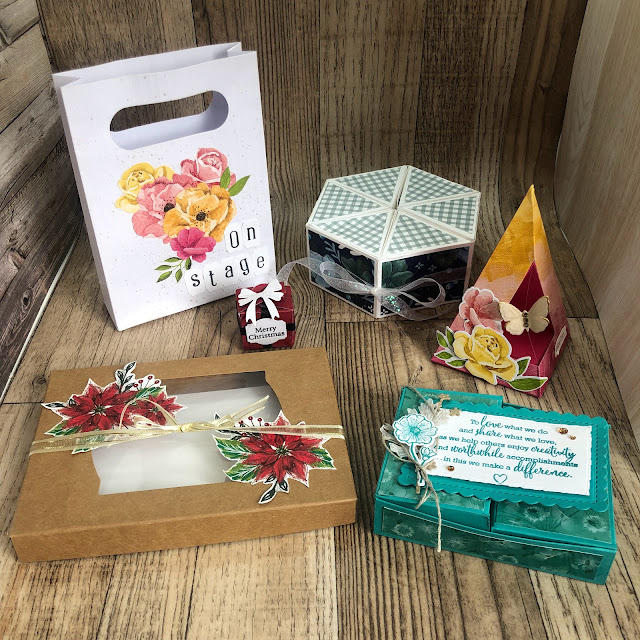
Then on the Saturday we had the main event, I helped out with check-in, which was fun, handing out the special boxes to everyone.  At Stampin' Up! events they invariably give us a box, with goodies in it (I show these off at the beginning of the video). You can see the boxes in the background here:


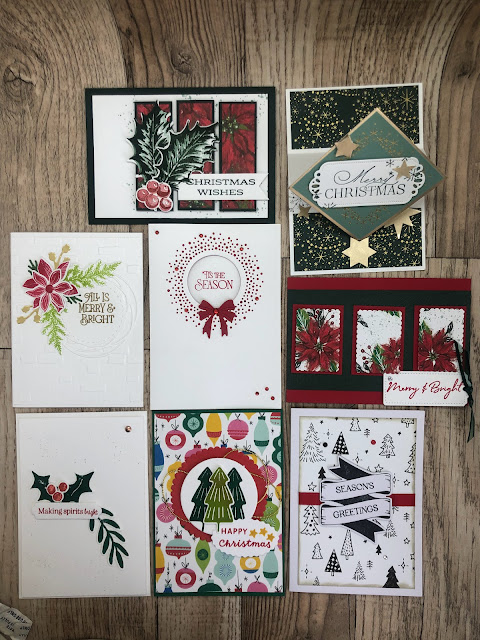
Then a lot of people make up what's called "swaps".  It means you create a heap of cards (I made around 30), and swap them with others for what they've made up, it's a fabulous way to see what others are creating, get ideas, and have something to show off.......

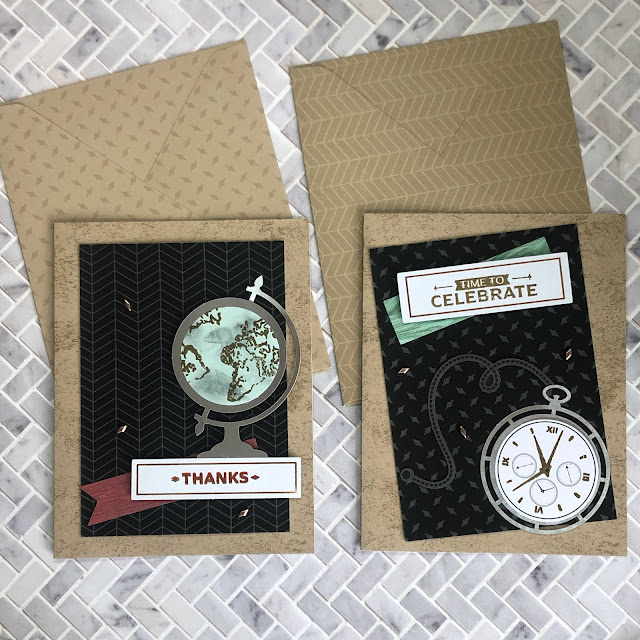
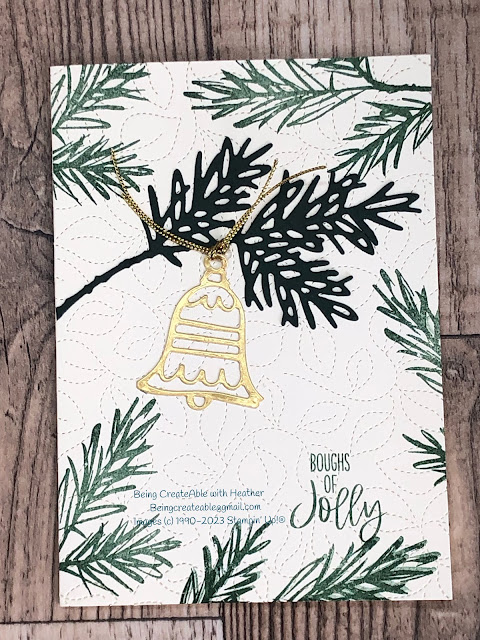
I've taken photos of the swaps I received (I did show them in the video, but just in case you want a closer view here they are: 

Being CreateAble with Heather, Something Saturday

Being CreateAble with Heather, Something Saturday

Being CreateAble with Heather, Something Saturday

Being CreateAble with Heather, Something Saturday

Being CreateAble with Heather, Something Saturday

then we had the opportunity to create a couple of cards from a kit that was launched on 15th Nov during our lunch break, it's called Timeless Greetings check it out through the linkBeing CreateAble with Heather, Something Saturday
And proof I was in Sydney 😍


In case you missed the video, here it is:


Hope these inspire you to create

God Bless love
Heather xox


Cards for December Classes

 Hi There Creators

Well we've finally got to December and ALL Christmas cards! 😍 

Just in case you're planning to order any of these, some of them will be on the retiring list on 1st December, and in some cases they'll be reduced, however you might have to get in quick to get them!

Classes are Wednesday 7th 10.30am in Laanecoorie, Thursday 8th 7pm in Laanecoorie and Saturday 10th 10.30am in Maryborough. $20 to create all the projects.  Let me know if you plan to come along.

Here is the offering for December:

First up is this duo of card with little pillowbox bag made using the Pretty Pillowbox dies I couldn't resist using the whole piece of metallic and shimmer specialty paper to create this duo (they're 6x6 sheets)  Along with the Celebrating You stamps, and the absolutely gorgeous Gold Shimmer RibbonClass cards for December, Stampin' Up!, Being CreateAble with Heather

Next up is this fun card using the Spruced Up Outline Dies (this will be retiring come December, so look out for a great price on the individual components - ask me if you're not sure) and, a bit of a sneak peek from the next mini catalogue, with the Handdrawn Dots Stamps, saying comes from Inspired Thoughts, which is a great all rounder saying set.
Class cards for December, Stampin' Up!, Being CreateAble with Heather
Then I've used the Decorated with Happiness bundle, (this is also retiring come December, again check the individual prices, as it works out cheaper)  it just really appeals to me this set!, and also the Stitched Greenery Die in the background for a bit of added interest
Class cards for December, Stampin' Up!, Being CreateAble with Heather

Then  lastly I felt a need to go "Aussie" and figured a bit of wattle could be Christmassy too 😁 As the Aussie Christmas carol goes: Deck the Sheds with Bits of Wattle......

Here I've used the beautiful Texture Chic Memories & More Cards & Envelopes paired up with the Brightest Beauty Stamp set (again it will be on the retiring list at the beginning of DecπŸ˜”) and Decorated with Happiness stamp set (and some gold heat embossing - gotta have some bling.....)  I've finished off by stamping the saying directly onto the natural finish ribbon.

Class cards for December, Stampin' Up!, Being CreateAble with Heather

Well that's it, next month is January so we won't be having our usual classes due to holidays, however I do plan to do one of my Mega Classes on a Saturday mid to late Jan, once I have my hands on some of the new products I'll be working out what we're going to do.

Look forward to seeing you if you can make it to class, if not have a wonderful Christmas

God Bless love 

Heather xox

Something Saturday - Brightest Beauty (Wattle next?....)

 Hi there Creators

I'm not sure if this set is specifically meant to be Wattle, but it sure looks like it!  Here in Australia (in case you're from a different part of the world)  the Wattle has been flowering beautifully out in the bush recently, here's one of the photos I took recently: (might have been good had I taken my phone out of it's red cover to take the photo, or even checked the photo after I took it! but I've never claimed to be a photographer, and didn't have my glasses with me - at least that's my excuse)

Anyway on to the cards.... Using the Brightest Beauty Bundle  I make up this card in the video, nice and simple just a bit of stamping, I thoroughly recommend using the Stamparatus to line up/position and stamp the yellow (fluffy bits) commonly called blossom 🀣  And I love using the linen thread with natural looking stamps.

Stampin' Up!, Brightest Beauty Bundle

After finishing the video I then made up these 2 cards:

This uses some of the pieces I had already cut out, and again the linen thread with a double bow, I love the background triangle pieces stamp 😍
Stampin' Up!, Brightest Beauty Bundle

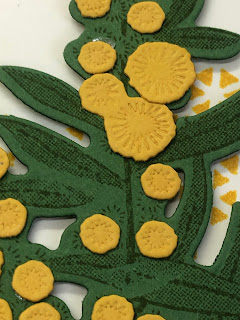
And you can see the little yellow cut out pieces have debossing in them to give them that "fluffy" appearance.

Stampin' Up!, Brightest Beauty Bundle
Then I decided that actually it didn't need to be completely yellow, so thought I'd use up the last pieces of greenery with purple blossoms (and again the linen thread)  And how lovely is the tag for the saying? it also has a little bit of de-bossing texture at the top and bottom.


Stampin' Up!, Brightest Beauty Bundle

If you missed the video, here it is....


I hope this inspires you to purchase this bundle (from me πŸ˜‰) πŸ˜€  I don't know if it'll make it into the next catalogue - here's hoping 🀞 so if it doesn't you only have potentially till 4th January. (you can click on the links above to check out what I used)

God Bless love

Heather xox

Something Saturday - Strip Christmas Trees

 Hi there Creators

Umm might not have picked the right name for this one 🀣  What I actually mean is Christmas trees made from strips of Designer Papers.  Phew we're not going to make our Christmas trees strip!

I had a few strips of the Boughs of Holly Designer Papers that were (in theory) 1cm strips, so I thought I'd have a go at something I used to do with washi tape.

The idea is to have strips of paper that are slightly shorter each time so when you attach them down you end up with the typical pyramid tree shape.

Here's the card I made up in the video.  I teamed it up with the Decorated with Happiness bundle (stamps & dies) Oh and the Adhesive-Backed Seasonal sequins  I do like sequins without holes in the middle for adding to cards!

Stampin' Up!, Boughs of holly designer paper

Then after the video I made up this card, as I still had some scraps left over.  This time I also stamped the branches from the stamp set in the background, which I rather like, I'm looking forward to doing more with this set (it only arrived a couple of days before I did the video!)  I tried to stamp the saying directly onto the card with Stazon Black, but it really didn't show up, so ended up covering it with vellum, and punching the ends with the Handmade Tag Punch.  As I mentioned in the video I often do these cards so that the tree is a little skewiff or wonky, I kind of like the effect it gives.

Stampin' Up!, Boughs of holly designer paper
the stars have some rather nice detail in them as you can see:

Stampin' Up!, Boughs of holly designer paper
If you missed the video here it is:


I hope this inspires you to have a go too, feel free to share what you make, I do love seeing what I've inspired in others 😊


God Bless love

Heather xox

Something Saturday - Really cool Sunlight effect

 Hi there Creators,

Well I really didn't know what to call this, but the effect reminds me of sunlight streaming through gaps, so I'm running with that 🀣 (or at least walking fast - if I'm running there's something seriously wrong...)

The card I start making in the video is this one;  in the video I show how to create this effect in the baubles, it's actually remarkably easy, all you need is a shape cut out of spare cardstock, then sticky notes, ink and a blending brush.  I think it might be easier for you to watch the video than for me to try and explain it, but suffice it to say it's easy and creates a fabulous effect!  I've used the Spruced Up Outline dies (which are so fabulous)

Stampin' Up!, Spruced Up Outlines

After that I felt I should try and use most of the dies in the Spruced up Outline dies, so I went on to make these 2 cards....  I love the way you get the outline of the die, as well as the inside 😍  and of course looking at them on here I kind of wish I'd done the same effect with the trees - Oh well, famous last thoughts........

Stampin' Up!, Spruced Up Outlines


And this card......

Stampin' Up!, Spruced Up Outlines
I think there ended up being 3 dies I didn't use from the set (not bad going!)

If you missed the video here it is......

I hope this inspires you to create, and try out the "sunlight effect" for yourself

God Bless love

Heather xox


Something Saturday - 2 from 1 Stripes & Trees

  Hi there Creators Today I'm doing one cut with my Designer Paper and creating 2 different cards - gotta love it when you can get 2 for...