Punch Art Giraffe

Hi there Creators

I was asked recently to make up a Giraffe Card, so I turned to Punch Art, and wondered if I could possibly do it with our current Stampin' Up! Punches, I almost achieved it 😄

So this is the card I'm pretty pleased with how it turned out!  I'll show you what I used after it:
Punch Art Giraffe card
this was the photo I was using to get by 'bearings" on the giraffe face:
punch art giraffe card

And here's what I used:
Punch Art Giraffe card
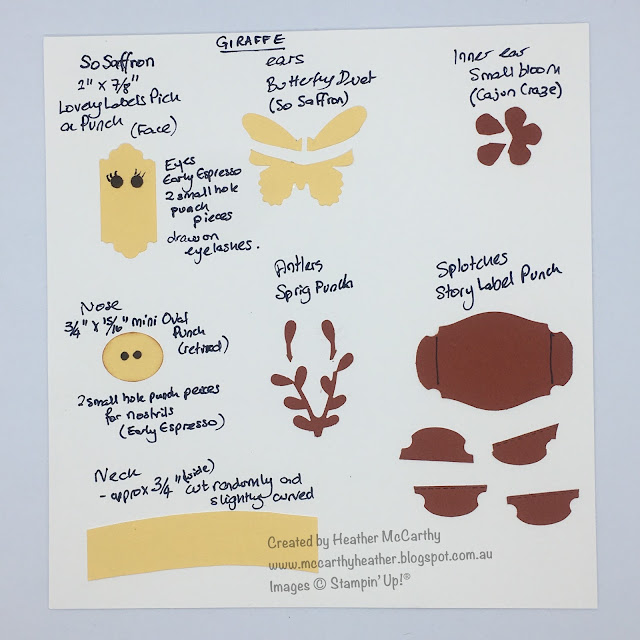
The face is made from Lovely Labels Pick a Punch, it's punched on both ends for the face (I found I had to add an extra length of card to the back of it, so I could get it into the punch properly).  I've then punched 2 small hole punches for the nose and another 2 slightly larger ones for the eyes.
The nose is the only main punch that's not still current, which is a small fat oval punch.
Ears are made from the top part of the large butterfly in the Butterfly duet punch, with 2 petals cut from the Small Bloom Punch for the inner ear pieces
The Antlers are the end pieces of the Sprig Punch (I've turned them inwards)
The Neck is a bit random, I've just cut a slightly curved piece, and kept it around 3/4" wide.
then the last part is the splotches on the neck, I've used the end pieces cut off the Story Label Punch, stuck them on and trimmed it.
Oh I've also daubed round the edge of the pieces to make them stand out on the card.

For the card I've used the stitched rectangle dies, then I couldn't resist using my new Happiest of Birthdays saying stamp, I love that the stamps are a great size in this set.

I hope this has inspired you to see what you can make with your punches!
let me know if you have a go at the giraffe, or if you have any questions about it :)

God Bless love
Heather xox

Fancy Phrases Stamps

Hi there Creative Peeps,
Thought I'd show case Fancy Phrases stamp set today, funny thing with this one is that it wasn't on my list of "must have's" but then I was buying the one across the page from it (Arrange a Wreath) and happened to see it, it's such a pretty set with such lovely wording, and I had a few hostess dollars to spend (I think it was my pre-order and I get a bit carried away sometimes lol), so it suddenly catapulted to the top of my list, and here are some of the results......
I saw this set as a vintage type, the first thing I wanted to try was watercolour, I kind of like the way watercolouring bleeds outside of the lines (might just be me lol)
Fancy Phrases Stamps
I used some of the watercolour paper to stamp on then some of the new colours, Just Jade for the leaves and Bumblebee with Magenta Madness for the flowers

Fancy Phrases Stamps, clear heat embossing
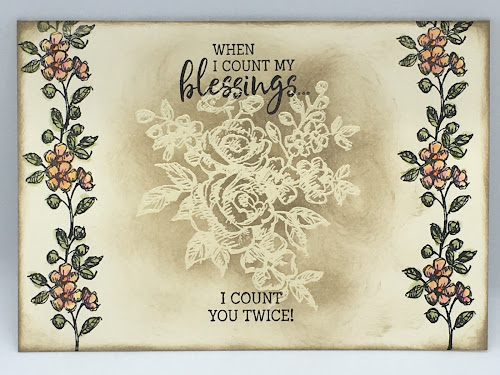
Next I wanted to go a bit more vintage'y, starting off with the smaller flower spray in the stamp set, I've put them on top of each other, they actually joined really easily, I thought I'd missed a couple of times but it worked! this time I used watercolour pencils and a blender pen to smooth them over, then for the middle I went with a bit of clear stampin' emboss powder (I had thought I'd be able to watermark the middle with the versamark stamp pad, but it didn't show up enough, I think it's better on coloured card), then I've used a bit of crumb cake over top to make the image pop, and stamped with Stazon the saying, as anything else would rub off the embossed work

Then I had an idea......!
Fancy Phrases stamps, Old World Paper 3D embossing folder

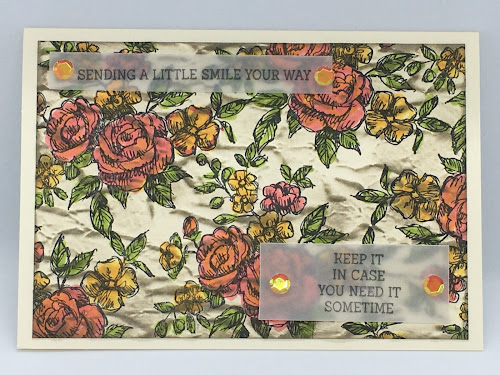
Why not mix this stamp set with the Old World Paper 3D embossing folder?, after all I want it to look old 😊  So I stamped the image a few times with Stazon, coloured it in with the Brights Stampin' Write Markers (mainly Flirty Flamingo, Mango Melody, and Granny Apple Green), ran it through the embossing folder, and buffed over the top and round the edges with Gray Granite.  I love the way it turned out, however then the saying wouldn't show up (or for that matter, stamp on it), but I didn't want to lose the look by putting stark vanilla on top, so thank goodness for vellum! again using Stazon ink, and how fabulous are the sequins?  They're the Artistry Blooms sequins, I like the fact they have no hole in the middle, so they look more like gems.

All in all I'm pretty pleased I bought this set, although when I was typing up this blog I then discovered that I missed out on getting the Fancy Phrases Bundle, bother, as I'm bound to buy that Fancy Tag Topper punch anyway, Ah well - learn from my mistake, and check to see if there's a bundle involved (saves you 10% on the overall price)

So I hope this inspires you to play around with your stamp sets, and reminds you to look out the bundles in the catalogue!

God Bless love
Heather xox

Game On Stamp Set

Hi There Creative Peeps,
I had to get this set "Game On", as my oldest son plays cards, chess and generally likes board type games (the other 2 are more of the camouflage sort, as in yesterday's post).
I'm actually quite enjoying having time to create some cards that I wouldn't be able to teach (sorry!)
this first one was a bit of a challenge colouring the stamp in with the red and black as it's quite hard to see the image properly on the stamp, and I really wanted the colours to be more realistic, however after a bit of wet wipes I got there! and here's the result
Game On Stamps, Ridiculously Awesome Stamps,  In Good Taste Designer Series Paper
did you notice the little club in the right hand corner?, I kind of wish they'd added a little diamond, heart and spade too!  the saying is from "Ridiculously Awesome", another one of those nice large saying's sets, and the patterned paper behind is from "In Good Taste Designer Series Paper"

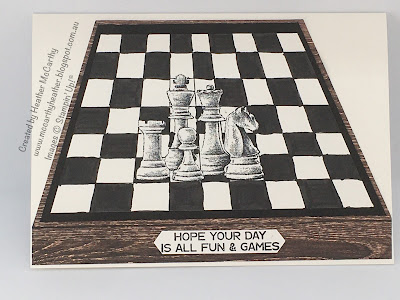
Next up I had an idea for the chess pieces.  I wanted to put them onto a chess board, but I knew it would need a bit of perspective, I think I achieved it, and the family seemed to think so too!, what do you reckon?  the saying is also from Game On, and fabulously it fits inside the Classic Label Punch, yay!  Again I've used the In Good Taste Designer Series paper.
Game On Stamps, In Good Taste Designer Series Paper

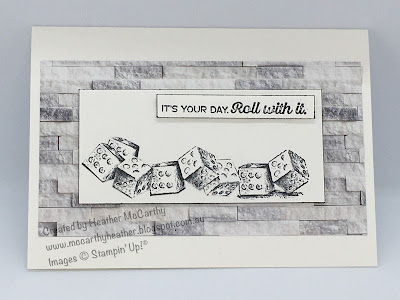
And lastly the dice! I really wanted to show them tumbling out, but as they have shadow underneath them the only way I could do this was to cut them individually, I'm actually looking at the picture now and thinking maybe I need to manually add shadow to the ones I cut out!  Again the saying is from the Game On stamp set, and the background paper is In Good Taste Designer Series Paper
Game On Stamps, In Good Taste Designer Series Paper
All in all I'm pretty chuffed with these cards I've created, what do you think?

I hope they inspire you to have a think with your stamp sets and work out what you want to see them doing on the paper for you (if that makes sense?!)
God Bless love
Heather xox
Camouflage Stamp

Hi there Creative Peeps,
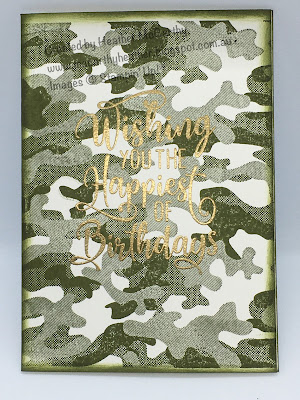
Well if you have any "boyzie boys" or "boyzie girls" (if you get my drift!) in your life I think this is a must have background stamp!  Camouflage is the stamp, and there's nothing to it but to show you what I made with it......  I've used the same stamp in the middle, from Happiest of Birthdays Stamp set, I really love the size of this stamp.  Sadly it doesn't show up on the photos terribly well with this green one! I embossed it with Gold embossing powder.  Oh and I used Mossy Meadow for the green.
Camouflage background Stamp, Happiest of Birthdays Stamps

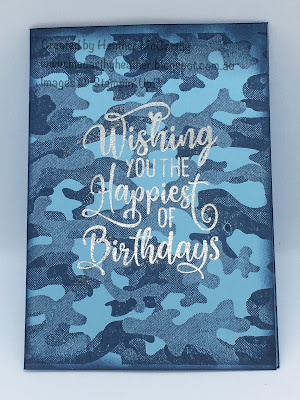
Next card; I wanted to make a matching card for the blanket I made for Sam (youngest son), and I noticed the base of it is blue in colour, so I started off with Balmy Blue cardstock, then used the Misty Moonlight to stamp the Camouflage, and silver embossing powder for the saying.  I have to say Sam was pretty chuffed with it and did proclaim it to look the same as his blanket.
Camouflage background Stamp, Happiest of Birthdays Stamps

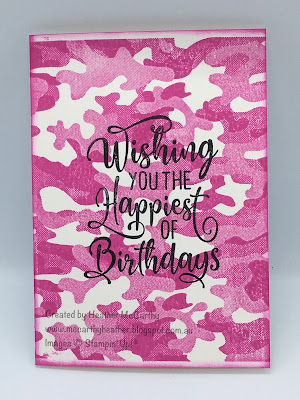
This last card I thought I should make a girlie camo card!  I know it's cliched but I still think of pink as a girlie colour!, this one I did with the Magenta Madness, it really is a fabulous bright pink, not sure the photo does it justice, this one I stamped the saying with Black stazon.
Camouflage background Stamp, Happiest of Birthdays Stamps
Ok, going to have to keep this one to a short post today as I can't stop my eye from watering, which is kind of hard to see the computer screen properly!

Hope you enjoy this spot of inspiration!  amazing what you can do with just 2 stamps eh?
God Bless love
Heather xox

Something Saturday - 2 from 1 Stripes & Trees

  Hi there Creators Today I'm doing one cut with my Designer Paper and creating 2 different cards - gotta love it when you can get 2 for...