Bubble Over New Stamp Set and Dies

Hi Everyone
Been wanting to do this post for a few days, but due to changing up my phone (or at least I'm assuming this is the reason) I'm having trouble watermarking my photos, for some reason the app I was using won't work anymore, and itunes/app store won't allow me to download a new one (grrr)
However winge over, excuse the extra watermarking.....

There is a new cool set in the upcoming Occasions Catalogue (if you've got the catalogue it's on page 32)   Bubble Over, and Bottles & Bubbles framelits
I felt it needed me to do something with it, so here's my offering!
First up I felt it should be teamed up with the new Sale-a-Bration papers that match it - Bubbles & Fizz Designer Series Paper, the "bottle tops" are in the paper, and there's a framelit to cut them out (yay)
Next card I made, I wondered how the bottles would look cut out of the new glimmer Papers (page 37) Tom (husband) wasn't keen, but then he's not so keen on sparkles lol.
Card #3 I've been meaning to try out this technique for a while now, it's where you use a Stampin' Write Marker just to colour over the edges and lines of a stamp (as you can see in the top card, the bottles are actually a block stamp, as oppose to a line stamp, I really like the look it gives them doing this this way (what do you think?)  I've teamed them up with this Painted with Love Designer Series Paper (which I accidentally ordered 2 lots of - lol) and the saying comes from Petal Palette Stamp set
Next up is the one that Tom quite liked (yay go me!) I've teamed it up with some of the Wood Textures Designer Series Paper to create the Bar table, and the circles (stamp) that are used in the middle of the "wine Bottles" above as the labels, have become the stains on the wood surface.

Ok so the last card for this post..... I just fell in love with the bubbles!, they made me think of my boy's bubble bath's, however slightly lacking in a bath stamp, so I've teamed it up with the Fruit Basket stamp set, in an effort to make it look like a washing up bowl (although thinking about it I'm not sure why I'd send a washing up bowl to someone for their birthday lol) but the bubbles are cute :)
Let me know which is your favourite? If you haven't got the new catalogues yet, let me know and I'll pop them in the mail to you/deliver them off.

I hope it inspires you to create,
God Bless love
Heather xox


Teacher Gifts 2017

Hi Everyone,
I can finally share what I made up for the teachers for their gifts this year.  As they've all got them and opened them!

When the kids start getting a cold, I put Thieves Young Living Essential Oil on them, to ward off the cold (and make sure that others don't get it).  A couple of the teachers have commented that when Sam has that on they follow him around as he smells so good (he's 6 so they can probably get away with following him around lol!).  So I thought, why not give them all some of my favourite oils?  I managed to buy these cute little bottles to put the oils into, and decorated them with different coloured beads, so they'd know which is which! (and of course decanted the oils into them!)


They needed something to sit in! and that's where Stampin' Up! came in, I made cute little round "tub boxes" for the 3 oils to sit in
And then they were all completed:
Gotta have bling at this time of year! Also gave them instructions and an explanation, otherwise it probably would have seemed a little odd - lol!

And just like that, was the end of Josh (middle son's) time at Primary School :(

I hope everyone has a fabulous Christmas and New Year, don't forget if you're after a last minute presie for a crafter, I can email gift vouchers out!

God Bless love
Heather xox

Kids Christmas Cards

Hi Everyone,
thought I'd share the cards I whipped up for my kids to give out at school, to show you how simple the cards can really be, with just a couple of stamps and a small card (in this case the A4 is cut to A5, then scored down the middle at 7.4cm, and cut into three 7cm cards, and voila 6 cards out of an A4 sheet - simples....)

Sam (6 year old) had said that he was keen to have chickens on his Christmas cards........, hence the chickens re-appearance from last years Sale-a-Bration!, he's also quite into Dinosaurs, so I figured what better on a Christmas card than a Ho Ho Ho dino? from the No bones about it stamp set (have to admit at one stage it was almost an OH OH OH dino, till I turned the stamp up the other way lol)  The dog's and cats from Santa Paws stamp set, will be retiring at the end of this month :( but again they make a cute easy card, and a little bit of colour on each card, and I reckon they all came up alright!
The 2 birds on the top row are new comers from the new Occasions catalogue being released on the 3rd January a set called Bird Banter.  And the Party hats came from the Bird Banter and the No Bones About It.

They were all so simple to stamp, and lightly colour in, I had 72 done in no time at all (now I've discovered I need to do some more, of course when I've put everything away!)

Ah well.... I hope this has inspired you to create, and know that you don't need heaps to create!

God Bless love
Heather xox

Tag Card for December

Hi Everyone,
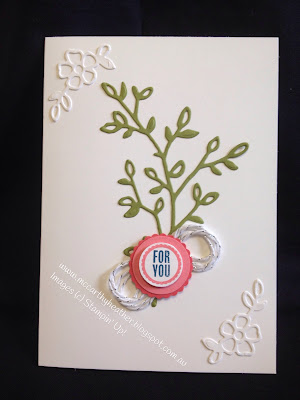
If you happen to order from me this month, this is the card you will receive to make up using your bag tag.
Thought I'd better give a little explanation of "how to put it together".
But first what's in it?
The tag is kind of small! it uses the cute Tabs for Everything Stamp set, plus the 3/4" circle punch, the 1"circle punch and the new (next month) 1 1/8" scallop circle punch.
Then the card itself uses a couple of new (next month) dies from a suite called Petal Passion, and also some new lovely silver bakers twine.

To put your card together, first attach the green leaves (I used Tombow Multipurpose Adhesive) also add the white flowers and leaves die cuts to 2 corners.  Take the twine, and wrap it round 3 fingers, then twist it in the middle, and attach it to the back of your tag (I used Tear & Tape Adhesive to do this), then I've added a dimensional to make it stand out a bit and attached to the card.
And Voila! your card is made :)

If you'd like to receive this tag card, simply order from me during December.  Also if you'd like the new catalogues that start on the 3rd January, let me know, and I'll get those out to you as soon as I can.

I hope this inspires you to create,
God Bless love
Heather xox

Mail Out Class for January

Hi Everyone,
As I won't be offering card classes in January, I thought I'd offer a "Mail Out" class.  This uses one of the new products in the new Occasions Catalogue called Sweet Soiree Embellishment Kit, that'll be released on 3rd January (as a demonstrator I got to pre-purchase this - yay!  if you'd like to be able to pre-purchase things too, let me know and I can tell you more about becoming a demonstrator and joining my team)

Anyway back to it!  this kit includes shiny (oooo shiny things.....lol) accents and embellishments, (ribbon, vellum/silver foil die cuts, cardstock/silver foil die cuts, mini paper tassels, washi tape, mini clothes pegs, and numbers), out of this I have created 6 cards for you to make, and you'll still have more of the kit left over to create more yourself!

With the 6 cards I've created, you'll be receiving all the cardstock cut to size, and basic instructions to put them together.  You will need to have:
  1. a stamp set for the sayings and the small background stamps, (I've used a new one called Perennial Birthday, which is priced at $38, I've used 10 of the stamps out of 14 in the set! which works out to only $2.71 per stamp, bargain!!) 
  2. Glues (I've used Snail Adhesive, Dimensionals and Tombow Multipurpose Adhesive). 
  3. Something to colour in with (I've used Stampin' Blends in Old Olive duo's, Pumpkin Pie duo's and Pink Pirouette duo's), 
  4. Ink Pad/s, you could use Memento Black, and colour in with the Blends, although I've used Old Olive and Marina Mist.  I'll add more details after the photos :)

Here are the cards:
the cards with the numbers are interchangeable, you pick out your own numbers from your kit.

Ok, onto the nitty gritty!

Price of the kit is $25, and $5 for postage.
HOWEVER!  
As it is Sale-a-Bration, if you order $180+ from me (either on line or in person) then I will send you this class for FREE, and you'll also receive 1 or 2 FREE Sale-a-Bration items as part of your order (double bonus!!) If you order online, just drop me a line to remind me to send your kit to you, I'd hate to miss anyone accidentally!
Please place your order with me and pop the money into my bank account with your name as a reference by 6th January (let me know and I'll send you my a/c number), I will get the order done by the 8th and will aim to have everything mailed out by the 15th (should be enough time for Australia Post to get the order to me!)

I'm hoping the new catalogues will arrive with me any day now, so I can start sending those out to you, let me know if you want one (I'm sending them out for free😊 so don't miss out by not letting me know!)

I hope this inspires you to want to create in your own space!
God Bless love
Heather xox
Interactive Cards Class December 2017

Hi Everyone,

As promised at the end of the last post, here are the "interactive Cards" I'll be teaching in December, were are doing Double Cascade Cards.  We'll be making 2 of them.  The class cost is $20, and there are 2 classes that day, 10.30am and 7.30pm - do make sure you have booked your place, as there is a limit of 6 in my classroom.  Otherwise you can order a kit from me instructions and pre-cut papers, and I will mail it out to you (let me know) the only thing I can't do with the kits is pre-stamp them (which is only the words) in both these cards. Kits cost $15 with $2 postage.

Moving on the first card is this one:
this uses the Dragonfly Dreams stamp set, the detailed dragonfly thinlit dies, the Pansy Punch, 1/2" circle punch and the Delightful Daisy Designer Series Paper


And the 2nd card is this one:
this one uses the gorgeous Year of Cheer Designer Series Paper, Gold, Silver and Champagne foil sheets, Seasonal Layers thinlit dies, Every day label punch, and the Labels to Love stamp set.

Do let me know if you'd like to join in a class or have a kit mailed to you, and I hope this inspires you to create!

God Bless love
Heather xox

Cards for classes in December

Hi Everyone
I feel like I say this every month, but Wow hasn't November gone fast! lol
Classes next month are on Maryborough - Saturday 2nd at 10am (bring Christmassy party food!)  Kangaroo Flat Wednesday 13th 10.30am (again the Christmassy party food), and Laanecoorie Wednesday 13th 7pm (see the note at the end).

These are the cards we'll be creating:
first up I love this Eclipse Technique, very simple when you know how!  I've used the Large Letters Framelit dies  and the Musical Season Stamp set

Card #2
This one uses the Christmas Quilt Photopolymer Bundle (stamps and dies), and also the matching Quilted Christmas Designer Series Paper.

On to Card #3:
this one uses on of my favourite stamp sets Every Good Wish Stamp set, inks it up with 3 different colours, and frames it :)

And last but not least Card #4:
this one uses the Tags and Trimmings stamp set, Be Merry Designer Series Paper, and the fabulous Everyday label Punch, which has rapidly become one of my favourite punches! Oh just realised it also uses another punch, the Triple Banner Punch for the ends of the Designer series paper!

If you are coming to my evening class we're starting at 7pm rather than 7.30pm as we're going in for making 2 of each card (8 in total) and the fee is $25 rather than the usual $15.

Check out the next post for Interactive Cards Classes which are on the 12th December.

I hope this inspires you to create!, and I look forward to seeing you if you can make it to any of these classes

God Bless love
Heather


Coffee & Cards Class on Monday 20th Nov

Hi Everyone,
My 2nd Coffee&Cards class in Dunolly is on again this coming Monday . 
I was inspired by one of my swaps from OnStage, having had in my mind that I wanted to use the Coffee Cafe suite of products but wanting to somehow tie it in with Christmas, I got given a card that had 2 coffee cups with Christmas sayings on them.  Highly observant me, hadn't realised that there is a set in the Holiday Catalogue that actually coordinates with the Coffee Cafe framelit dies! it's called Merry Cafe (on page 46), Ha who would have known? lol

However as I don't have that set, I've gone with one that is on the Extravaganza list - on 20 Nov you'll be able to buy this stamp set "Every Good Wish" for 20% less!! on that day only (let me know if you want to see the list!) Oh and the Coffee Cup framelits are on the list with 20% off too!
Anyway on to the cards:
This makes me think of Christmas in Australia, due to the heat, and to me it's a cold drink (frappe), bit of swirly cream on the top with the straw.  I've used some of the Be Merry Designer Series Paper and some Cherry Cobbler cardstock in the background.

 Then I got to thinking about how we go out for coffee with friends, and this card came about:
couldn't resist a couple of handbags, made with the Best Badge Punch and the cute little coffee cups, that I've coloured up with the little holly and berries stamp from the same Every Good Wish stamp set, oh also the background dots are from the same stamp set, very versatile!  funny looking at it now, I think I'm going to add a "button" to the handbags, maybe coloured in with a Stampin Blend marker, Oh the possibilities are endless!!

If you'd like to join us on Monday, do let me know, and don't forget to check my Stampin' Up! Demonstrator Business Website for a list of the specials that will be released on Monday (24 hours for the stamps, although there are accessories available for a week at reduced prices)  I do have the list, so let me know and I can email it to you.

I hope this inspires you to create
God Bless love
Heather xox

BIG THANKYOU to you all !

Hi Everyone,
I just wanted to share something with you all that I found out today.  Because of all you, my lovely customers and my amazing Team (The CreateAbles), when Stampin' Up! released the Top 50 Performing Achievers in Australia, I am in it!! ranked at #41.

I am absolutely blown away with this news, and I know that I couldn't have done it without all you guys, so I want you all to know how much I appreciate every one of you 😊

Some of you will know that I went down the Stampin' Up! event in Melbourne over the last weekend (it's called OnStage, and available to Demonstrators only).  I was privileged enough to be included in the Leadership session on the Friday evening, where we had some useful training and a lovely meal, thought I'd show you some photos of my time away:)

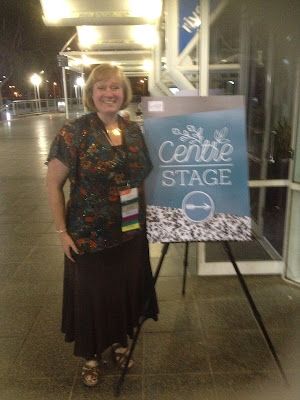
 So here I am at the evening session called Centre Stage (obviously very excited) lol
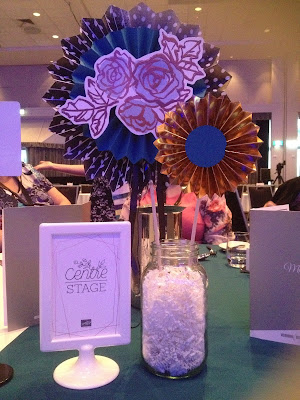
 On our tables we had this amazing decoration (sadly we weren't allowed to "borrow" them)
Moving onto the Saturday - the actual OnStage event, here I am with my level 1 team members who were able to make it from the left Jenny (behind) Renee, Me, Jenny, and Rosalie.
Again there were training sessions, a inspiring talk from Sara Douglas CEO of Stampin' Up!  Who reminded us of Stampin' Up!'s Statement of the Heart: "To love what we do, Share what we love, as we help others Enjoy Creativity and worthwhile accomplishments, in This we make a difference"

There was recognition for various achievements (I got my name up on the big screen!) and got to do 2 Stage Walks.
 

There was crafting sessions, the new unreleased Occasions catalogue and Sale-a-Bration catalogues were given to us, as well as being given new stamp sets and accessories! through Prize Patrol, and All Attendee GiveAways!  I ended up with 4 new (unreleased yet) stamp sets, as well as a few accessories.

When we got to our tables we discovered these (I'm glad Stampin' Up! staff have a sense of humour)

there was also this..... what we thought was a box for rubbish, ha ha weren't we wrong! after popping a heap of rubbish into it I lifted it up and it all fell out umm it's actually a tube lol!
I did manage to score some of those bits, (not the rubbish) so if you're visiting my Class room you may find them there........
Here's some of my team, hard at work....
And to finish it off these ladies:
are the lovely ladies who I was honoured to share an apartment with for the weekend, and this was our view from our 5th Storey Apartment:

not a bad view eh? that bobbly looking building was lit up with gorgeous red and green flashing lights in the evening, which really didn't turn out well on the camera :(

It was such an exciting fun weekend, if you join Stampin' Up!, you will also be invited to these events they happen twice a year (April and November) .  I'd love to have you join my team The CreateAbles, to find out more, click on the link above, or just ask me.

I hope this inspires you, I know the weekend has inspired me! And thankyou once again for your involvement in my Stampin' Up! business, you guys all rock!

God Bless love
Heather xox

Stampin' Blends (in the normal way)

Hi Everyone,
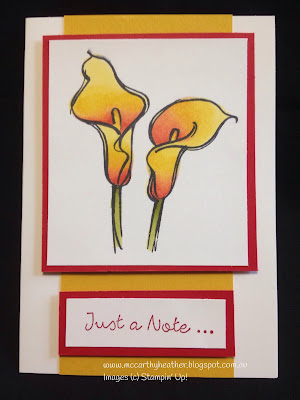
Well I know I wrote about the new Stampin' Blends the other day, but can't resist sharing some more creations with you! The "normal" way is where you use light plain cardstock (I've used Whisper White, stamp an image with Memento Black ink, and start colouring) As one of my favourite sets is Remarkable You Stamp set, I've gone with the flowers from it, I'll start with my favourite, the Lilies:
this one uses the Daffodil Delight combo blends, Calypso coral combo Blends, and the Pumpkin Pie Combo Blends, and of course the Old Olive Combo Blends for the stems!

Next up the waterlily type flower (I'm sure someone will know what it is!), this one again uses the Daffodil Delight, but then I've used some Pink Pirouette to create the delicate colour in the bottom of the flower, then some Old Olive for the stems again.....

And moving onto the last flower in the stamp set, reminds me of a magnolia flower (although I'm pretty sure if it is that I'll have coloured it in wrong lol), so this one I've used again the Old Olive Blends for the stems, then the Bermuda Bay Blends for the base of the flower blending into the Rich Razzleberry Blends.

Which one was your favourite?

Stay tuned for more Stampin' Blend ideas, Oh and before you go I just wanted to share with you one of my favourite things about the Stampin' Up! Stampin' Blends. You can buy them individually for $7.75, or as a duo with the light and dark of that colour for $15.50.  I really love this versatility as you often use one more than the other, and I think for the price they are really amazing value!
So there's my bob's worth for today :)

 I hope it inspires you to want to give them a go too, and start building up your collection. Let me know if you have any questions.

God Bless love
Heather

Christmas Quilt Bundle

Hi Everyone,
yep I succumbed to the Christmas Quilt bundle, and Oh My Goodness I wish I'd got it sooner LOL

It arrived on Friday evening, although my "wonderful" husband decided not to tell me there was a box for me (grrr) until late in the evening (even though I'd asked!) by which time it was too late for me to do anything and I had a full on weekend, culminating in a migrane. However enough of my griping, and onto the exciting stuff.....

This is what I made up for my "Tag" card for this month, so if you order from me, you'll receive it to make up with your bag tag, just a quick heads up on how to make it, the Quilted Christmas Designer Series Paper is cut for you to 3x6" just fold over the ends and stick them down (around 1/2cm)
then attach your tag onto it and the cotton reel and needle. I found that Tombow (Multipurpose Adhesive) worked best to attach the tag on with.
So after this I had another go, and created this:
I've used one of the Clear Faceted Gems, and coloured it using the new Stampin' Blend pens (in this case the dark Cherry Cobbler), doesn't it look fabulous? looks better in real life!
Ok so onto the last card for today:
I couldn't resist just stamping, and I really love the way this turned out, hopefully the lady who receives it will like it too!  Don't think I'd be much of a quilter though I got a bit lost with the design lol!
just a close up of the Rhinestone basic jewels - again inked up with the new Stampin' Blends, Oh the Stampin' Blends are so much fun to play with!, and I love the fact you can buy individual colours, so if you use one a lot more than others you can replace it, and they are such an amazing price too, if you haven't checked them out, do so!!
Ok we'll I'd better keep going, I hope this inspires you to create
God Bless love
Heather xox

New Today (1st November 2017)

Well!  Very happy to say that Stampin' Up! have bought out a  new range of colouring tools called Stampin' Blends, hopefully this link works for the Utube video that has been released for it!

U tube video about Stampin' Blends
 When mine came a couple of weeks ago I'd also ordered myself the Just Add colour Specialty Designer Series Paper, here's what I created:
 yes it took a while but so satisfying to just sit and colour in, loved the way the colours will just blend into each other, so you can create the light and dark shades, and because they're alcohol markers you can just keep going and going with out the paper balling up. Even Tom (husband) was impressed (and it takes a fair bit to impress him, after so many years of Stampin' Up! lol)
Check them out here: Heather's Stampin' Up! shop
Let me know what you think!
I hope this inspires you to create,
God bless love
Heather xox

Got a new stamp set and dies!

Hi Everyone,
well surprise, surprise I bought another new Stamp set and matching dies! lol
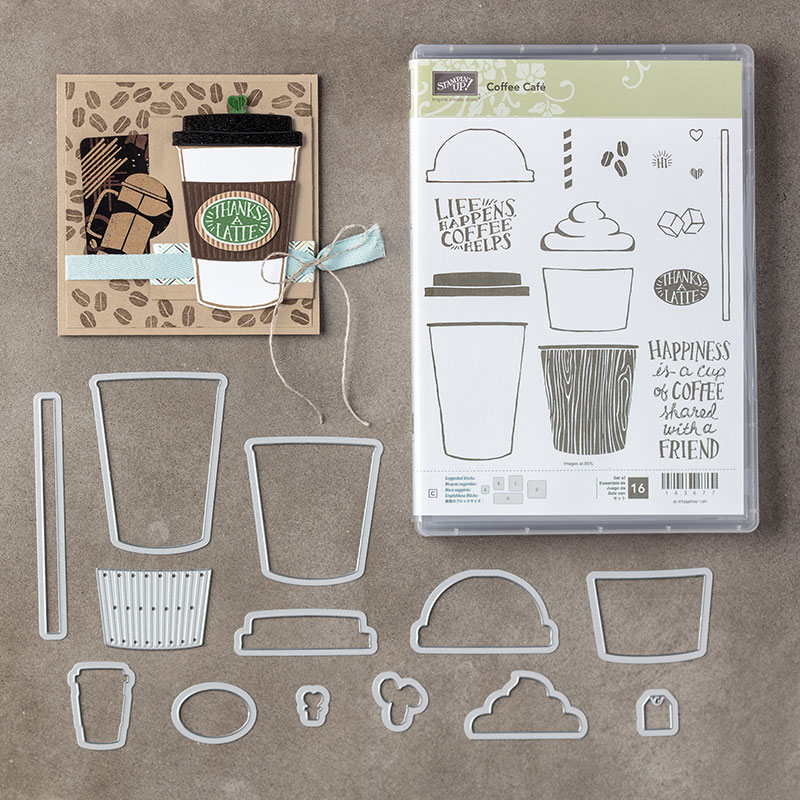
This time I figured because I'm doing a "Coffee&Cards" class I should really have the Coffee Cafe Bundle
Coffee Café Photopolymer Bundle See? how appropriate!
So, I finally set to work with it and created these 2 cute little cards.......
The cards are small (dinky I'd say), the cardstock measures 7 x 14.8cm, and then scored at 7.4cm (you can get 6 out of a piece of A4)
Kind of loving the cute little Corrugated elements too!  (the little heart and oval)  and this evening I have just discovered that there is a cute tiny coffee cup that is cut out with the dies too that's in the Designer Series Paper (Coffee break Designer Series Paper)!
Umm I can feel some more playing with it coming along now I know about that.......

Ironically I don't actually drink hot drinks (tea/coffee) however I do like my iced coffee/mocha, so I'm seeing those ice cubes in a drink lol.

I hope this inspires you to create.
God Bless love
Heather xox

Cards for October

Hi Everyone,
Sorry it's been a while since you heard from me!  But here I am again :)
Wow it's nearly the end of the month, so for next month I thought we'd settle into Christmas with 3 of the cards for the month, and one bright summery one!  Classes for these cards next month (November) are on the 1st Bendigo, 4th Maryborough and 8th (eve) Laanecoorie
 Let's start with the bright summery one, because I really love it! lol
Oh my goodness, I can't believe I hadn't bought this Iridescent Sequin Assortment before! and for 1c per sequin wow what awesome value!, got to show you a close up of them..... I've also used a new stamp set to me: Hello Friend, along with the Pattern Party Decorative Masks.
How gorgeous are they?!! I think I'm in love again! lol

Ok ok, I'll move onto card #2 (we'll come back to that later.......lol)
Right, the first of the Christmas cards!
this one uses the Merry Little Labels Stamp set (comes as a bundle with the Everyday Label Punch), the Cable Knit Dynamic Embossing folder (which I haven't used much before, but I really like the effect it gives!, what do you think?)  I've also used the 2" circle to punch out the saying, and the Starburst Punch under it, and what do you think of the bow? this is from the Holly Berry Builder Punch, and the extra bits are drawn on (no tying involved!)

Card #3 uses one of my favourite sets for Christmas words - Snowflake Sentiments, (comes as a bundle with dies) I think the font that's been used on the words is beautiful!
I've also used the Winter Wonder Embossing folder, but not as a folder through the Bigshot, just inked up and pressed on!  and the Houses are not stamped!  they're from the Just Add Colour Specialty Designer Series Paper, add a bit of Dazzling Diamonds and pop them up on Dimensionals (have to admit that I use Dimensionals all the time, have you tried them yourself?  did you know that dimensionals come in 2 sizes, and for $6 you get 300 big ones or 720 mini dimensionals! (and that doesn't include the outside bits that I cut up and use too)

Last but not least Card #4 I just had to use Every Good Wish Stamp set
I've teamed it up with Berry Burst and Lemon Lime Twist, and also *drum roll* the ultra gorgeous Year of Cheer Washi Tape (looks way better in real life than here)  Oh and not forgetting the leaf Punch (I really do hope this one moves into the next catalogue too, I use it so much!)

Well I did say that I'd get back to that first card, so thought I'd show you the other variations I made with the Pattern Party Decorative Masks....... Do you know what the pack is only $10 for the 4 masks, that's only $2.50 per mask! how's that for value!!

Saved the best for last (I think)  which one is your favourite?, let me know!
 
Ok well I hope this inspires you to create, and I look forward to seeing whoever can make it to the classes this month.

God Bless love
Heather xox

Something Saturday - 2 from 1 Stripes & Trees

  Hi there Creators Today I'm doing one cut with my Designer Paper and creating 2 different cards - gotta love it when you can get 2 for...