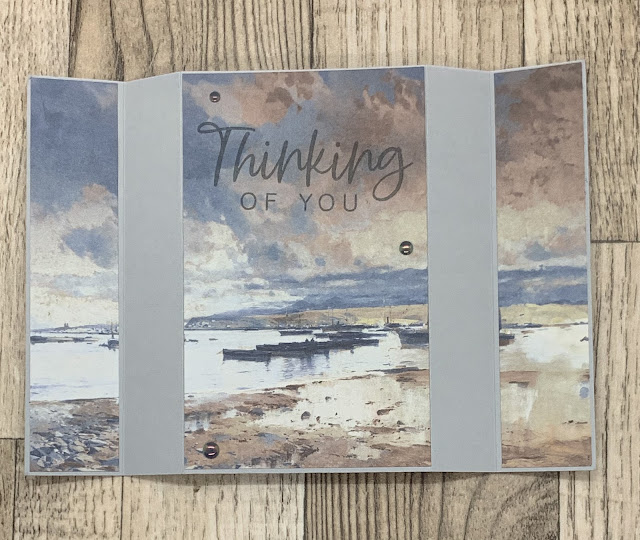
Something Saturday - Bit of a Sneak Peek

 Hi Creators

I thought I'd show off a couple of the new Designer Series Papers coming up in the new Annual Catalogue.  The catalogue will "go live" for customers on 6th May, but if you want to get your hands on some of these goodies earlier you could join my team (and like me order them early!)😁

Joining is so easy, you pick out $235 of goodies (you can pick from the brand new stuff too) and only pay $169 (how's that for a deal?!)  You then get an ongoing discount on all your orders of 20%, plus you also qualify for the free 10% of any $35+ orders to spend on a future order (in essence giving you a 30% minimum saving) Win, Win!  The requirement after that to remain a "demo" is to order (through your own and /or others orders) around $470 per quarter, works out to just under $160 month (about $40 a week)  not so bad when you work it out to a weekly amount is it🀣  Anyway if your interest is "Piqued" ask me or check out more here: Join my team.

On to the cards I create in the video using the Beautiful Gallery Designer Series paper, ironically as thought I'd be playing with the other paper Celebratory Sips!  Ah well another time.

I wanted to showcase these Beautiful Gallery papers so that I didn't lose any of the beautiful design, so that's when the idea for these cards came about: (they are remarkably simple)

With Both cards I've used the Stamp Set "with you in mind", which is current (hence the link), and some new blingπŸ’Ž  The flowers card uses the upcoming Holographic resin dots, Oh and I silver heat embossed the sentiment, as I felt that would go well with the colours.

Beautiful Gallery DSP, Stampin' Up!

Beautiful Gallery DSP, Stampin' Up!

This next card uses the new 2025 -2027  In colour Flat Pearls (in this case the Secret Sea colour)
Beautiful Gallery DSP, Stampin' Up!

Beautiful Gallery DSP, Stampin' Up!

If you'd like to see how to make the cards, it's near the end of my video, check it out here:


I hope this inspires you to create!
God Bless love
Heather xox

Something Saturday Wildflower Birthday Fancy fold Cards

 Hi there Creators,

Today I thought I'd show you something I saw at the Picture to Page show recently, the fold kind of fascinated me, so I went home and mocked up a practice one (and after several attempts with scrap paper finally got it worked out!) A4 style 😁

I decided to use the Wildflower Birthday Specialty Designer Series Paper  partly because I keep forgetting to use it, and I do love the gold foiling in it.  I ended up using Peach Pie A4 Card and Blueberry Bushel A4 to create the base cards with, then used the Nested Essentials Dies (so glad I bought these as they're incredibly useful), and Simply Said stamp set, which is my "go to" set, when I don't know what else to use🀣.

Here are the finished cards:

Wildflower Birthday, Stampin' Up, Fancy fold card

Wildflower Birthday, Stampin' Up, Fancy fold card

and just a few more photos to show you the back, side and bottom....


So to create....
The peach card (portrait) take a piece of A4 cut in 1/2 lengthways, and score in 1/2 at 14.8cm, from the 1/2 way point across the top fold of the card score down to each corner.
then measure down the sides from the top corners 7cm and mark, score from the top middle score lines down to the 7cm marks on each side.

The Blueberry (landscape) card.  take a piece of A5 card, score in 1/2 at 10.5cm, then mark the middle of the fold, and score down to each corner, then mark down on each side 5cm, and score from the central score mark down to the 5cm marks.

If you haven't seen the video, here it is:


I hope this inspires you to create.

God Bless love

Heather xox

Something Saturday - Origami Envelopes

 Hi There Creators,

Guess what? it's that time of the week again for Something Saturday!πŸ˜ƒ

This week I happened to be scrolling through Facebook and came across this origami envelope quick video, so I have deciphered the video (you know how they do it and it's so fast!)

And I've worked out if you do it with 12x12" cardstock you get an envelope worthy of a card, and a 6x6" piece gives you a gift card sized envelope.

Here they are: then I'll try and explain how to make them......

This first one is made using one of the 12x12" pieces of Unbounded Beauty Designer Series Paper

origami envelope, Stampin' Up!
and this smaller one uses one of the 6x6" pieces of Full of Life Designer Series Paper
origami envelope, Stampin' Up!

Now, how to create these envelopes:

take your square piece of designer cardstock, and fold in 1/2 diagonally

Open it up and fold one side in to the middle:
then fold as shown:
open up the bottom flap and fold in the sides

fold up the bottom
tuck the point bit inside the envelope (you might want to stick this down)

then pop your card in and fold the top over.

If you missed the video here it is:

I hope this is helpful and it inspires you to create matching cards & envelopes πŸ˜ƒ
God Bless love
Heather xox


Something Saturday - Easy Pop Up Card

 Hi there Creators

Today I'm showing off a card that one of my friends (and downline) Lee-Allan sent me which is an easy pop up card (very easy) πŸ˜ƒ she has taken it from Lynn Dunn (Easy Inside Pop Up Card)

I've used the lovely Storybook Moments Specialty Designer Series Paper, which is so darned cute, but I haven't been able to work out how best to use it, so I'm thrilled that this works!

I also used the Tiny Bee trinkets on the card, perfect for a little bit of embellishment


Storybook Moments Specialty DSP, Bee Trinkets, Stampin' Up!

Storybook Moments Specialty DSP, Bee Trinkets, Stampin' Up!
I then got a bit carried away and made another card....
Storybook Moments Specialty DSP, Bee Trinkets, Stampin' Up!

Storybook Moments Specialty DSP, Bee Trinkets, Stampin' Up!

I borrowed a saying from You are Remarkable Stamp set for this one, and cut a slit in the wheelbarrow for the little rabbit with the radish to sit in.

Now for the measurements:
You'll need a card cut from A4 cardstock, so it's lengthways, ie 10.5cm across and scored at 14.8cm
Then a piece of 6"x6" Designer Series Paper (DSP),  cut a piece off for the front 5.8cm, then trim off some from the end to make it 14.3cm long
The other side of the DSP cut 2cm off the end, then another 2 cm.
lastly you'll need the white piece for the inside, I have a photo for you....

Oh and obviously you'll need something to add to Pop up on the inside πŸ˜ƒ

If you missed the video here it is:

I hope this inspires you to create
God Bless love
Heather xox

Cards for April Classes

 Hi there Creators

Yay, sharing our cards for my April Classes now, so I don't forget when my Mum is over!

Class dates in April are Friday 4th 1pm in my classroom Laanecoorie, and Saturday 5th at 10.30am at Wattle City Church Maryborough. Don't forget to book your place!

First up we have this card made with the Spring Corners Bundle (it's an Online bundle in case you're wondering where it arrived from!)  I was quite taken with the dies in particular, but of course some of them cut out images, and after having seen these cute little balloons on someone else's card I was hooked!🀣 also used the delicate Blooming pearls, I felt it needed something that wasn't really bold with this set!

Spring Corners Bundle, Stampin' Up!

Next up We have this card using Birthday Celebration Stamps, and One More Year Stamps, I love using the Brights colours with the One More Year Stamps, I really feel it lends itself to bright and fun!  Inside the card is a surprise saying of " At least you're not as old as you'll be next year" 🀣

Birthday Celebration Stamps, One More Year Stamps, Stampin' Up!

3rd Card is this chest, I've used the Tags to Go Dies to create the locked chest, with a key to unlock their wishes πŸ˜‰ the saying comes from Birthday Celebrations, and the Reindeer Memories Two-tone cardstock (which is reduced and on the last chance list) is embossed with the Dashing Designs 3D embossing Folder and then sanded. Oh also, some Timeless Plaid Designer Series Paper in the background!  Thought it might make a good guys card.

Tags to Go dies, Dashing Designs 3D EF, Stampin' Up!

Last but not least, is a choice card: (either/or)  As it takes a bit to colour in the turtles and starfish, so I thought that way people can choose their colour scheme and what they want on it!  I've used the Sea Turtles stamp set, Dotted Circles 3D embossing Folder, Labelled with Love punch (or at least 1/2 of it!) and the Tags of Thanks stamps.

Sea Turtles Stamps, Dotted Circles 3D EF, Stampin' Up!

And that's it!  I hope you can make it to class but if not I hope these inspire you to create.

God Bless love

Heather xox

Something Saturday - Concentric Shapes Cards

 Hi There Creators

Today I decided to have a go at something that's been brewing in my brain, and I'm happy with the way it turned out, not sure if there's a specific name for cards like this or if this is a Heather special!

The idea is to stamp a nice colourful image for the underneath image, then the same image as a plain image non-coloured in or less decorative.   This one then gets cut up with a series of dies that allow a small gap between them.  I thought it would be cool if the top image is raised and the best way I found of doing this was to add Foam Adhesive sheets to the back before it's cut, gives it a nice sturdy lift, plus saves faffing around with mini dimensionals and trying to cut them down!

Anyway here are the photos of the finished cards, and you end up making 2 cards out of the one cut!

these are the ones I made up first, using the Beautiful Butterflies stamp set and the absolutely gorgeous Drusy Adhesive Backed Embellishments
Beautiful Butterflies, Concentric Shapes card, Stampin' Up!


Beautiful Butterflies, Concentric Shapes card, Stampin' Up!

So then onto the ones I created in the video, I've used the Sea Turtle Stamp set, some Gold Twisted thread, I added an extra cut out from the middle using the Tags to Go Dies, and the Riverside Irregular Pearls (kind of thought it might be appropriate for a "sea" based stamp set 🀣)
Sea Turtle stamps, Concentric Shapes Card, Stampin' Up!

Sea Turtle stamps, Concentric Shapes Card, Stampin' Up!

Sea Turtle stamps, Concentric Shapes Card, Stampin' Up!

Sea Turtle stamps, Concentric Shapes Card, Stampin' Up!

If you missed the video here it it:


I hope this inspires you to create
God Bless Love
Heather xox

Something Saturday - Fancy Fold Card

 Hi There Creators

Today I'm showing you how to make the card that Paula (Yellow Bear Stamping) was showing off when we were together in New Zealand (couple of weeks ago in my video) see the video here: Live Video with Paula

I have no idea if it has a special name, she found it on Connie Stewarts blog (from USA), so now I'm borrowing it and changing it (as I do....)  see my measurements down the bottom.

Here is the "original style" card that I made: (click the links to see the products)

This one uses Nested Essentials Dies, Courage & Faith Stamps, and Timeless Plaid Designer Paper on a backing cardstock of Pebbled Path (I'm going to be so sad to see that colour go when the In colours retire in May!)

Nested Essentials Dies, Courage & Faith Stamps, Stampin' Up!

then in the video I (kind of) made this one: which uses Wildly Flowering Designer Paper, the same dies (Nested Essentials), and a new Stamp set: Tags of Thanks.

Wildly Flowering DSP,  Tags of Thanks Stamps, Nested Essentials Dies


then I made my sideways revised version....  for this I've used the rather lovely Everyday Happiness Designer Series Paper, Spotlight on Nature Dies and the same Tags of Thanks stamp set.

Everyday Happiness, Spotlight on Nature dies, Tags of Thanks Stamps

Everyday Happiness, Spotlight on Nature dies, Tags of Thanks Stamps

I also made this one which I show in the video, but uses a retired Designer Paper, the saying is current though😊 it's from Beautiful Butterflies.


Now for the measurements:

Take your standard A5 sized card, score it in 1/2 at 10.5cm, then each of the sides in 1/2 again (easiest way is 5.25cm in from either side.)

Don't fold the side bits!

Now cut 5cm up a slit from one score line to the next, and repeat on the other side, so you have 2 parallel cut lines in the middle of card that go from the outer score line to the other outer score line. (hopefully that makes sense!, if not watch the video below)

Then you need some Designer paper, I measured it 5 3/4" x 4", and a further piece 5 3/4" x 5cm, see the video for how to cut it, as it's a bit hard to describe! (sorry)

Then you'll need something for your saying to go on I used die cuts but you don't have to

And either a full card to add to the back for the Landscape card or an A6 piece for the back for the portrait card.

If you missed the video here it is:


I hope this inspires you to create
God Bless love
Heather xox

Something Saturday - Nutcracker Tags Kit

Hi there Creators, Today I figured I'd crack open my Nutcracker Tags Kit (pardon the punπŸ˜ƒ) I did discover there's more than you ne...