Hi Everyone,
oops this was yesterday's challenge, to find the largest stamp we own and create something with it!
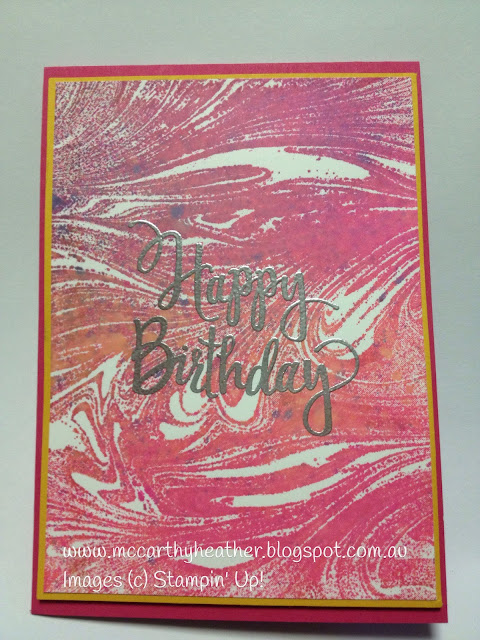
As I have a few background stamps I thought I'd ink up one I haven't used much Marbled Background Stamp.
I wanted to create a multi-coloured effect, but the idea of using Stampin' Write Markers on such a large stamp wasn't so appealing, so I tried out the "Baby Wipe" Technique, but wasn't too impressed with the way it inked up.
So my next option was spritzing......
and this is how it came out:
I did feel this was kind of pink, which is great if you're a big "Pink" fan, but I'm generally not lol.
So then I made up another one using more green and blues
This is more my colours, but of course once I had it made I then thought I maybe preferred the Pink one! generally I'm pretty happy with the way it worked.
To make them I have had the stamp sitting in my bin, and I sprayed colour onto it (drops of re-inker, mixed with Isocol alcohol liquid into the Stampin' Spritzers), I've used 3 or 4 different colours, then having the stamp still the wrong way up, I've moved it onto my table and pressed the card onto it. You don't want to get the stamp too wet or it blurs the image too much.
Then with these 2 cards I've heat embossed the Stylized Birthday stamp. Love this stamp it's nice and easy to use, always gives a great image, and it's big enough to make a great card on it's own!
Well that's it for challenge day 2 (little late admittedly) I'll see how I go with challenge day #3 hopefully will be back later..... watch this space as they say!
Hope this inspires you to create!
God Bless love
Heather xox

Thankyou for joining me today, I have been a Stampin' Up! Demonstrator, since 2008. My blog will show you how to make cards and projects using Stampin' Up!'s fabulous products. And occasionally random extra stuff (that's the way I roll 🤣) Please do sign up to receive my emails, so you get my latest info.
Subscribe to:
Post Comments (Atom)
Something Saturday - Holder for last weeks project
Hi there Creators, I mentioned last week that maybe I should create a holder for all those cards to sit in and make it look great as a gift...

-
Hi there Creators I saw this cool star ornament in another video, and had a bit of a play around with it, ending up with this.... (with a r...
-
Hi there Creators Come and join in our Collective 61 Fundraiser on 21st February at 2.30pm at Enjoy Church, 29 Valentine St, Bendigo. Mak...
-
Hi there Creators, thought I'd join in this Sale-a-Bration Blog hop today, and I'm excited to see what others have created using...


.JPG)

No comments:
Post a Comment