Posts

Something Saturday - Inchie equivalent card for those with an A4 Brain!

Image
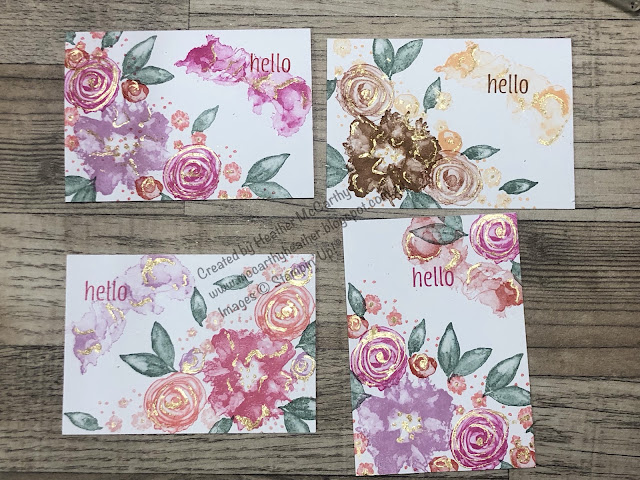
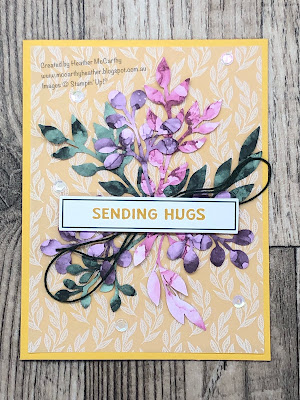
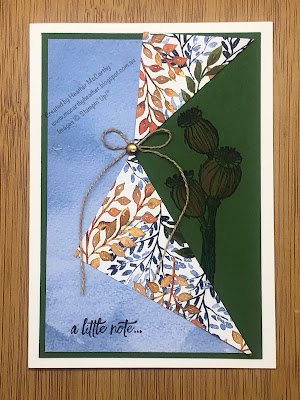
Hi there Creators, Well today I thought I'd have a go at an "inchie" card, only mine (unsurprisingly for me) aren't inchies! The idea behind it is that you have inch squares, which get attached to a background paper (which has been scored up before hand so you have lines to attach your inchies to, and embossed with an embossing folder, which then deletes the score lines. However, as you have to cut your base card down to create an inchie card, I decided to do things "my way" hence "equivalent for an A4 brain" Here are the 2 Inchie cards I received the first one from Simone my up-line as a swap at the Stampin' Up!event. She's used the beautiful vibrant Flowering Zinnias designer series paper and the second from Lee-Allan one of my down-line (which uses some paper that now I need to buy 🤣) check it out for yourself:  Natures Sweetness Designer Series Paper then I got onto creating one - my size using retired Designer Papers (you can never

Something Saturday - How to add veins of gold leaf to your stamped images

Image
 Hi there My Something Saturday this week is about how to add veins of the gorgeous Gold Gilded Leafing to your stamped work, I've used the beautiful Artistically Inked Stamp set, I think this is just soooooo gorgeous! (check the bottom for the link  to the products I've used) Here are my cards I created: this is the card I create in the video:  Isn't it gorgeous?  It's so easy, this stamp set Artistically Inked, is so forgiving to use, pick a few coordinating colours and stamp, you can stamp quite randomly, I like to try and cluster them together. then just use the fine end of the tombow (Multipurpose Liquid glue) to draw on glue where you want the gilded leafing to go, allow the glue to dry a little before dusting over with the Gilded leafing, and brush off the excess, I like to use a fairly firm sponge for this.  And voila gold veined stamped images, wooooooh 😍 And one last image for you.. (got a bit carried away!)  Link to the YouTube Video Click on this link to se

Which Stampin' Up! Glues for what?

Image
 HI there Creators Well this "Something Saturday" was on the variety of Stampin' Up! glues (aka Adhesives) on offer currently. first up on my list was Dimensionals, these are Sticky Up'y dots, little foam hexagons with adhesive on both sides, so you can create "dimension" with your work.  They come in White and black in 2 different sizes and there's heaps of them in a pack.  The white standard Dimensionals have 300 plus you can cut up the side bits so it probably gives you another 100 peices.  The white mini dimensionals have 720 mini dimensionals plus again all the bits round the sides.  Black dimensionals have both in the pack (2 sheets of each).   Next up is the Tear & Tape Adhesive , (basically double sided sticky tape that's stickier than your average double sided sticky tape and doesn't fall apart after 6 months!) when it goes on it's sort of translucent when it's on, it's fabulous for getting your ribbon straight, or just

Do more with your Punches!

Image
 Hi there Creators Well I said the title out loud and my youngest son showed me a few creative punches, like this Mum, umm not quite the sort of punches I was thinking of lol!😀 Of course I'm talking about "papercraft punches", how to get the size to be bigger or smaller, handy to know when you have a saying that's longer than your punch, or when a small saying looks a little lost in the middle of your punch! So that's what my "Something Saturday" video was on this week, you can find it over on my Youtube "Being CreateAble with Heather" Channel or on my Facebook "Being CreateAble with Heather" Page However I have taken a few photos for you, and I'll try and explain.... (click on the links to view the punches). This first one shows the Delightful Tag Topper Punch , which has 3 widths, 2", 1 1/2", and 1", I love this for making my tags to go on bags or presies, you can do a larger one in colour, and pop a smaller one

Bright Baubles Bundle Bumper kit

Image
  Hi there Creators As I mentioned in the email I've just sent out, I'm planning to offer a Bundle or Suite focus every month or every other month, as a "by mail" class.  I'm not sure I've got the right name for it yet, so votes please....   Please could I have votes for what I call the Bundle focused one , (I've decided on Suite Sensation for the Suite one, although I'm up for suggestions on that one too) Currently I have: Bundle Bumper (not my fav, but it's what I thought of first lol) Bundle Brilliance Bundle Bounty If you have a better suggestion and I use it, I'll be sending you a pack of embellishments for free😊 I have teamed up the Delicate Baubles dies with the Heartwarming Hugs Designer Series Paper   to create these cards for those who like their traditional red and green Christmas colours:   This Kit is available to you for $42, which includes: 1/4 pack of Heartwarming Hugs Designer Series Paper (you will have left overs) A full p

Expressions in Colour Paper Pumpkin Kit

Image
  Hi there Creators, Oh wow have you seen this kit yet?  Mine has finally arrived so I've done a video on how to put it together, the cards are so pretty!  I think it would make an amazing gift for someone at only $37, you could either send it to them to create the cards, they only need a clear block for the stamp set included in the kit, or you could create the cards then send it on (if they're truly not into creating things)!  I also think it would be fabulous for anyone short on space or going on holiday... anyway let's show you the cards. So here are my finished cards: The kit gives you 3 of each of these cards to create, plus a gorgeous box you can use to gift onwards  I think my favourite is the yellow one, which is your fav? If you would like to check it out and order it click this link:  Expressions in Colour Paper Pumpkin Kit Check out the other kits available here: Kits Collection   there certainly are some gorgeous kits! I hope this inspires you to create God Ble

Card Class for October

Image
 Hi there, All going well we should be having this class on 6th October in my classroom, I've based the class around the Beauty of the Earth Designer Series Paper, and as there's quite a bit of stamping involved it is an in-person class, however there will be a new postal class coming soon (stay tuned....) Anyway here are the cards, and at the bottom I'll add links which show you exactly what I've used for each card: This first one I wanted to show both sides of the designer paper, as it's so pretty! then I've used the Enjoy the moment stamp set to stamp the seed pods (haven't used this set much) The second card I've gone with the Daisy Lane Stamp set and matching Medium Daisy Punch (again a stamp set I haven't used in a while!) 3rd card is such a wintry pattern (and of course being English, wintry patterns remind me of Christmas....)  So these 3 trees and saying come from Perfectly Plaid stamp set and the matching Pine Tree Punch. Last but not least

Stamped Heat De-bossing (Something Saturday)

Image
 Hi There Creators, This week my "Something Saturday" video was on Stamped Heat De-bossing, I'm not sure if it's called this but I can't think what else to call it! This is it, there's no ink used in the saying, just heat embossing powder and a stamp.  I think it creates a really cool look. These are the finished cards the top card is the one I actually make in the video : Now that I'm looking at them on here, I'm thinking it would make a really cool tag to hang on a Christmas Stocking!  They kind of end up looking a bit like dog tags!  Or even on a scrapbook layout it would look really great! Anyway I'm sure if you haven't viewed the video that you're wondering how I've done this. It's actually quite simple if you know how to heat emboss! Take your piece of card, wipe it over with your Versamark ink pad, then cover it with heat embossing powder, and heat emboss it. Then repeat the process so (in my case) the Gold or Copper gets thi