Posts

Something Saturday - Inchie equivalent card for those with an A4 Brain!

Image
Hi there Creators, Well today I thought I'd have a go at an "inchie" card, only mine (unsurprisingly for me) aren't inchies! The idea behind it is that you have inch squares, which get attached to a background paper (which has been scored up before hand so you have lines to attach your inchies to, and embossed with an embossing folder, which then deletes the score lines. However, as you have to cut your base card down to create an inchie card, I decided to do things "my way" hence "equivalent for an A4 brain" Here are the 2 Inchie cards I received the first one from Simone my up-line as a swap at the Stampin' Up!event. She's used the beautiful vibrant Flowering Zinnias designer series paper and the second from Lee-Allan one of my down-line (which uses some paper that now I need to buy 🤣) check it out for yourself:  Natures Sweetness Designer Series Paper then I got onto creating one - my size using retired Designer Papers (you can never

Create a Camera Shutter card

Image
 Hi there Creators, Well my Something Saturday this week is showing you how to create a Camera Shutter Card (I'm not sure if that's what it's called but that's what I'm calling it 😀), so here is the card..... The photos above are the finished card from the video, I did add a little to this one. Anyway the basic ingredients are:   You will need 1 piece of A5 card for the card base, you'll need to "gate-fold" this, which means scoring at 5.25cm in on each edge.  It gives you the usual A6 size card but the opening is in the middle. You'll also need 2 pieces of 7.4cm x 10.5cm, which need to be scored on one side in by 1cm And one piece of 14.8cm x 7cm, scored in at the top and bottom by 1cm You'll also need an appropriate punch ideally one that's fatter in the middle and tapers towards the ends slightly. Also a pencil, rubber, ruler and glue  Oh and some images to stamp I've used the really cute Sale-a-Bration Counting Sheep stamp set and

6 quick and easy Christmas Cards

Image
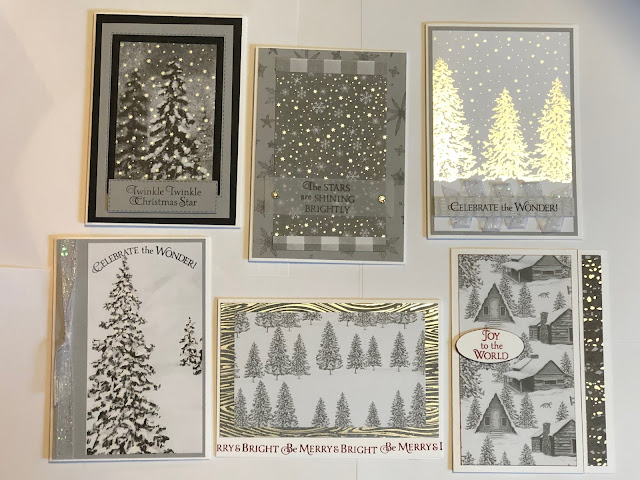
 Hi there,  well my "Something Saturday" this week was these 6 Quick and Easy Christmas Cards using the elegant Peaceful Place Specialty Paper , the Stars are Shining Stamp set   and the fabulous White Glittered Organdy Ribbon and I promised in the video that I would pop the measurements up on my blog, so here goes.......  Those are the 6 cards, however as I did repeat them all I've then taken photos of each with it's "pair", so I can give you the instructions for both if they ended up different.   however this first card didn't end up much different!  This card I've cut the same paper and used both sides, the underneath piece is cut to 3.5" x 14.5cm (sorry about the combination of cm and inches!) the top piece with the trees is 3" x 5" Then I've just stamped the saying across the bottom of the card. This next card has a base of Smoky Slate, cut to 14.5cm x 10cm, then the specialty paper is cut to 6" x 9.5cm  with 1/2 "

Creating a Faux Stained Glass Window

Image
 Hi there! In my latest YouTube/Facebook Video I showed how to create a faux stained glass window on the top of one of the new Stampin' Up! Kraft Gift Boxes.   These boxes are fabulous as they actually fit cards and envelopes in them!  Yay!, as I quite like to give some of my cards as presies from time to time I'm really stoked that these are the right size. They have a little window at the top of them, which is where the stained glass bit comes into play.... So how do you do this? Before you put the box together, using Black Stazon Ink stamp the image onto one side of the window, then use a black permanent marker pen to draw on the rest of the stained glass bits. Turn the box over, and on the opposite side colour in the parts with Stampin Blends (alcohol markers)  NB do not colour in the side that has the stazon on it!  if you do the stazon will run, and you'll end up with muddy colour. Pop your box together and viola one stained glass window effect. Just in case, you do w

Giving Gifts Dies

Image
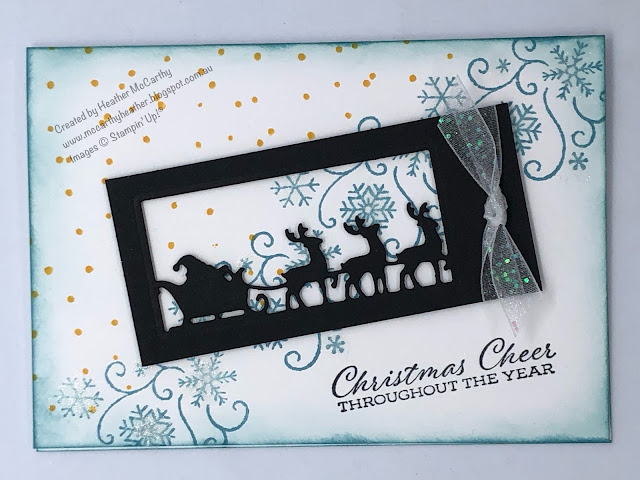
 Hi there! In my random extra Facebook video I did yesterday I was creating this card: (because the new mini catalogue is out and I couldn't resist sharing some of the Christmas goodies in it) In the video I mention that I intended to make up cards with the other dies in this set, and that I would show them off once made......so yay I've made them! I've continued using the whole bundle, check it out here:  Time of Giving bundle   how cute are the little reindeer and sleigh? The funny thing with this Giving Gifts Dies is that I didn't really think properly when I was looking at them in the catalogue, I was expecting for some reason much bigger dies, possibly the name should have given it away lol!  they really are around gift tag size, but I'm really happy putting gift tags onto cards.........so here goes... the next card I made up uses the leaves, I had the idea to cut it out of a rectangle of card, then have a second rectangle under it, and colour this in autumnal

Decorative Mask Wows

Image
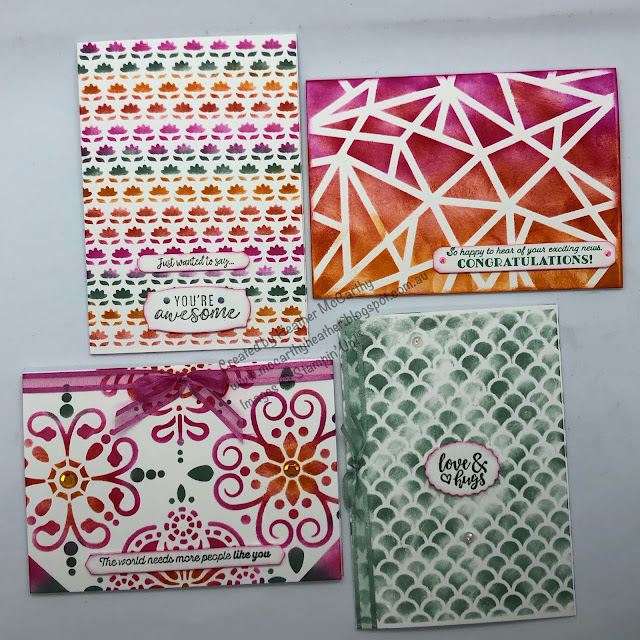
 Hi there, its been a while since I put anything on here usually it would be my monthly class, but when we got locked down again, my Christmas In July class got moved, so now it's "Christmas in August" lol.  So I thought as today I had only done the background for the cards I was showing on my Something Saturday video (Facebook or Youtube), I should show you how the cards actually turned out. As I mentioned in the video I've just received these Plenty of Patterns Decorative Masks , actually one of my fabulous customers ordered herself some and I couldn't resist adding some in for myself (at only $14 why not!)  In my defense, I had been eyeing up the geometric patterned one for some time!  Here are the 4 cards all finished, then I'll move on to telling you what's been used on each..... I have to say the colours just pop!  I used Pumpkin Pie, Poppy Parade, Magenta Madness, and Soft Succulent. the first card I created in the video was with the geometric desig

Christmas In July Mega Class

Image
 Hi there, As you may (or may not) know I do a Mega Class in July (and January) each year, July's one is looming on the horizon, and I thought I'd better share it with you!  If you get my emails you'll already have details of it, if you don't get my emails let me know and I'll add you to my list! My Christmas in July Mega Class details are below, this is the stamp set and punch: Evergreen Elegance, that you'll be receiving as part of the class (amongst other goodies) Saturday 24th July 10.30am till 3.30pm.  At Laanecoorie Mechanics Institute (middle of Laanecoorie) We'll be making 12 individual cards (with envelopes) 2 of which are fancy fold cards.  Included in the cost of this class is your own stamp set and punch (Evergreen Elegance Bundle), full instructions, plus all the trimmings to make the 12 cards, and lunch is included in the price, so if you have special dietary needs you'll need to let me know when you're booking your place.  Cost

Rosette Tree Christmas in June Craft Alive Bendigo

Image
 Hi there Creators, I have done a Facebook video on this cute Rosette Christmas Tree and promised to share the measurements in a blog post, so here we are.... first up the tree!  I will aim to add the video to my YouTube channel too! It's a really sturdy little tree when you put it together with hot glue. You will need ideally 12 x 12" Designer Series Paper, the first one I made uses the beautiful Expressions in Ink Specialty Designer Series Paper, and the second one I've used the Simply Elegant Specialty Designer Series Paper the suites that go with both of these are just gorgeous! You'll need to cut each of the following: 12" x 1/2" 12" x 3/4" 12" x 1" 18" x 1 1/4" 18" x 1 1/2" 24" x 1 3/4" 24" x 2" I recommend for the last 2 that are 24" you cut double the width of the 12x12 card stock, then score it and then cut it in 1/2 (just saves an extra step).  Each piece you need to score and concer