Posts

June Class Cards

Image
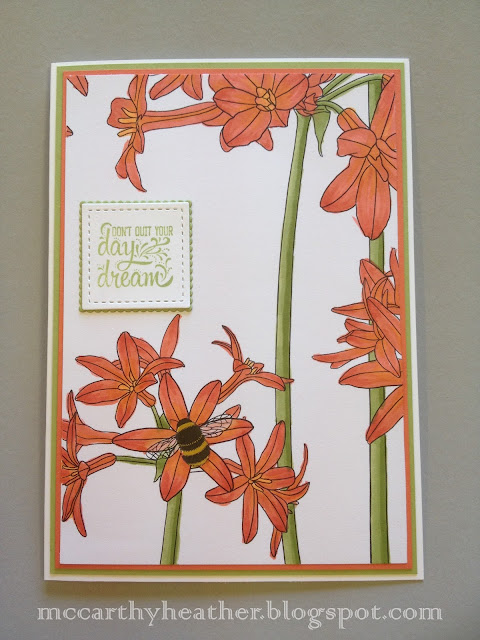
 Hi there Creators, Just a quick plug, if you're reading this and it's still May, there is an AMAZING joining offer, check it out here: Join Heather's Team I have June's cards worked out, and ready to go 😁  there's a heap of new goodies in this line up.  Class dates are:  Tues 4th at 12.30pm (or as close to that as possible) in Laanecoorie,  Thursday 6th at 7pm in Laanecoorie, and  Saturday 8th at 10.30am in Maryborough. Let's get to it, here are the cards and what I've used: This first one uses one of the Online only embossing folders Fun Patterns , and some of the Countryside Inn Designer Paper , which has been around since last year too (so lovely it stayed!)  And also the Something Fancy Stamp set (also a keeper from last year, I love this particular saying!) Next up is the Citrus Blooms Bundle , this was on my list because of the amazing dies! (plus we have an orange tree in our back garden) Then the So Swirly Embossing folder (which incidentally is A

Petite Cafe Gift Bags

Image
Hi Everyone, Well I thought I would share my "teacher" gifts.  I have seen on Pinterest and Facebook people using these Petite Cafe Gift Bags and decorating them up, popping fudge or biscuits into them (because they have a special lining in them so they are food grade). So....... I thought I can do that, found a cool recipe for Bailey's Fudge (yumm) checked none of the teachers were tee totallers! And here we are:     Here is a closer look at of one of the bags:   I have added 1cm strips of Gold foil cardstock to give interest to the bag, and the   Whisper White    Mini PomPom   trim, I have really got into now! I've just attached it with some of the tear and tape adhesive, which I've folded back onto itself to make it fit. I have used the Peaceful Pines Stamp set and matching framelits to cut out the tree The other side of the bag looked a bit plain, so............. I found a bit of pretty Designer Series Paper (sorry it's a retired

Twist'n'Pop Card tutorial done with A4 cardstock

Image
Hi Everyone, Well I am loving doing videos, I'd really like feedback on them too, if there's anything you feel I could do better (other than my somewhat precarious set up, which thankfully you can't see - might take a photo of it next time to show you 😊)  Tom (husband) has said he'll work on that one for me  (bless him...), so Anyway, this is the card I show in the Video below:  I've been wanting to make these Twist'n'Pop cards for a while but they always use 12x12 cardstock in the video's and tutorials I've seen, and I'm really an A4 girl, so this is my version done with ONE sheet of A4 (cos I'm also quite stingy and don't like to waste paper) LOL. Check out this Video I created for you to show you how it's done:   The measurements I have used are:   Start with an A4 sheet, cut 2 sections of 8cm each from it Take the remainder piece and score it in 1/2 at 10.5cm One of the 8cm pieces, score in 1/2 (through the w

Video using Stampin' Up! Star of Light Stamp set

Image
Hi Everyone, well here it is my first "Official" Video!  I'm excited to share this with you, I hope you enjoy it and it inspires you 😊 Here is just a photo of the card: Here is the list of "ingredients" I have used, which you can purchase through my Stampin' Up! blog if you are interested, just click on the links to see each item: Star of Light Photopolymer bundle Clear Block E (for the plain block, but you could also use it for your stamps too) Soft Sky Ink Pad Pacific Point Ink Pad Island Indigo Ink Pad Silver foil cardstock Tombow - Multipurpose Adhesive Glue Sponge Daubers Fancy Frost Sequins Fine Tip Glue Pen

Sneak Peek Stampin' Up! Sale-a-Bration

Image
Hi Everyone, As I said in the last post Jenny came over today, and created the 3 cards that I showed you, and drum roll please here is my 1 card! lol This card uses some of the beautiful Sale-a-Bration "Inside the Lines" Designer Series Paper, it's designed as a black and white image that you colour in  (as Jenny was saying, how's your colouring-in therapy going?) I enjoyed colouring it in, this is just a section of the 12x12 sheet, and there are 4 different designs.  Then again, with the Sale-a-bration products the saying comes from a cute stamp set called "Designer Tee"  I just love this particular saying , Don't Quit your Daydream ;) Sale-A-Bration (SAB) starts on 4th January, for every $90 you spend on regular products you get to pick a SAB product for FREE (yay!)  there are also perks for hosting a workshop, and for joining - ask me! Anyway I hope this inspires you with excitement of things to come! God Bless love Heather

Stampin' Up! Sneak Peek of 2017 Occasions Catalogue

Image
Hi Everyone, To continue the sneaky peeky bits...  Jenny Stewart (one of my downline) came round today and successfully made 3! cards whilst I did a heap of prepping work for my 8 Christmas cards class tomorrow, and finally had the opportunity to create 1 card! - well 1 is better than none, and Jenny did say I could share her cards with you all😊  So, I thought I'd share Jenny's cards first, I'm going to get to play with this balloon at some point! She has used the Up & Away Thinlit dies for this card and the matching Lift Me Up stamp set (no links at the mo, as it's not available till January 4th, unless you are a demonstrator)  however feel free to join my team, this is just ONE of the many perks of being a "demo"!   This next card (I might add Jenny likes Purple!)  She's used  the Blooms and Bliss Designer Series Paper (this one is current, in the annual catalogue, hence the link!)  She's also used The Balloon Pop- Up Thinlit dies, a

Stampin' Up! Christmas Cards for classes in December

Image
Hi Everyone, Welcome to my new blog, I'm hoping to be able to work out how to offer much more with this blog! Here are the cards I'll be teaching you in December (obviously focusing on Christmas)! First up is this cute Cookie Cutter Christmas Card using the Cookie Cutter Christmas Bundle isn't the reindeer gorgeous?  I've also used the Festive Textured impressions embossing folder   and the Layering Ovals Framelits . Next up is this beautiful Silver bells card, I'm pleased with this card, I hope you like it too I couldn't help thinking of the Christmas song my Mum used to sing when I was young called Silver Bells!  I took a close up of the bells so you can see that they are silver embossed too. This card uses the Seasonal Bells bundle  and the Softly Falling Embossing folder  Oh and to cut the saying at the bottom (which is part of the stamp set) I've used the Bunch of Banners Framelit dies . I'm so pleased with the cards for this month

About Me

Image
Hi Welcome to my blog, My name is Heather McCarthy, I am English, married to an Aussie, living in central Victoria. I'm Mum to 3 gorgeous boys Ben, Josh and Sam, aged 13, 11 and 5.   I'm blessed to be Stampin' Up! Demonstrator, which is mainly what will be in this blog (and I love it).  I am a Christian, and a member of a local Church in Maryborough.  Here I am! this photo was taken at the Silver Elite and above reception at a recent Stampin' Up! event up in Brisbane.  I'd be hard pressed to find a photo of my husband Tom, as he's quite camera shy! but here are my munchkins this one was taken on a recent trip to Melbourne: I hope you enjoy reading my blog, and it inspires you to create, if you would like my newsletter, do sign up for it. God Bless love Heather xox