Posts

Something Saturday - Inchie equivalent card for those with an A4 Brain!

Image
Hi there Creators, Well today I thought I'd have a go at an "inchie" card, only mine (unsurprisingly for me) aren't inchies! The idea behind it is that you have inch squares, which get attached to a background paper (which has been scored up before hand so you have lines to attach your inchies to, and embossed with an embossing folder, which then deletes the score lines. However, as you have to cut your base card down to create an inchie card, I decided to do things "my way" hence "equivalent for an A4 brain" Here are the 2 Inchie cards I received the first one from Simone my up-line as a swap at the Stampin' Up!event. She's used the beautiful vibrant Flowering Zinnias designer series paper and the second from Lee-Allan one of my down-line (which uses some paper that now I need to buy 🤣) check it out for yourself:  Natures Sweetness Designer Series Paper then I got onto creating one - my size using retired Designer Papers (you can never

New 2nd wave Sale-a-Bration goodies and more

Image
Hi There Creators, thought I'd drop in and show you a few things I've been creating recently. After the class I had a few horse cards unfinished so one of them got turned into this, using some of  of the other stamps in the Let It Ride stamp set , to do this I've ended up cutting out more stencils, 2 for the single horse and one for the 2 background horses, so that I could stamp the trees into the background  I think it's kind of cool having the 2 galloping away in the foreground, what do you think?    There is a second wave of Sale-a-bration products available from tomorrow 15th Feb, and this card that I have made up as my "tag" card for the month uses some of them.  I've used the Country Floral Dynamic Textured Impressions embossing folder, which is so pretty!  I've used Rich Razzleberry, Pumpkin Pie and Old Olive daubers to lightly daub over the raised pattern. For those of you receiving it I've left it white for you to add

Cool! watercolour pencils on black card

Image
Hi Creators, I was thinking about a gorgeous technique I've done before that uses white embossing on black cardstock then you use the aqua painter to add white craft ink to the design, allow it to dry a bit, then add colour over the top, (it's a little time consuming) and I was wondering if I could produce any other ways of colouring on Black card (I'm sure others have done this too, but I haven't noticed it).  So......enter the Watercolor Pencils , yep they're spelt missing the 'u' in the catalogue (it's an American thing!) although its really hard to spell color that way when you're so used to spelling it colour! lol However moving on if you're a regular reader of my blog you'll notice that in my class this month we're using this technique on this card: however I decided to make a video on it, and thought I'd use a different set, that doesn't have quite so much to colour in (keep the video shorter).  This next photo shows

Cards for February Classes

Image
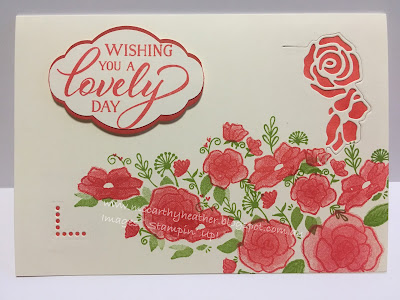
Hi there Creators, Almost February, so thought I'd best show you what we're going to be making at the classes on Saturday 2nd 10am in Maryborough, Tuesday 5th at 7.30pm in Laanecoorie (my classroom) and Wednesday 6th 10.30am in Laanecoorie (my classroom) They all use some of the new goodies from the Occasions and Sale-a-Bration Catalogues. First up: this card uses the Forever Lovely stamp set and matching Lovely Flowers Edgelits , and the Pretty Label Punch Card 2 uses the Let it Ride stamp set , combined with the Stamparatus for ease of stamping my sister and daughter are both into horses so I really felt this was a must have set for cards for them!, and as so many people around this rural area have horses I also thought it was a fairly safe bet to do a horse card, I think just about everyone I know, knows someone who has a horse!   Card #3 uses the beautiful Lovely Lattice Sale-a-Bration stamp set , remember when you purchase $90 of goodies you can get this set for

All My Love #Simplestamping Challenge

Image
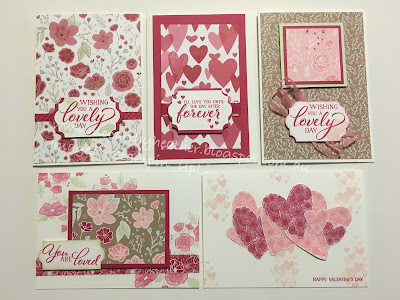
Just makes you want to go Muwah! Hi There Creators, well today I'm showcasing the "All My Love Designer Series Paper" Oh it's so pretty!  I have made a determined effort that this year I'm going to actually use my DSP's (Designer Series Paper's) rather than just looking at them and admiring them lol (which seems to often happen) So with this series of 5 cards I've managed to use a piece of each of the 6 papers - admittedly I've used what I consider to be the prettier side of each, although sometimes it's a hard choice!  Stampin' Up! are also doing a Simple Stamping challenge, which means that you try and take your stamping back to basics, by just using Stamps, Ink and Paper, and in this months challenge a punch too.  This month the theme is Valentines Day, which conveniently fits in nicely with these papers! So onto the cards here they are all together, then I'll show you them individually:  For the #simplestamping Challenge I

How Sweet It Is Designer Series Paper Cards

Image
Hi Creators, I've made a YouTube video on these 6 cards, and wanted to pop it in writing too, so here goes! I wanted to show how you can take a Designer Series Paper pack add one stamp set and create a heap of cards quick and easily from it. (I used Birthday Cheer stamp set, which coincidentally has a fabulous die set to go with it!, and of course it comes as a bundle, so you can get 10% off it *yay, gotta love bundles*), First up, cutting your cardstock, I've added white cardstock as my base card and a piece cut to 10.5cm x 7.4cm.   As I don't like to waste cardstock, you'll find that A4 cut in 1/2 creates A5 (14.8cm x 21cm). which you can fold in 1/2 at 10.5cm and create your base card. Then cut A5 in half (10.5x14.8), and in half again gives you the 10.5x7.4cm, and you have the perfect size for a focal piece for your card. On to the cards I've used the How Sweet it is Designer Series Paper which will be available from tomorrow! in the new Occasions Catalog

Inspired by Craft Room cleanup

Image
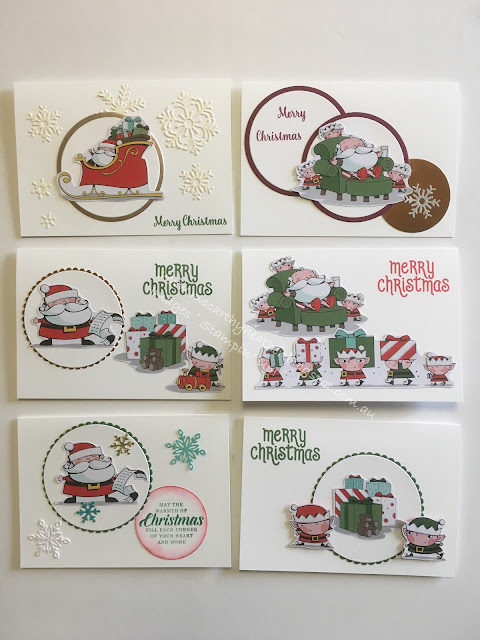
Hi all you lovely Creators! Well it's Boxing Day so I figured I could spend a couple of hours cleaning up my craft room in preparation for the new catalogues coming in January. Ha ha!, so I started to clean my desk space, and came across all these bits of pre-cut stuff, from extras I've had after teaching a class, or experiments I was playing with.  Which then of course I had 2 choices; do something with them or chuck them in my "I'll get to that later box/ give it to someone else to do something with box".  This time I figured why not do something with it........ (yeah you can see how the cleaning up the craft room is going lol) However it has given me something to share with you, and they're all really simple projects from left over stuff, that let's face it most people have (especially if you've been crafting for some time) I've grouped them into categories (made slightly more than I'd anticipated, and still there's stuff left over

Birthday Bonanza, Creation day

Image
Hi there Creators, In January on Wednesday 23rd, I'm just offering one Creation Day class it's called    Birthday Bonanza, held in Maryborough  (you must book and pay by 8th January) We'll be making a special Birthdays file/book with space to store cards, and also 12 cards to go into it.  At the class you will receive 2 stamp sets,  1 punch, A pack of Designer Series Papers,  Pack of A4 cardstock,  Enamel Dots  Instructions and more,  which we'll be using during the day (and the extras you get to take home to create more with), Oh and lunch is provided (Subway)!  The day will begin at 10.30am and commence at 3.30pm.  All this for only $110, unless you're part of my team, in which case it's only $45! (contact me for details) You will need to bring some things with you if you have them: ·         Stampin’ Cutter with scoring blade (or bone scorer) ·         Either a D or H clear block (can bring others too if you’d like to) ·