Posts

Something Saturday - Citrus Blooms

Image
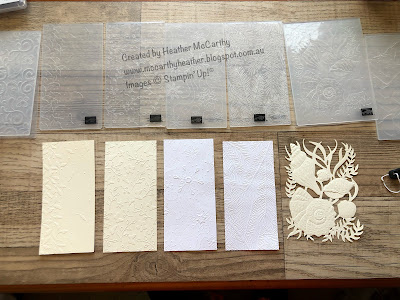
 Hi There Creators Today I thought it would be fun to try out a technique I haven't done in ages - Paper Tole, using the new Citrus Blooms stamp set and dies.  Every so often I come across a stamp set that inspires me to do a spot of Paper Tole'ing, and this one has lots of dimension to it perfect for this technique. To those of you who are saying "Paper Tole-what-ing?"  Paper Tole is a way of taking a picture and literally adding dimension by having several images of the same picture a and cutting out the various parts of it and laying them up, so the picture literally builds up and gives a 3D type image. I thought it would make a beautiful framed piece (and a nice gift for a friend) - let me know what you think.... I did team it up with the fabulous sayings from Unbounded Love Stamp set (the dies that go with this stamp set are a must have!)   Then to create shiny bits I've added some of the fine tip glue pen which dries shiny clear😍 I also said in the video I&

Blender Pens and how to use them

Image
 Hi there Creators, For my Something Saturday this week, I'm showing off Stampin' Up!'s blender pens (to view them click the link), they're really cool!  they have no colour at all, but you can pick up colour and then colour in your stamped images with them! These are the cards I made after the video with the bits I made in the video☺ There are different ways to pick up the colour with the blender pens.  I show 5 in the video The first I show, is to stamp in the colour you want to use, and use the blender pen to "pull" the colour from the edges into the image, the mouse in this card uses this technique.   the second technique is on the pencil which is coloured using blender pen to pick up colour from the pastels, literally just wiping the blender pen across the pastel and colouring with it. Both of these techniques give quite a nice soft look. Next is picking up colour by squeezing my ink pad (while it's still closed) this gives you ink on the inside of t

Cascade Card (Something Saturday)

Image
 Hi there Creators, Well today I'm showing how to make a really simple cascade card, once you've got the dimensions worked out you can make it in any size. I couldn't remember the name of this to begin with and waterfall card, accordion card both came to mind, but after a spot of googling, it's actually called a Cascade card! Here is the finished article (which will be off to my friends who are getting married this afternoon, so they shouldn't be able to see this post!)   As you can see I ended up having to create an envelope too for the card, as it was just too big for a standard envelope (plus this dresses the outside up nicely!)😉  How gorgeous is this Edens Garden Paper? and the meadow dies I think go nicely with it.  I couldn't resist using some of my favourite Garden Gems too (sad to think at the end of the year the Eden's garden paper and gems will retire 😢)  So if you want some get them now!! See this link for the products I used in this card:  What

Really Pretty Baubles!

Image
 HI there Creators, I saw these really pretty baubles on pinterest, and thought I'd give it a go, she cut all hers by hand, Yikes!! I took the easy way out and used punches lol.  I picked out the Label me Lovely Punch , and the other things you'll need are ribbon and an adhesive that will draw a fine line - I used Multipurpose Liquid Glue (Tombow to most) They are remarkably simple to make, punch yourself 20 of your chosen punch shape. Then fold them in 1/2 then draw a fine line of glue across the inside middle of each individual one, do this to all 20. then draw a fine line of glue at each end, so you can stack them together, and they stick together top and bottom.  Once you have the stack of 20, and the glue is dry, check it out, slowly pull the 2 end pieces round to meet each other, you can add some ribbon, before you attach the 2 sides together (again by a line at the top and the bottom)  Check out the video I made if that doesn't make sense😊 I hope this inspires you

Eden's Garden Cotton Paper

Image
 Hi there Creators Well this isn't exactly my "Something Saturday" as it will be aired a little sooner thanks to Craft Alive Bendigo.  So if you're joining me for the first time from Craft Alive or GICS, Welcome!, and welcome back anyone who's been here before, I'm so thrilled you choose to see my blog posts and videos 😊 In my video this week I have gone through the Eden's Garden Collection of products and the Suite Sensation I currently have on offer (if you want to see the info about that, click here: Eden's Garden Suite Sensation Blog Post . Today's post is about the card I make in the video using the cotton paper, I'll admit that I wasn't 100% sure how to use it to begin with, so I googled and pinterest'd it and found a video by Wow Nola Creations, using the paper as a special textured background so I had a go, and changed it slightly, and voila:  Funnily enough the shabby chic thing doesn't usually do much for me, but I think

Eden's Garden Suite Sensation

Image
 Hi there Creators wow I didn't realise I hadn't done a blog post on this yet!  (had it in my emails for a while - oops!) Eden's Garden is a gorgeous new Collection, sadly the papers and gems are only hanging around for a couple of months till 3rd Jan (or while stocks last) 😢, then the stamp set and dies will carry over into the upcoming catalogue. My New Suite Sensation! Using the new Eden's Garden This Kit I have created is available to you for $40 , which includes: 1/4 pack of Ever Eden Specialty Designer Series Paper (you will have left overs) A 1/2 pack of the Garden Gems (again you'll have left overs) the ribbons and various papers, all cut & scored/ die cut etc for you to get creating. Envelopes for all the cards full written instructions to create all 6 cards  (3 of which are fancy folds) plus video instruction links if I feel it needs them. If you would like this kit, you can order it through this link: Eden's Garden S

Embossing folders 3D & Standard

Image
 Hi There Creators,  I had a request to do an Embossing folders video, so that's what this weeks video is all about.  They can be a little confusing as they come in small, medium and large, Standard and 3D.  And how do you know how to get them through your machine so they actually work? Stampin' Up! has 2 Stampin' Cut & Emboss Machines, the mini and the standard.  The Standard one is a similar size to the Bigshot (I find it has a tad more room for the plate, the Bigshot used to shave bits off my plates if I didn't have them lined up exactly, I haven't noticed that with the Cut & Emboss machine) Anyway, as you'll see from this picture our embossing folders come in a thin (small) size, which would emboss around 2/3 of your card front, a Medium size, which completely embosses your A6 card front and also a "large" which is 6" x6" sized (handy if you want the pattern on an angle!)   An important tip is to make sure the fold of the embossin

Mixing it up with Embossing Powders

Image
 Hi there Creators,  Well this Something Saturday I've mixed up my embossing powders - literally! I thought it would be interesting as they come in packs of 3 now to see what black and white would look like mixed up and embossed etc. Therefore here are my findings..... first up the embossing powders straight up -  Top Row: Gold, Silver, Copper,  Bottom Row:  Black, Clear & White (yes the clear isn't obvious, but bear with me!) So then I took a bit of 2 different colours from the sets of 3 and mixed them up in separate containers, and these were the results: I've put the 2 original colours either side of the mixed colour Gold and Silver mix Silver & Copper Mix Black & White Mix Gold & Copper Mix (I really liked this one!) Now I asked you to bear with me on the clear, and here is what I did with it (actually I did 2 things....) Firstly I took the clear embossed on white cardstock, and added colour to the background using Blending Brushes;  where the embossing