Posts

Something Saturday - DSP & Blends

Image
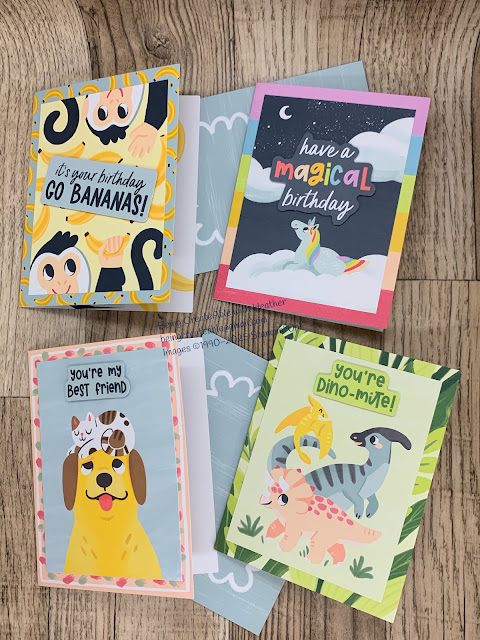
 Hi There Creators Today I thought I'd show off an idea that Claire our Stampin' Up! Demonstrator Development Manager showed us in a workshop the other day, I took it a bit further in one of my cards, let me know which card is your favourite! If you'd like to see all the goodies I used on these cards click here:  DSP & Blends Turtles Cards Here are the cards I ended up creating The first 2 I've just used the blends to go round each of the images on the designer paper, I really love the way the images get highlighted from it, almost a "stained glass effect" This first card I also used the blend on the white card base under the Designer Paper to give a border This second card I used the Blend around the edge of the Designer paper to draw a line  (I did use a ruler to do this!) again to create a border. Then this last one I've gone round the edges again with the darker Pool Party blend, but then blended in the lighter one in all the gaps. I actually did g...

Something Saturday - Iridescent Treat bags meets Sweet Jar

Image
 Hi there Creators We're back to the same stamp set & punch as last week, this time adding the Iridescent Treat Bags to create a really cool internal part to the jar. Wow the Iridescent Treat bags are really something, also incredibly sturdy, they do not rip (believe me I tried🤣) To see all the goodies I've used click this link: Heather's Treat Bags/Jar Cards This is the first card I made before the the video, I had stamped the baubles onto the window sheet and coloured them in with Stampin' blends (alcohol markers) as they will stay on the window sheet. But this second card I made in the video I wanted the sweets to be behind the iridescent layer (plus I wanted them to not be black!, and the only ink I have that will stamp on window sheets is my Stazon Black Not sure how easily you can see the bling, but Oh my goodness it goes well with this, I've used the Two tone Sparkling gems (very pretty blue & purple'y colours) I've used a white piece measuri...

Something Saturday - Christmas Favours Boxes

Image
  Hi there Creators Today I thought I'd show off these little Christmas Favours Boxes.  Rose came to class the other day with one and I forgot to take photos, but I think this is pretty similar, so cute! The link to all the products used can be found here:  Christmas Boxes products used (if you're reading this let me know if this makes it easier to see the products used, I usually put up individual links for everything but thought I'd try something new, and potentially easier!) Anyway onto the photos..... the front: The lift up flap at the front The Back And I wanted to show off the gorgeous little "Low Profile Sparkle Dots", not sure if it really shows up as well as it could I've just realised in all the photos you don't really see the box! That's ironic! so here's one of the box! Right now I can give you the measurements for the box! Really simple: 12cm x 12cm, then score in each side by 4cm. then cut as shown: fold in the flaps and glue togethe...

Something Saturday - Time for Celebration Ephemera Pack

Image
 Hi there Creators Today I'm showing off this Time for Celebration Mix & Match Ephemera Pack because I discovered something really cool...... They're sticky backed!  I totally recommend having your Take Your Pick tool handy for removing the backing.  Here are the links for products I've used in these cards: Sweet Jar Bundle ,  Old Olive Two-Tone Cardstock , Green "Luck" card Beautiful Butterflies stamp set ,   Petal Pink Two-Tone Cardstock  Peachy Hearts Celebrate Card Simply Said Mix & Match Stamp set ,  the Tools card and Disco Ball Card I also added some Rhinestones to the ones in the first 2 photos (let's face it gotta have bling!)💎 Then I got carried away and made a heap more......  I pressed out all the images then put them into piles of things I thought would go well together (Christmas was the easiest pile 🤣)  But it's really cool that there's a bit of everything in the Ephemera. These Christmas cards I used Jar of J...

Something Saturday - Pop Up Pals Kit

Image
  Hi there Creators, Today I thought I'd show off this kit, which is really cute!  Would make great kids cards (and even some Big kids would enjoy them I reckon!)  It's the Pop Up Pals Kit (click the link to see it) you'll get to create 4 individual cards, and I think a bit of a bargain at $17.50 (just under $4.50 per card) which if you have had to buy a pop up card recently I'd imagine they are a lot more than that!, plus the added bonus of being able to say "I made it" 😍 Ok, so here are the 4 cards you'll create with this kit:  Then the insides of the cards: How cool are these cards?!  I love the pop out elements in them (and in fact even Tom (hubby) was impressed🤣) If you missed the video here it is: I hope these inspire you to create God Bless love Heather xox

Something Saturday - Long Time No See

Image
Hi there Creators, Well today I just had to show off this idea I had for my new stamp set: "Long Time No See" (click the link to see it)  I couldn't resist the idea of making the bodies longer, with pull out pieces. This is the one I started in the video all finished:  I've used the Regals Stampin' Write Markers to colour my Alpaca & Christmas Decorations in, and some of my favourite bling; Drusy Adhesive Backed embellishments , Oh they are soooo shiny! 😍 I'm so happy with the way it turned out! Then of course I had to have a play with the sausage dog.....  using the Brights Stampin' Write Markers this time, and the Happy Labels Pick a Punch to create the Ticket look for the sayings I took a couple of "how to" photos as I was making this second card and thought I'd share with you: First up stamp the dog on the top piece of card Then  add some body to him, plus stamp his tail and extra body onto other card, and cut out, then cut a slit a...

Cards for August Classes

Image
 Hi There Creators, Being ultra-organised (or so it feels) and putting up the cards we'll be creating at classes in August.  If you can make it, the Laanecoorie Class will be Friday 1st at 1pm, and the Maryborough one will be Saturday 2nd at 10.30am.  Let me know if you plan to be there.   Remember to click on the links below if you want to see the products in all their glory😃 First up is this card, Oh my goodness the Extraordinary Flora Bundle and Washi Tape are amazing! I've teamed it up with the Inspiring Imperfections bundle, and the Misty Moonlight two-tone cardstock .  Next up using the Inspiring Imperfections bundle again, and the funny  Long Time No See Stamp set , I couldn't resist creating a Genie in a bottle 🤣  teamed up with the words from Birthday Celebration Stamp set , and the Sweet Jar Builder Punch to create the lid Card 3 uses the hilarious Not 29 Anymore Stamp set , I knew I had to have this one as soon as I saw it! Also uses...

Something Saturday - Sunflower 3D Embossing Folder

Image
 Hi There Creators, last Saturday I showed you this embossing folder:  Sunflowers 3D Embossing Folder , which is absolutely gorgeous! Its a large A5 sized folder.  Today I thought I'd show you how I created the 2 pieces I showed off last week, you'll need (obviously the embossing folder!), a  Stampin' Brayer , inks and Blending Brushes . And here's what I created: I ended up cutting one of them into 1/4's and doing something different with each 1/4 then the next one I cut up into 2 long strips  If you've watched the video, you'll know I had to cut out a section owing to inking it up wrong, so I've cut this next one in 1/2 the other way, and created these 2 cards: then lastly I kept one whole and created an A5 sized card front from it: With this one I ended up embossing another piece and cutting some flowers out to add them up on dimensionals.  I'm quite proud of it and hubby reckons its one of my best cards (high praise!)  Absolutely no idea what I...